In February, Google and Mattel introduced their Hello Barbie Internet-connected toy. This Barbie has an internal microphone, a WiFi connection to Google’s voice recognition services, and a speaker to carry on a “conversation” with the targeted child.
Like the folks at Somerset Recon, we’d say that this is an Internet of Things (IoT) device that’s just begging for a teardown, and we’re totally looking forward to their next installment when they pore through the firmware.
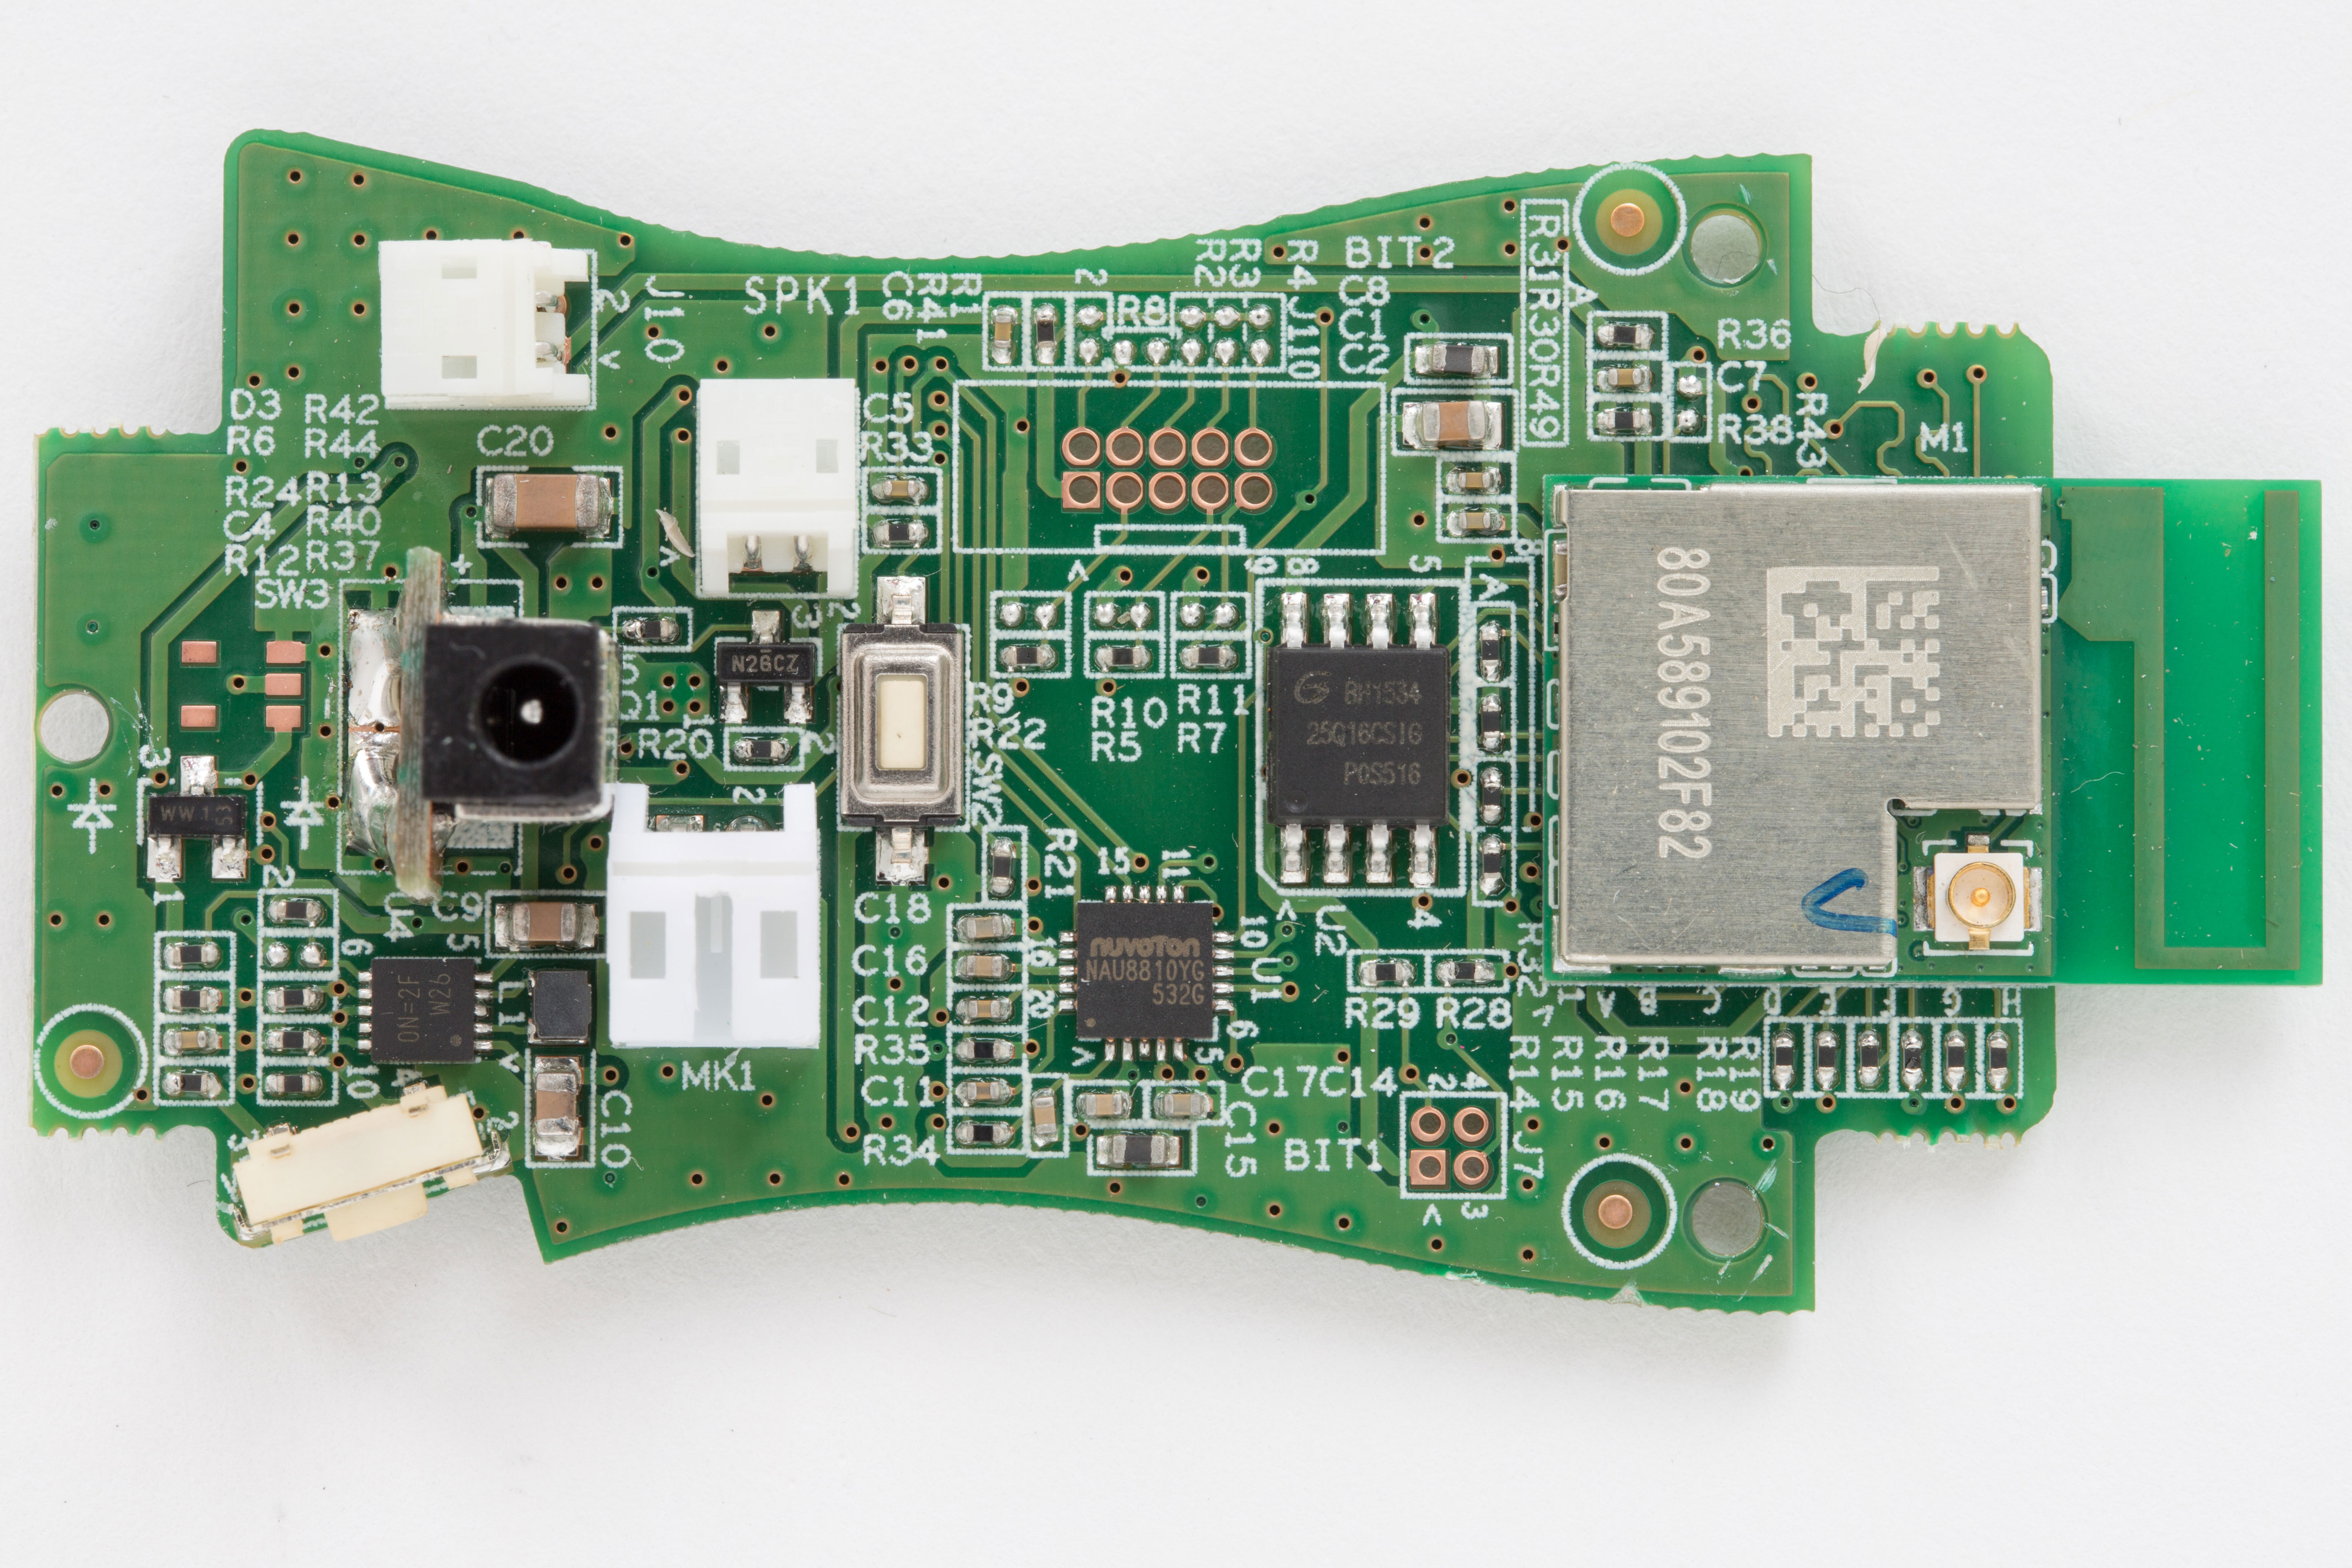 On the hardware front, Barbie looks exactly like what you’d expect on the inside. A Marvell 88MW300 WiFi SoC talks to a 24-bit (!) audio codec chip, and runs code from a 16Mbit flash ROM. There’s some battery management, and what totally looks like a JTAG port. There’s not much else, because all the brains are “in the cloud” as you kids say these days.
From day to day we alternate between the promise of IoT and being anti-IoT curmudgeons, so it should come as no surprise that we’re of two minds about Hello Barbie. First, there’s the creepy-factor of having your child’s every word overheard by a faceless corporation with “evil” in their mission statement (see what we did there?). Next, we’re not sure that it’s OK to record everything your child says to a toy and listen to it later, even if you are the parent. Hackaday’s [Sarah Petkus] summarized this neatly in this article.
But mostly, we’re curious about how well the thing actually works and what it will do with naughty words. And who will take on the task of reviving the Barbie Liberation Organization? Now we totally want to go out and buy one of these things.