Repairing A Mill That Cost As Much As A Car

miters

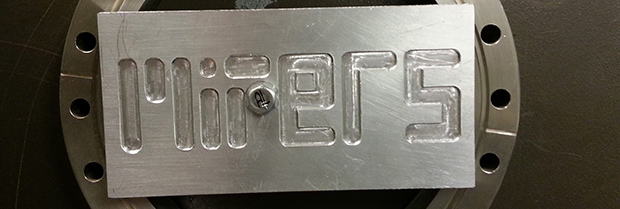
Years ago, someone at the bio-instrumentation lab at MIT needed to change a CMOS battery in the controller for a three axis mill. This reset the machine’s BIOS and was widely regarded as a bad move. The mill sat in the lab for a few years before  Prof. [Ian Hunter] donated it to MITERS – the student shop at MIT. And so the task of repairing a machine that cost as much as a car fell upon a plucky group of students.

The machine – a  Dyna-Myte 1007 has a 10″x7″x10″ work area, pneumatic tool changers and carousel, and the working for a fourth axis. It is. however, driven by an ancient Pentium computer running DOS with all the fun of ISA slots and IRQs that entails.

The MITERS began their repair by digging around in the software configuration, finding the axis drive is controlled via IRQ 3, which was currently occupied by COM 2. Changing that in the BIOS let the computer control the axes and, with a few solenoids and an air compressor, the tool carousel also worked.

With a bit of digging around, the MITERS also got the spindle working, giving them a very awesome and very expensive CNC milling machine for free. Even though the computer could be replaced with a $35 Raspberry Pi, we really have to admire the MITERS for fixing what they already had; it’s a cheaper and much, much faster way to get their new toy up and running.

Continue reading “Repairing A Mill That Cost As Much As A Car”

Building A Barn Door Tracker For Astronomical Photography

That’s a pretty amazing image to catch peering out from your back balcony. The rig used to record such a gem is seen on the right. It’s called a Barn Door tracker and was built by [DCH972]. Details for this build are scattered all over the place, there’s a video (also found below), another album of some of the best images, and plenty of background info in the Reddit thread.

This design is also know as a Haig or Scotch mount. While we’re dropping links all over the place check out the Wikipedia page on the topic. The point of the system is to move the camera in such a way so that the stars appear to hold in the same place even though the earth is moving. There’s an ATmega32u4 breakout board riding on top of the breadboard. It’s doing some pretty heavy math in order to calculate the stepper motor timing. That’s because the mount is like a photo album, hinged at one side and opened on the other by a ball screw. This linear actuation needs to be meshed with the change in angle of the mounting platform, and finally it needs to sync with the movement of the earth. But once a series of images is captured correctly they can be processed into the composite photograph shown above.

If missed that SDR galactic rotation detector from last May you should find it equally compelling.

Continue reading “Building A Barn Door Tracker For Astronomical Photography”

Controlling Real World Objects From Your Lucid Dream For $15

[Kyle Fredericks] tipped us about his first electronics project, a cheap and smart sleep mask that uses a vibration sensor to detect rapid eye movements.

As some of you may know, REM sleep is the part where you dream the most vividly and actively. If some external stimulation (sound, movement) is sent to you at this moment, it may help you take control of your dream by becoming aware of it. If not, your brain will create dream scenarios that incorporate this stimulus.

The interesting part of the concept is that the vibration sensor calibrates itself at the stage 2 sleep, when no eye movement occurs. This later allows a very accurate detection of the REM sleep stage, triggering a shelf stereo. Secondary buttons are even included in the mask sides.

[Kyle Fredericks] went to great lengths to document every step of the project, making it a perfect first step to learn electronics for beginners out there.

Six Years, A Giant Robot, And A Kickstarter

robot

Since 2007, [Jamie Mantzel] has been building a huge remote-controlled walking robot. If you’ve been following him on his YouTube channel and blog, you’ve seen the very beginnings of him building a lumber mill to create a workshop, making the legs for his robot, and improving his welding rig. This week, though, has been very special. [Jamie] has finally finished his giant robot project, bidding closed the fevered dream of a madman who awakes to a 10 foot robot in his yard.

The giant robot is constructed nearly entirely out of scrap aluminum. In the interest of simplicity, [Jamie] has come up with some interesting techniques to scale up conventional RC gear to power huge motors swinging giant legs: the steering motors are powered by manual switches, but these switches are activated by servos. A brilliantly simple solution to driving high-current loads if we do say so ourselves.

[Jamie]’s robot has garnered a lot of attention over the years, so much so that toy companies have licensed his designs for a line of battling combat spiderbots. [Jamie] believes his robots should be more educational, so he’s launched a Kickstarter for his own version as a kit. With this kit, getting the bug tank robot up and running isn’t simply a matter of pulling it out of the box and installing batteries; [Jamie]’s version is an actual kit with linkages that must be assembled. We know which version we’d want.

It’s an amazingly impressive project, and we’re glad to see such an awesome cat has finally realized his dream of a walking aluminum arachnid of death.

Supercharging Your Digital Calipers

supercapCalipers01

A dead battery in your digital calipers usually means a trip to the store for a new button cell. Not for [Trevor]. His hack substitutes a super capacitor, guaranteeing you’ll never need to rummage around for one of those pesky watch batteries again.

These calipers require only 20 seconds to reach a full charge that can last for a few days. Better still, [Trevor] designed a simple circuit with a voltage regulator at the end of the cord to allow charging via USB: just remember to flip the switch from “discharging” to “charging” mode. Although this is a fairly straightforward hack, its design is impressively tidy. The super capacitor fits perfectly at the end of the display and slides along with it, keeping it away from any important printed numbers. If these are the same calipers everyone seems to have these days, it looks like it may still fit in the provided case, too.

If you’re looking for more ways to beef up your calipers, try upgrading them with a Bluetooth module.

The Cramp: A MSP430-powered Crane Lamp

theCramp

If you think your last project required a lot of soldering, take a look at [Multivac’s] remote controlled and fully-articulable desktop crane lamp. Sure, it’s a 430 microcontroller combined with an LED driver, 32 LEDs, PWM control, and some moving parts: but take a closer look at the structure. The Cramp uses an old HDD as its base, with the crane spinning around the main bearing that previously supported the platter. A system of spools and pulleys provides a reasonable range of motion to the rest of the build. Relocating the entire assembly, however, is evidently an unpleasant task.

[Multivac] based his design on a Liebherr LR1750 Crawler Crane, which he meticulously pieced together using leftover copper salvaged from an upgrade to his home’s mains wiring. A mountain of solder secures what must include several hundred joints—possibly more. The head of the lamp is an elegant exoskeleton-interpretation of industrial designer Eero Saarinen’s TWA Flight Center. You can see the Cramp in action in the video below.

Continue reading “The Cramp: A MSP430-powered Crane Lamp”

3D Printering: Remote Control Of 3D Printers

extrude

With new owners comes new editorial direction. You’re looking at the first evidence of that right now. We’re going to be doing some weekly columns dedicated to certain subjects, and with our fascination of all things three dimensional, it only made sense our first weekly column was dedicated to 3D printers. And using 3D printers, stuff made with 3D printers. Also, things that can be used with 3D printers. Great wordsmiths we are, we’re calling this column ‘3D Printering.’ If you have a better name (or a title pic) send it in and we’ll probably use it.

With that out of the way…

This week we’re taking a look at remote printing. With anything from an Android tablet to a Raspberry Pi, it’s possible to have a networked 3D printer, the perfect thing for hackerspaces or anyone who wants to print objects from multiple computers. One of the most-used tools for this is OctoPrint, a printer host designed to be run on small embedded devices such as a Raspi.

We’ve seen OctoPrint before. but since then it’s matured a whole lot. with a ton of reports of successes running on everything from a Raspberry Pi, BeagleBone Black, and even an OUYA. All the major electronics boards – RAMPS, RAMBo, Sanguinololu – and firmwares should work with OctoPrint, making an Internet-connected 3D printer simply a matter of connecting a Raspberry Pi.

Of course OctoPrint isn’t the only networking solution for a 3D printer. PrintToPeer is deep into development and should be released sometime this fall. It’s a much more sophisticated way of networking a printer that includes an iPad app and ‘enterprise class’ functionality.

The PrintToPeer team is offering private beta invitations, but with a catch: you need to print out a piece of a sculpture and send it to them. These pieces will be unveiled in September as the largest 3D printed sculpture, and the word’s first collaborative 3D sculpture.