Orphaned IoT Sleep Tracker Resurrected As An Air Quality Monitor

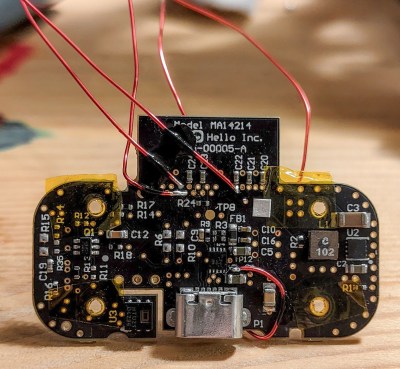
If you have a Hello Sense sleep tracking device lying around somewhere in your drawer of discards, it can be brought back to life in a new avatar. Just follow [Alexander Gee]’s instructions to resurrect the Hello Sense as an IoT air quality data-logger.

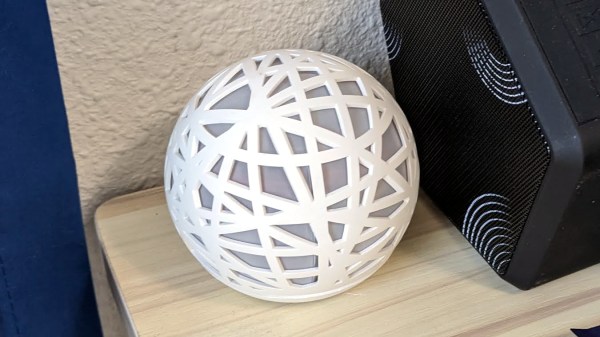
In 2014, startup “Hello” introduced the Sense, an IoT sleep tracking device with a host of embedded sensors, all wrapped up in a slick, injection molded spherical enclosure. The device was quite nice, and by 2015, they had managed to raise $21M in funding. But their business model didn’t seem sustainable, and in 2017, Hello shut shop. Leaving all the Sense devices orphaned, sitting dormant in beautifully designed enclosures with no home to dial back to.

The original Sense included six sensors: illumination, humidity, temperature, sound, dust / particulate matter on the main device, and motion sensing via a separate Bluetooth dongle called the Pill. [Alexander] was interested in air quality measurements, so only needed to get data from the humidity/temperature and dust sensors. Thankfully for [Alexander], a detailed Hello Sense Teardown by [Lindsay Williams] was useful in getting started.

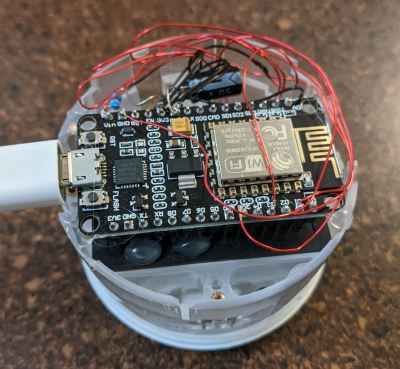
The hardware consisted of four separate PCB’s — power conditioning, LED ring, processor, and sensor board. This ensured that everything could be fit inside the orb shaped enclosure. Getting rid of the LED ring and processor board made space for a new NodeMCU ESP8266 brain which could be hooked up to the sensors. Connecting the NodeMCU to the I2C interface of the humidity/temperature sensor required some bodge wire artistry. Interfacing the PM sensor was a bit more easier since it already had a dedicated cable connected to the original processor board which could be reconnected to the new processor board. The NodeMCU board runs a simple Arduino sketch, available on his Git repo, to gather data and push it online.

For the online data display dashboard, [Alexander] found a nice solution by [Nilhcem] for home monitoring using MQTT, InfluxDB, and Grafana. It could be deployed via a docker compose file and have it up and running quickly. Unfortunately, such projects don’t usually succeed without causing some heartburn, so [Alexander] has got you covered with a bunch of troubleshooting tips and suggestions should you get entangled.

If you have an old Sense device lying around, then this would be a good way to put it some use. But If you’d rather build an air-quality monitor from scratch, then try “Building a Full-Fat Air-Quality Monitor” or “An Air-quality Monitor That Leverages the Cloud“.

Satellite Ground Station Upcycles Trash

While the term “upcycle” is relatively recent, we feel like [saveitforparts] has been doing it for a long time. He’d previously built gear to pick up low-Earth orbit satellites, but now wants to pick up geosynchronous birds which requires a better antenna. While his setup won’t win a beauty contest, it does seem to work, and saved some trash from a landfill, too. (Video, embedded below.)

Small dishes are cheap on the surplus market. A can makes a nice feedhorn using a classic cantenna design, although that required aluminum tape since the only can in the trash was a cardboard oatmeal carton. The tape came in handy when the dish turned out to be about 25% too small, as well.

Continue reading “Satellite Ground Station Upcycles Trash”

Ask Hackaday: How Do You Prepare?

Last month, large parts of the southern United States experienced their coldest temperatures since the 1899 Blizzard. Some of us set new all-time lows, and I was right in the middle of the middle of it here in Southwestern Oklahoma. Since many houses in Texas and Oklahoma are heated with electricity, the power grids struggled to keep up with the demand. Cities in Oklahoma experienced some short-term rolling blackouts and large patches of the Texas grid were without power for several days. No juice, no heat.

In places where the power was out for an extended period of time, the water supply was potentially contaminated, and a boil order was in effect. Of course, this only works when the gas and power are on. In some places, the store shelves were empty, a result of panic buying combined with perishables spoiling without the power to keep them cold. For some, food and drinkable water was temporarily hard to come by.

There have been other problems, too. Houses in the south aren’t built for the extreme cold, and many have experienced frozen pipes, temporarily shutting off their water supply. In some cases, those frozen pipes break open, flooding the house once the water starts flowing again. For instance, here’s an eye-witness account of the carnage from The 8-bit Guy, who lives at ground zero in the DFW area.
Continue reading “Ask Hackaday: How Do You Prepare?”

Hacking The Ortur Laser With Spoil Board, Z-Height, And Air Assist

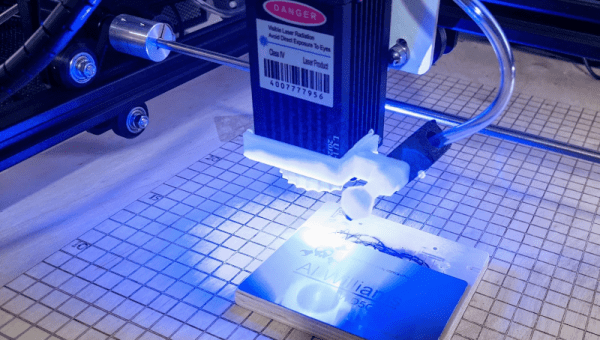
Last month in my hands-on review of the Ortur Laser I hinted that I had done a few things to make it work a little better. I made three significant changes in particular: I anchored the machine to a spoil board with markings, I added a moving Z axis to adjust focus by moving the entire laser head, and I added an air assist.

Turns out, you can find designs for all of these things all over the Internet and I did, in fact, use other people’s designs. The problem is the designs often conflict with one another or don’t exactly work for your setup. So what I’ll tell you about is the combination that worked for me and what I had to do to get it all working together. The air assist is going to take a post all by itself, but some of the attempts at air assist led to some of the other changes I made, so we’ll talk about it some in this post, as well.

One of the modifications — the spoil board mount — I simply downloaded and the link for that is below. However, I modified the moving Z axis and air assist parts and you can find my very simple modifications on Thingiverse. You’ll also find links to the original designs and you’ll need them for extra parts and instructions, too.

Continue reading “Hacking The Ortur Laser With Spoil Board, Z-Height, And Air Assist”

Hey Google, Is My Heart Still Beating?

University of Washington researchers studying the potential medical use of smart speakers such as Amazon’s Echo and Google’s Nest have recently released a paper detailing their experiments with non-contact acoustic heartbeat detection. Thanks to their sensitive microphone arrays, normally used to help localize voice commands from the user, the team proposes these affordable and increasingly popular smart home gadgets could lead a double life as unobtrusive life sign monitors. The paper goes so far as to say that even with multiple people in the room, their technique can be used to monitor the heart and respiratory rate of a specific target individual.

Those are some bold claims, but they aren’t without precedent. Previous studies performed at UW in 2019 demonstrated how smart speaker technology could be used to detect cardiac arrest and monitor infant breathing. This latest paper could be seen as the culmination of those earlier experiments: a single piece of software that could not just monitor the vitals of nearby patients, but actually detect a medical emergency. The lifesaving potential of such a program, especially for the very young and elderly, would be incredible.

So when will you be able to install a heart monitor skill on the cheap Echo Dot you picked up on Prime Day? Well, as is often the case with this kind of research, putting the technique to work in the real-world isn’t nearly as easy as in the laboratory. While the concept is promising and is more than worthy of further research, it may be some time before our lowly smart speakers are capable of Star Trek style life-sign detection.

Continue reading “Hey Google, Is My Heart Still Beating?”

Video Ram Transplant Doubles RTX 3070 Memory To 16 GB

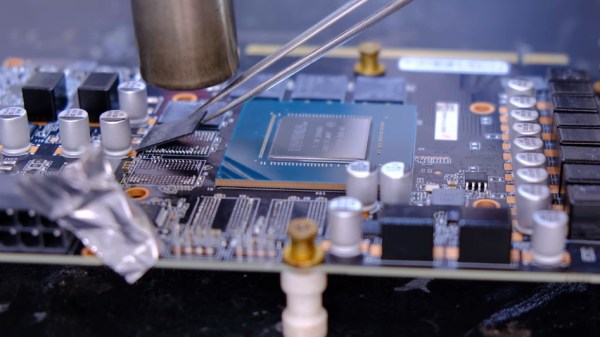
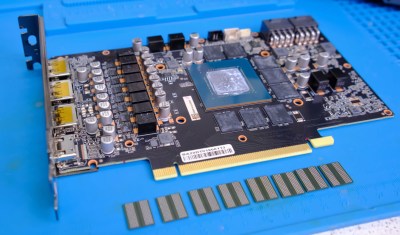
Making unobtainium graphics cards even more unobtainable, [VIK-on] has swapped out the RAM chips on an Nvidia RTX 3070. This makes it the only 3070 the world to work with 16 GB.

If this sounds familiar, it’s because he tried the same trick with the RTX 2070 back in January but couldn’t get it working. When he first published the video showing the process of desoldering the 3070’s eight Hynix 1 GB memory chips and replacing them with eight Samsung 2 GB chips he hit the same wall — the card would boot and detect the increased RAM, but was unstable and would eventually crash. Helpful hints from his viewers led him to use an EVGA configuration GUI to lock the operating frequency which fixed the problem. Further troubleshooting (YouTube comment in Russian and machine translation of it) showed that the “max performance mode” setting in the Nvidia tool is also a solution to stabilize performance.

The new memory chips don’t self-report their specs to the configuration tool. Instead, a set of three resistors are used to electronically identify which hardware is present. The problem was that [VIK-on] had no idea which resistors and what the different configurations accomplished. It sounds like you can just start changing zero Ohm resistors around to see the effect in the GUI, as they configure both the brand of memory and the size available. The fact that this board is not currently sold with a 16 GB option, yet the configuration tool has settings for it when the resistors are correctly configured is kismet.

So did it make a huge difference? That’s difficult to say. He’s running some benchmarks in the video, both Unigine 2 SuperPosition and 3DMark Time Spy results are shown. However, we didn’t see any tests run prior to the chip swap. This would have been the key to characterizing the true impact of the hack. That said, reworking these with a handheld hot air station, and working your way through the resistor configuration is darn impressive no matter what the performance bump ends up being.

Continue reading “Video Ram Transplant Doubles RTX 3070 Memory To 16 GB”

A Very Modern Tube Headphone Amplifier

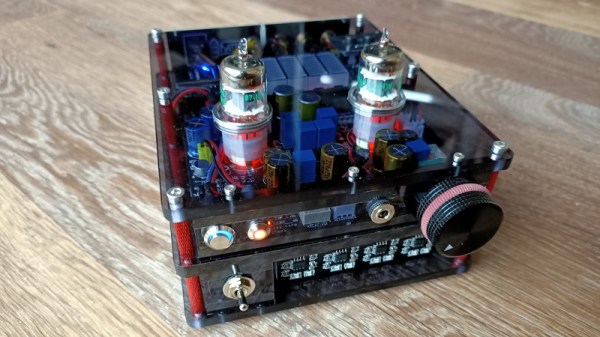
Once a discarded relic, over the years the humble vacuum tube has been rehabilitated in the arena of specialist audio. There are plenty of tube amplifiers now being manufactured, with a popular choice being headphone amplifiers that use a tube as a gain stage followed by an op-amp as a buffer with a low impedance output. This forms the basis of [Ratti3]’s amplifier, but with the added interest of a battery supply and a Bluetooth connection.

The tube circuit is a very conventional anode follower using an EF95 pentode. This provides plenty of gain and of course that “valve sound” beloved of audio enthusiasts, but suffers from an output impedance too high to drive a set of headphones. An NE5532 steps in for the op-amp buffer role, making for a very simple circuit. Power comes from a set of four 18650 Lithium-Ion cells with associated charger and balance boards, while a little switching boost converter provides the 100 volt HT for the tubes.

We’ve visited this type of amplifier before with a similar but much more rough-around-the-edges Chinese version. That had some astonishingly cheap Chinese tubes, but if we’re seeking better components it’s interesting to know just who makes tubes these days.