It’s a great time to be a hobbyist. No matter how you feel about the Arduino/Raspberry Pi effect, the influx of general enthusiasm and demand it has created translates to better availability of components, a broader community, and loads of freely available knowledge. When people have access to knowledge and ideas, great things can happen. Tools that were once restricted to industrial use become open source, and the price of entry-level versions goes into a nosedive.
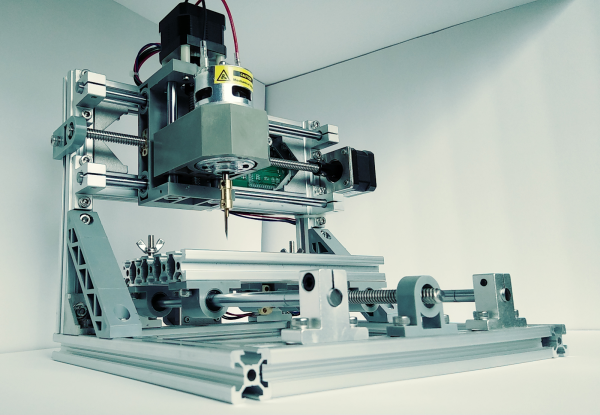
As we’ve seen over the last several years, the price of cheap 3D printers keeps falling while the bar of quality keeps rising. It’s happening with laser cutters and carving tools, too. Strolling through Microcenter a few weeks ago, I spotted a new toy on the back wall next to the 3D printers. It was LinkSprite’s desktop mini CNC. They didn’t have one out on display, but there were two of them in boxes on the shelf. And boy, those boxes were small. Laughably small. I wondered, could this adorable machine really be any good? To some, the $200 price tag suggests otherwise. To me, the price tag made it justifiable, especially considering that the next price point for a hobby CNC mill is at least twice as much. I took my phone out and stood there frantically looking for reviews, documentation, anything that was available. It seemed that the general, if sparse consensus is that this thing isn’t a total waste of money. Oh, and there’s a wiki.
According to LinkSprite’s wiki, this little machine will engrave wood, plastic, acrylic, PVC, and PCBs. It will specifically not engrave metal (PCB copper notwithstanding). I’m a bit leery of the chemicals used in the PCB etching process, so the idea of engraving them instead was especially tempting. I pulled the trigger.