Making Aerogel At Home

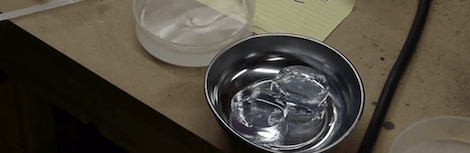
[Ben] outdid himself. He successfully made monoliths of silica aerogel in his garage. Aerogel, the light-weight solid that has been referred to as ‘hard air’ is really freaking expensive especially in non-granulated form.

The techniques behind producing aerogels have been on the Internet for a fairly long time. A few uncommon chemicals and a supercritical drying chamber are required for production, meaning it takes a lot of know-how to make hard air at home. Somehow, [Ben] got ahold of some tetramethoxysilane, the hard to come by ingredient and made a supercritical drying chamber out of pipe fittings and liquid Carbon Dioxide.

In the end, [Ben] was able to make a few small pieces of aerogel. The size of his pieces were constrained by his “mold” (actually a syringe) and the size of his drying chamber. It’s very possible [Ben] could build a larger supercritical drying chamber and make larger pieces of aerogel that would be sold commercially for hundreds of dollars.

Check out the very informative walkthrough of [Ben]’s process after the break. It’s 10 minutes long and makes for a great lunch break video.

Continue reading “Making Aerogel At Home”

Ice On Your Turkey Makes It Tender, Apparently

Turkey day is fast approaching and for those of us not cool enough to be rocking the deep-fried turkey this year we’ll have to suffer though a potentially dry oven-roasted bird. Chef [Justin] came up with a great way to prevent dried out white meat on a turkey using ice of all things.

The enemy of moist and tender breast meat is heat. Cooking meat for too long will dry it out. There’s a problem, though: the breast is the thickest part of the bird which means it will take longer than the legs or thighs to reach the necessary 160 degrees. [Justin] figured that if he could cool down the breast with ice, it will take longer to cook and both the white and dark meat will come out perfectly.

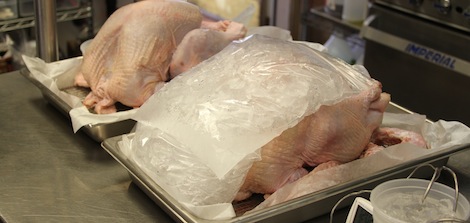
[Justin] set up a test with two 15-pound birds. Both turkeys were allowed to come up to room temperature, then ice packs were put on the breast of one bird for 15 minutes. This lowered the temperature of the experimental breast by a few degrees. Both birds were then thrown into the oven.

After coming out of the oven, both birds looked great. The bird treated with ice packs appeared to be more tender and moist. Sounds like the perfect thing to pull out of our bag of tricks next week.

Zero-G Experiments Will Make Some Pretty Pictures

Does a yo-yo work in zero-g? How about a paper airplane? These questions were answered in 1985 on the Space Shuttle Discovery, but reproduction of results is the cornerstone of the scientific method. [Rob] is about to reproduce some of the awesome zero-g pictures by riding on a vomit comet and taking a few pictures of water globes colliding.

For the last few months, [Rob] has had a standby ticket on the G-Force One, a plane that takes passengers on parabolic arcs to simulate microgravity. He was lucky as his standby ticket allowed him to take a few experiments on board, so [Rob] decided there’s just not enough awesome pictures of water colliding in zero-g.

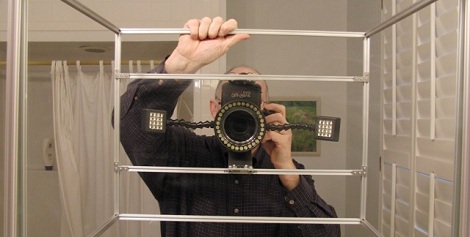
He built a rig out of micro t-slot aluminum. A DSLR is mounted to the frame along with a few ‘test tubes’ containing water. When [Rob] blows through a tube, a small sphere of water will be released to collide with other object. Think of it as the nerd’s version of water splash photography.

Of course, a trip through zero-g wouldn’t be complete without a few more experiments. [Rob] plans on testing a few toys to see if yo-yos ‘sleep’ without gravity (they don’t), and if a grandfather clock works on the moon (there’s a month-long day, so kind of). We can’t wait to see [Rob]’s pictures once he comes back to Earth.

A Technique To Avoid Warping On Large 3D Prints

[Jamie Mantzel] figured out his own way of 3D printing large objects without fear of warping. First a bit of background information. When using a 3D extrusion printer like the RepRap or Makerbot, prints that span a large area tend to warp. That’s because these printers lay down one thin layer of plastic at a time. If the first layer cools too much, it will shrink a bit before the next layer is laid down. As that second layer cools it pulls the part toward the center, eventually bowing the part which causes it to hit the extruder head.

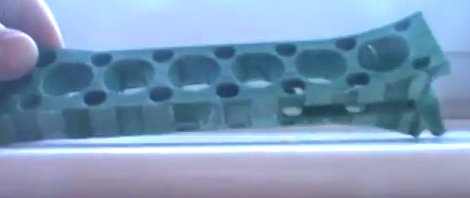
After having several prints encounter this issue [Jamie] decided to alter his design so that it wouldn’t cause these stresses. The first thing that he did was to add alternating voids to a layer between the raft and the actual part. You can see these as notches on the bottom the piece pictured above. This takes care of the initial stresses from the first layer. Next, he adds holes wherever he can in the main body of the part. This is especially important on the edges of the piece where the warping forces will be the greatest.

He also moved the starting position of the bed closer to the extruder head. His hope is that this will help the raft bond better, and resist pulling away from the bed during printing.

See his video explanation of his adventure after the break.

Continue reading “A Technique To Avoid Warping On Large 3D Prints”

DIY LED Photography Lights

led-light-box

[Markus] had been drooling over some LED panels to use as a soft light source for photography, but being a hobbyist, he didn’t want to spend a ton of money to buy them. He figured that he had enough electronics know-how to build his own panels, while saving a boatload of cash in the process.

He hoped to keep the total cost under £100, so along with new items like LED light strips, he would have to use some stuff he had sitting around, like the metal cooking containers that make up the body of the lights. While originally planned for use in a different project, it turns out that the cooking containers were ideal for his lighting setup, since they are both durable and great heatsink material.

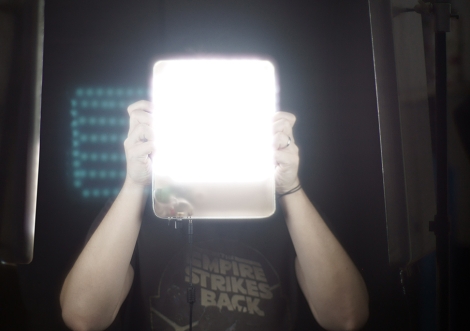
The remainder of the build is pretty straightforward. [Markus] used a pre-made LED dimmer to control the panel’s brightness, along with some tinted plexiglas to diffuse the light while bringing the color temperature into a more usable range.

While he missed his £100 mark, the lights look great – we just might have to build a few of them ourselves.

Snake-bot Gives Us The Mechanical Heevy-jeevies

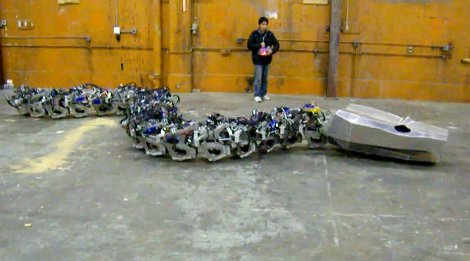
Basilisk? Nope, just your run-of-the-mill giant serpentine robot build. This build aims to recreate Titanoboa, a prehistoric snake which measured more than fifty feet long and weighted over a ton. They’re well on their way to completing the goal, as what you see above is fully operational, lacking only cosmetic niceties which would only serve to make the beast less horrifying.

The video after the shows the snake getting round an open space, presumably at the eatArt headquarters in Vancouver. You may remember the team from one of their other builds also featured in that clip, the Mondo Spider. Eventually, the snake will have a rider just like the spider does, sitting in a saddle mounted just behind the head. There’s few details about the hardware, but we know it’s hydraulic, and that they raised $10k to make the build possible.

For some reason seeing these bots interact gives us flashbacks to childhood cartoons. Is it possible the eatArt crew has been watching too many old G.I. Joe cartoons and the like?

Continue reading “Snake-bot Gives Us The Mechanical Heevy-jeevies”

Stylophone 5 – Modernizing The Best Of The 1968 Hardware

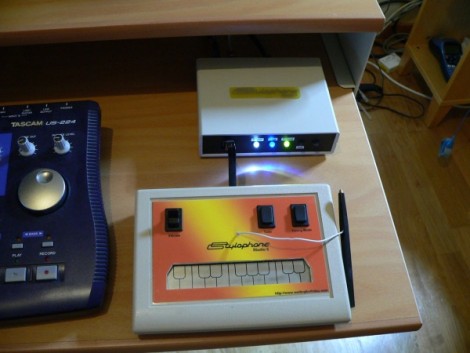
We love looking in on [Simon Inns’] projects, and this must be one of his very best. This is the fifth version of his MIDI-capable stylophone. The gist of the control system is that a conductive keyboard (made of a tinned PCB) is played by making a connection with the tip of a wired stylus — hence the name. The idea comes from the original 1968 Dubreq Stylophone hardware, but [Simon’s] not just using the idea. He has his own working original and used it to reverse engineer the circuit design.

When it first came out, the Stylophone had three flavors for Bass, Standard, and Treble audio ranges. They differed only in the choices of passive components used in the circuit. [Simon] built the variations into his design so that they are selectable on one unit. This most recent version connects via USB, allowing you to control MIDI software. But unlike his first four iterations, this also offers MIDI-In capabilities. This makes it possible to control tuning, vibrato, and to drive the Stylophone circuitry from the computer interface. Get a good look at that, and a nostalgic Portal moment, by watching the clip after the break.

If you’re looking for an easier build, you might try this analog standalone version of the Stylophone.

Continue reading “Stylophone 5 – Modernizing The Best Of The 1968 Hardware”