Quadcopter Stabilization System Using Wii Motion Plus

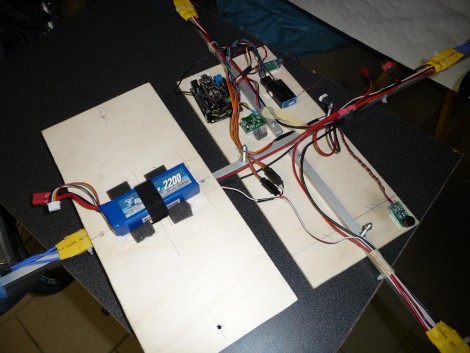
If you’re contemplating a quadcopter build here’s a way to add stabilization hardware without breaking the bank. The BaronPilot project uses an Arduino and a Wii Motion Plus module to ensure an even keel for your flying projects. The hardware inside of the Motion Plus includes two gyroscopes, which the BaronPilot monitors for changes in your flying rig’s orientation. The project serves as a co-pilot by differentiating between movements caused by the remote control, and changes due to wind or other outside factors (like hitting the quadcopter with a stick as seen in the video after the break). It should all translate to less chance of crashing due to operator error.

You can pick up a Motion Plus for less than twenty dollars, a deal when compared to the IMU boards that we usually see in quadcopter builds which usually run more than twice that amount. It’s an I2C device which makes it easy to hook up to just about anything. This project has native support for Teensy, Arduino Nano, and Arduino clones using an ATmega328 chip. But the portability of the Arduino platform should make it easy to tweak the code for use with just about any microprocessor.

Continue reading “Quadcopter Stabilization System Using Wii Motion Plus”

Keeping Simple Children’s Toys Interesting With Small Modifications

souping_up_slot_cars

[Jaroslav] was racing slot cars with his son not too long ago, but like many of us discovered in our youth, driving cars around a small oval track can get dull after awhile. Rather than buy more track sections, he decided to fiddle with their cars a bit to make racing them a little more exciting.

After removing the top of his slot car, [Jaroslav] found that it cruised around corners with ease, giving him a distinct advantage over his son. He did the same with his son’s car to level the playing field, then he decided to add a few extra LEDs to make driving around the small track more lively.

Now, this obviously isn’t the most advanced of modifications, but it is a great example of extending the useful life of a toy by using cheap, easy to access components. We think that it would be reasonable to add even more features to the cars/track such as speed-dependent lighting or lap counters without changing the car dynamics all that much.

Any thoughts or suggestions to help [Jaroslav] soup up his kid’s race track even more? Share them with us in the comments.

A Laser Cutter Challenge

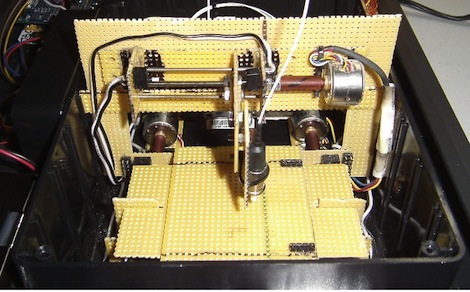
When the Louisville hackerspace LVL1 was discussing the purchase of a new laser cutter, a member said, “I could build one before you get around to buying one.”  The gauntlet was thrown down, a challenge was set, and the race was on to build a tiny laser cutter before the hackerspace took delivery of their new laser cutter.

The mechanical aspect of the build is fairly simple. The X axis is simply a stepper motor, threaded rod and laser module mounted on a carriage. This carriage moves along the Y axis with the help of two stepper motors for either side. Everything was mounted on more perfboard than reason would suggest.

For the electronics of the project, three motor drivers were made with a few logic chips and the laser firing relay was stolen from test equipment developed for LVL1’s trans-Atlantic balloon build. Motor and laser control was handled by an Arduino to keep the build simple because the contest was over after the first laser was finished cutting a square.

LVL1 is now working on a second version of the winner of the laser cutter challenge. They’re planning on a touchscreen interface that will cut a plastic blank about the size of a credit card. We can’t wait to see the results of that build.

ATtiny Hacks: Look Ma, No Batteries!

ATtiny Hacks Theme Banner

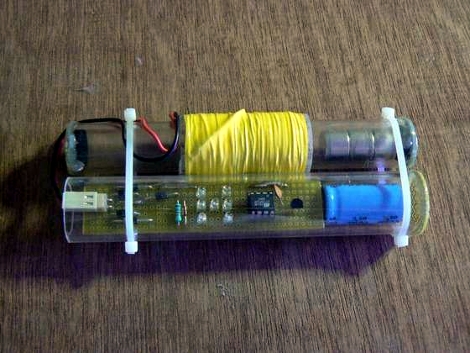
[Gadre] built his own ATtiny project without using any batteries. It’s an electronic Dice (or die if you’re being critical) which uses induction to charge a storage capacitor to act as the power source. The voltage generator is made from a tube of Perspex which houses a set of rare-earth magnets. At the enter of the tube [Gadre] machined a channel wich accepts about 1500 windings of 30 AWG magnet wire. When someone shakes the tube back and forth the magnet passes the wire, inducing a current.  The product is stored in a 4700 uF capacitor, which feeds a boost converter to power the rest of the circuit.

The ATtiny13V that controls the circuit is running its internal RC oscillator at 128 kHz, the lowest setting possible in order to minimize power consumption. After a good shake the user can press a button to roll the die, which is then displayed for several seconds on a group of seven LEDs. See for yourself in the video after the break.

Continue reading “ATtiny Hacks: Look Ma, No Batteries!”

Upverter: It’s Like Github For Hardware

If there’s one thing we’ve noticed about hardware hackery and electronics project, it’s that all the resources to build a project are scattered about the Internet on forums, blogs (heh), and personal web pages. Enter Upverter. The fellows who started Upverter had the same observation, and after some Y Combinator funding, launched what they hope to be “The Github of electronics” and the “Google Docs of hardware design.”

Upverter has the features we would expect – forking, versioning, and integration with Github for a project’s code. Already there’s a few cool projects, like a PIC programmer, a TV-B-Gone, and a tiny version of Conway’s Game Of Life.

We’re not ready to wave the banner of an Upverter fanboy quite yet. There’s quite a number of components available in the schematic editor, but from our experience the component library could use some refinement both by weeding out duplicates and increasing the number of parts. We’d also like to put a zoom control for the schematic view on our wish list. Upverter doesn’t have a PCB editor either, but from this post from a VC rag, the team is working on one. While this is really just nitpicking – Upverter launched less than 24 hours ago – we’ll be happy to see the some projects roll in on the tip line that are hosted on Upverter.

EDIT: link to the Google cache, because we probably Slashdotted it. It’s up for now.

Motion Detecting Window Closers Keep Train Noise At Bay

motion_detecting_window_closers

[Ed Rogers] has the unfortunate privilege of living right next to a set of train tracks, and as a man who holds his sleep in high regard, he needed to find a way to keep the noise in his bedroom to a minimum. To combat the sound of passing trains, he built himself a system that automatically closes his windows when a train passes by his apartment.

The setup relies on a web cam, which uses motion-sensing software to detect a passing train. The video is analyzed by a computer in his room which passes a message to an Arduino when a train is near. The Arduino then sends a pair of window mounted linear actuators into action, slowly (and quietly) shutting his windows.

The linear actuators move pretty slowly as you can see in the video below, but we doubt that matters. Since it looks like [Ed] lives in a slow zone, it likely takes quite a bit of time for a freight train to pass, making the 40-second closing period more than reasonable.

Continue reading “Motion Detecting Window Closers Keep Train Noise At Bay”

Transformer-based PSU Repair

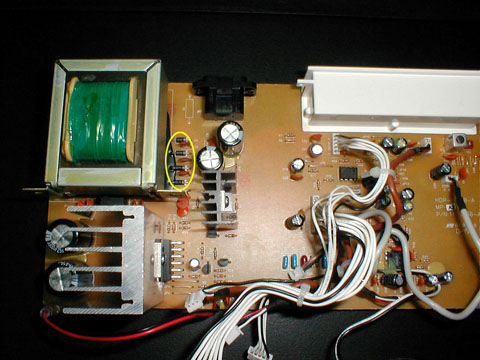
Repairing someone else’s design mistakes is much more difficult than starting from scratch. So whenever we come across someone who’s good at this type of trouble-shooting we pay attention. [Jim] had a Sangean HDR-1 in his home. It’s a tabletop HD radio that stopped powering up for some reason. He cracked it open and got to the bottom of the problem.

The first order of business is disassembly, which isn’t too hard with this model. With multimeter in hand he started probing the transformer and found that the contacts for the primary are an open circuit; signaling a problem. There’s no inline fuse for protection, and further study of the secondary winding let him to discover the use of 1N5817 diodes. These are underrated parts for this particular transformer. He replaced them with 1N4003 diodes to bring the device in spec. But there was still the issue of fuse protections. A bit of circuit free-forming allowed him add a fuse and varistor  by soldering the directly to the transformer’s contacts.

Why stop there? While [Jim] had the case open he also swapped out the low-end op-amp and a few electrolytic capacitors to improve the sound quality of the radio. Op-amp replacement seems to be a popular way to improve the sound from HD radios.