ATtiny Hacks: An Audio Alert For Cell Phones Accidentally Left On Vibrate

ATtiny Hacks Theme Banner
vibe2tone_cell_phone_vibration_alert

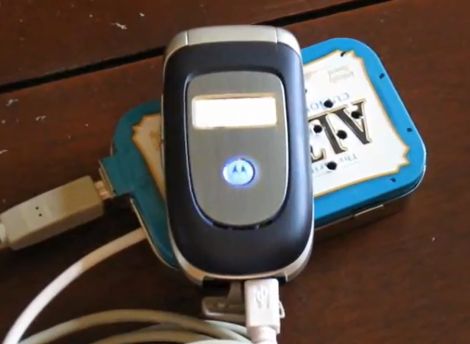
[John Thomson] usually keeps his phone on vibrate when it’s in his pocket, and he often forgets to turn the ringer back on when setting it down to charge. This typically results in a bunch of missed calls in the meantime, so he had to devise a way to counteract his forgetfulness.

You might remember [John] from the Santa-pede contest we held last December. He wanted to try his hand at yet another competition, the Avnet Dog Days of Summer contest, so he scrambled to come up with a quick fix for his situation. He concocted a simple circuit based on [ChaN’s] design for a “Simple SD Audio Player with an 8-pin IC” that would alert him to incoming calls, even when his phone was on vibrate.

[John] used an ATtiny85, just as [ChaN] did, adding a speaker for sound output and a piezo sensor to detect his phone’s vibrations. When the piezo senses a bit of motion, the audio player kicks in, blaring a series of sounds that are sure to get [John’s] attention.
Record Sound Without A Microcontroller

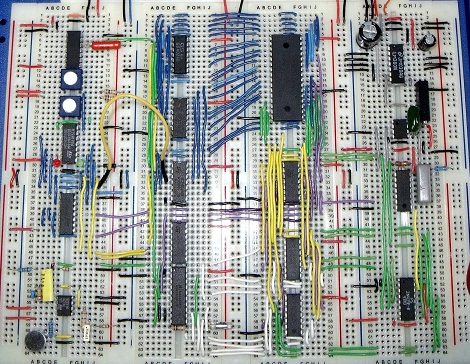
For his A-level electronic course work, [Andrew] decided to build a digital sound recorder that doesn’t use a microcontroller.

[Andrew]’s build captures audio from an on board microphone at 8000 samples/second. The audio is digitized into 8-bit sound data and sent to an SRAM. The recording and playback functions are controlled entirely by 4000-series logic chips. He admits the sound quality is pretty poor; this is mostly due to the 8kHz sample rate. In some circles, though, a terrible sample rate is seen as being pretty cool so we’re not going to say [Andrew]’s build is useless.

There’s some pretty smart design choices in [Andrew]’s build, like a cut off filter on the microphone set at 4000 Hz (the Nyquist frequency of his system).  For the recording medium, he used an SRAM that can hold about half a megabyte of data. At 8000 samples/second,  [Andrew]’s build can store a little more than 60 seconds of audio. The build may not be a logic chip computer, but there’s not any question in our mind that [Andrew] learned something. Check out [Andrew]’s 66-page coursework report here (PDF warning).

Adding A Little Polish To Your Cellphone Charging Setup

Cable management can really be an eyesore, but a little creative camouflage and you can have a cellphone charging station that also serves as decoration.

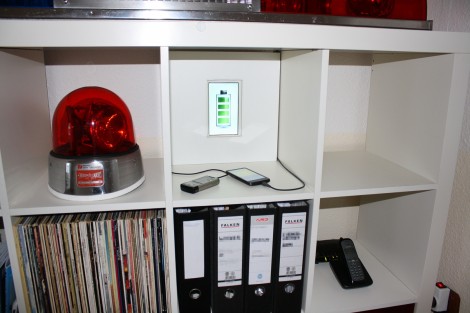
[Kitesurfer] wanted to use one of the cubbyholes in his new Ikea book shelf for charging but wasn’t keen on the rat’s nest of wires that would go along with it. Also not wanting to take on the challenge of wireless charging he hit the As-Is section of the home furnishing giant and grabbed a leftover board that matched the same finish as the cabinetry. It now serves as a false-back for the charging center behind which a power strip and wall-warts hide.

This covers up the problem, but a blank white box filled with the business end of the charging wires isn’t a whole to better. As with a magic show, the trick is in redirection. [Kitesurfer] cut a hole in the false-back and added the guts of a digital picture frame. Right now he’s got it scrolling through different charging icons, but it’s easy enough to change up the slide-show if he gets tired of them. We’d love to see a subsequent hack that lets the picture frame access the photos on your phone via Bluetooth.

Amp Hour Interviews [Joe Grand]

The Amp Hour, a podcast of electronics enthusiasts and professionals alike, just did an epic interview with [Joe Grand]. Along with hosts [Chris Gammell] and [Dave Jones], the discussion runs the gamut of points of interest in the hardware hacking world. The first vignette explores the rise, run, and fall of Prototype This, an engineering-centric TV show that [Joe] did along with a group of various engineers for the Discover Channel. He politely discusses some of the goods and bads of the TV business and how that affected the team’s ability to go into great detail about the projects they were building.

From there the guys discuss the development of Hackerspaces through the years. [Joe] has some concerns about the injection of corporate sponsorships in these DIY spaces and what that may mean in the long run. He then talks about the impending release of his 3-year-long laser range-finder project (we’ve seen a project using a prototype of this sensor). The show is rounded out with discussions about hardware fab houses that [Joe] uses and has used over the years for projects like the Defcon Badges (we loved his Defcon 18 badges).

It’s a great episode so download a copy and set aside about an hour to listen to the whole show.

CheapStat: An Open-source Potentiostat

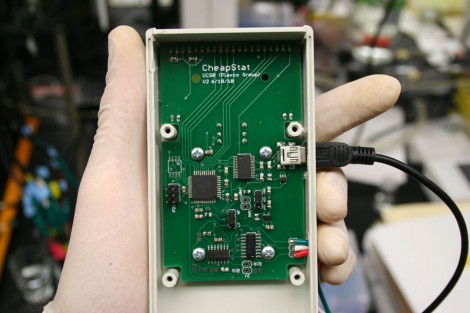
A commercial potentiostat can cost several thousand dollars, but the CheapStat is an open source project that makes it possible to build your own at a tiny fraction of that cost. It is possible to build one for less than $80, breaking down the cost barrier faced by many labs that would like to have this test hardware.

A potentiostat is used to measure electrochemical properties. To give you a few examples of what it can do, the hardware can measure arsenic levels in water, Vitamin C concentration in orange juice, Acetaminophen concentrations in over-the-counter medications, and a bunch of other less easily explained tests having to do with chemical compounds and DNA.

The device makes use of an Atmel XMEGA microcontroller and connects to a computer via USB. A Java program grabs that data from the hardware displaying test results on your choice of computer platforms. If you’re looking for all the gory details you won’t be disappointed by their journal paper.

Video – Eagle CAD’s CAM Processor

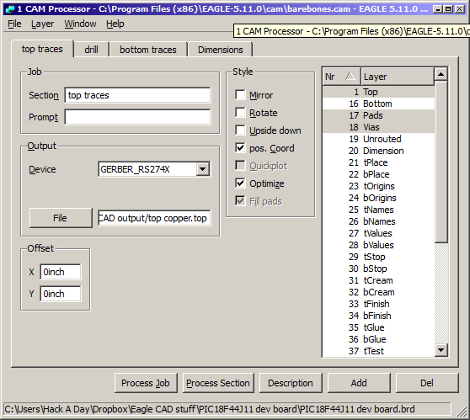
Here is the next installment in our series of Eagle CAD videos. In this video we skip ahead a bit and show off the CAM processor that you use to create the files necessary to have your circuit boards be manufactured. After watching this video, you will know how create a new CAM program, load a circuit board into the CAM processor, tell it where to save your files, and actually use it to create the files.

We’re skipping ahead today because of a screw up on our part. We meant to show the layout portion of the program today but edited the wrong video… We’ll show layout next week. After that, we will show the completed circuit board and solder the parts onto it.

If you are itching for some Eagle CAD layout info, you may be interested in some supplementary videos that we have uploaded to our Youtube channel. In those videos, we show how to use the most important features in the layout portion of the Eagle CAD.

Have you missed the previous videos? Here are some links to them:

Schematic and the beginning of a custom part: [click here]
More custom part stuff: [click here]

Video is after the break:
Continue reading “Video – Eagle CAD’s CAM Processor”

Making Better CNC Halftone Pictures

[Jason] was messing around with CNC machines and came up with his own halftone CNC picture that might be an improvement over previous attempts we’ve seen.

[Jason] was inspired by this Hack a Day post that converted a image halftone like the default Photoshop plugin or the rasterbator. The results were very nice, but once a user on the JoesCNC forum asked how he could make these ‘Mirage’ CNC picture panels, [Jason] knew what he had to do.

He immediately recognized the algorithm that generated the Mirage panels as based on the Gray-Scott reaction-diffusion algorithm. With this algorithm, dark areas look a little like fingerprints, meaning the toolhead of the CNC router can cut on the X and Y axes instead of a simple hole pattern with a traditional halftone. After a little bit of coding, [Jason] had an app that converted an image to a reaction-diffusion halftone which can then be converted to vectors and sent to a router.

It’s a very neat build and we imagine that [Jason]’s pictures would cost a bit less than the commercial panels. Check out the video after the break to see the fabrication process.

Continue reading “Making Better CNC Halftone Pictures”