Reviving Interlisp With The Medley Interlisp Project

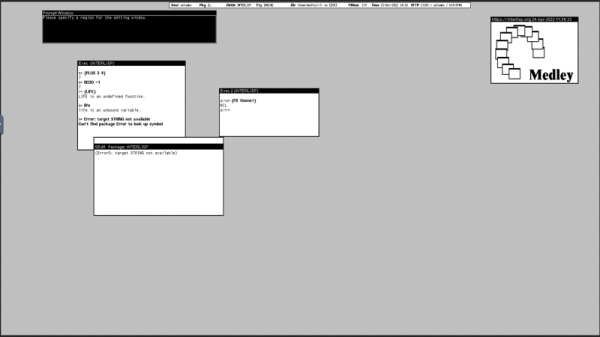
Within the Artificial Intelligence and natural language research communities, Lisp has played a major role since 1960. Over the years since its introduction, various development environments have been created that sought to make using Lisp as easy and powerful as possible. One of these environments is Interlisp, which saw its first release in 1968, and its last official release in 1992. That release was Medley 2.0, which targeted various UNIX machines, DOS 4.0, and the Xerox 1186. Courtesy of the Interlisp open source project (GitHub), Medley Interlisp is available for all to use, even on modern systems.

The documentation contains information on how to install Medley on Linux but also Mac and Windows (via WSL1 or WSL2). For those just curious to give things a swing, there’s also an online version you can log into remotely. What Medley Interlisp gets you is an (X-based) GUI environment in which you can program in Lisp, essentially an IDE with a debugger and the (in)famous auto-correction tool for simple errors such as typos, known as the DWIM (Do What I Mean), which much like the derived version in Emacs seeks to automatically fix simple issues like misspellings without forcing the developer to fix it and restart the compilation.

Thanks to [Pixel_Outlaw] for the tip and for also telling us about a project they wrote using Medley Interlisp for the Spring Lisp Game Jame 2023 titled Interlisp Fifteen Puzzle.

Miniware TS1C: A Cordless Soldering Iron With A Station

Most soldering irons in the market seem to fall into a few distinct categories. They either provide a full-blown station to which the soldering iron is wired, powered straight by mains, or an iron powered by DC power. The Miniware TS1C takes up an interesting position here in that it features both a station you put the iron into and adjust the temperature, as well as a fully cordless iron. Sounds too good to be true, perhaps, but a recent Tom’s Hardware review by [Les Pounder] seems to think it has real merit.

Behind the glossy exterior and marketing, we find a cordless soldering iron that uses a supercapacitor to power itself when it is not inserted into the station, with communication between the iron and station performed using Bluetooth. This way, you can keep an eye on both the tip temperature and the remaining charge left, which [Les] found to be sufficient for soldering about 80 smaller joints, with the marketing claiming it can solder 180 size 0805 SMD parts with one charge.

The advantage of having a station is that it is the part that is wired to a power bank or wall wart, with the temperature setting performed using a chunky dial. The station also provides a place for the iron in between soldering sessions, but in order to recharge the iron, the brass bands near the front have to be pushed into the holder for them to make contact. This also makes one-handed removal of the iron from the holder not as easy as you’d hope.

Continue reading “Miniware TS1C: A Cordless Soldering Iron With A Station”

Clock Escapement Uses Rolling Balls

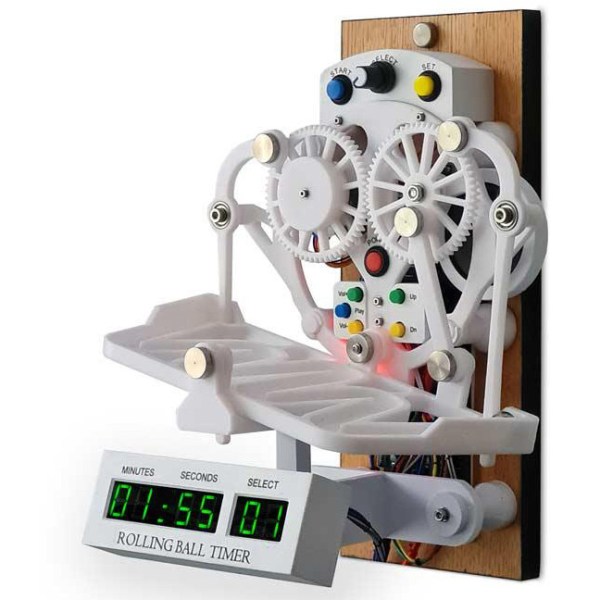
The escapement mechanism has been widely used for centuries in mechanical clocks. It is the mechanism by which a clock controls the release of stored energy, allowing it to advance in small, precise intervals. Not all mechanical clocks contain escapements, but it is the most common method for performing this function, usually hidden away in the clock’s internals. To some clockmakers, this is a shame, as the escapement can be an elegant and mesmerizing piece of machinery, so [Brett] brought his rolling ball escapement to the exterior of this custom clock.

The clock functions as a kitchen timer, adjustable in 10-second increments and with several preset times available. The rolling ball takes about five seconds to traverse a slightly inclined, windy path near the base of the clock, and when it reaches one side, the clock inverts the path, and the ball rolls back to its starting place in another five seconds. The original designs for this type of escapement use a weight and string similar to a traditional escapement in a normal clock. However, [Brett] has replaced that with an Arduino-controlled stepper motor. A numerical display at the bottom of the clock and a sound module that plays an alert after the timer expires rounds out the build.

The creation of various types of escapements has fascinated clockmakers for centuries, and with modern technology such as 3D printers and microcontrollers, we get even more off-the-wall designs for this foundational piece of technology like [Brett]’s rolling ball escapement (which can also be seen at this Instructable) or even this traditional escapement that was built using all 3D-printed parts.

Continue reading “Clock Escapement Uses Rolling Balls”

2023 Cyberdeck Challenge: YAHRC Takes Its Power Seriously

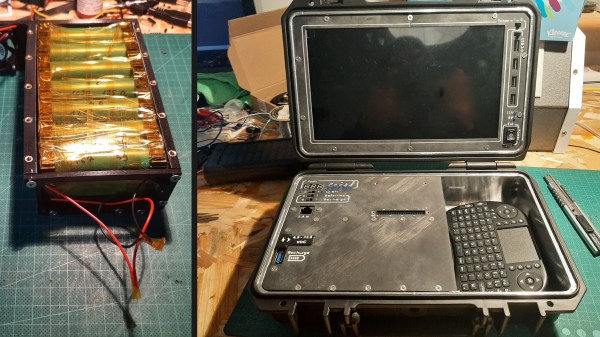
Cyberdecks are all about custom builds, and [f4drj]’s YAHRC (Yet Another Ham Radio Cyberdeck) takes its ruggedization and power seriously. There are some great power management features, and the enclosure even has a layer of RF shielding.

YAHRC is a Raspberry Pi-based build with a generously-sized screen that tucks a small Bluetooth keyboard into a storage area for input in a pinch. Everything is secured behind custom panels, and behind those panels are some really great build details. There’s active cooling via fans, an SSD for data, and [f4drj] even made a custom riser for the GPIO header by soldering together a couple of headers to act as an extender. This exposes the GPIO header right beside a clear area for prototyping, with easy access to USB ports next to the screen in the top panel. Continue reading “2023 Cyberdeck Challenge: YAHRC Takes Its Power Seriously”

Stirring Up 3D-Printed Lab Equipment

Magnetic stirrers are a core part of many chemistry labs. They offer many advantages for ensuring the effective mixing of solutions compared to other methods of stirring, including consistency, precise control, operation within closed systems, and of course, hands-free automatic operation. With so many reasons for employing a magnetic stirrer, it’s not too surprising that [Joey] would want one. He built his using 3D-printed parts rather than purchasing it.

The magnetic stirrer uses a 3D-printed enclosure for the base. Inside is a PWM controller which sends power to a small DC motor. A 3D-printed arm is attached to the motor, which hosts a pair of magnets. As the arm spins inside the enclosure, the magnetic fields from the magnet couple with the stir bar inside the mixture, allowing it to spin without any mechanical link to the stirring device and without any input from the user. [Joey] has also made all the 3D-printed parts for this build available on Printables.

While magnetic stirrers aren’t the most complicated of devices (or the most expensive), building tools like this anyway often has other advantages, such as using parts already on hand, the ability to add in features and customizations that commercial offerings don’t have, or acting as a teaching aid during construction and use. It’s also a great way to put the 3D printer to work, along with this other piece of 3D-printed lab equipment designed for agitating cell cultures instead.

Clock Runs Computer In Slow-Motion

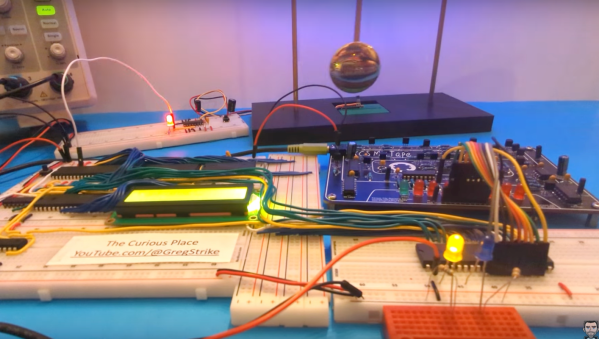
At the heart of all computers is a clock, a dedicated timepiece ensuring that all of the parts of the computer are synchronized and can work together to execute the instructions that the computer receives. Clock speeds for most modern off-the-shelf computers and smartphones operate around a billion cycles per second, and even clocks that tick at a human-dizzying speed of a million times per second have been around since at least the 1970s. But there’s no reason a computer can’t run at a much slower speed, as [Greg] demonstrates in this video where he slows down a 6502 processor to a single clock cycle per second.

To reduce the clock speed from the megahertz range down to a single hertz or single clock cycle per second, [Greg] is using the pendulum from an actual clock. He attaches a small magnet to the bottom of the pendulum which is counted by a sensor as it swings past. Feeding that pulse into a monostable conditioner yields a clock signal which is usable for one of his 6502-based computers, and at this extremely slow rate, it’s possible to see the operation of a lot of the computers’ inner workings a step at a time. In fact, he optimized the computer’s operation as this slow speed let him see some inefficiencies in the program he was running.

It helps if your processor is static, of course. Older CPUs with dynamic storage for registers and some with limited-range PLLs would not work with this technique. The 8080A, for example, required a clock of at least 500 kHz.

Not only can this computer use a pendulum clock as the basis for its internal clock, but [Greg] also rigged up a mechanism to use a heartbeat. Getting in a little bit of exercise to increase his heart rate first will noticeably increase the computer’s speed. And, if you’re looking to get a deeper glimpse into the inner workings of a computer, we’d recommend looking at one which forgoes transistors in favor of relays.

Continue reading “Clock Runs Computer In Slow-Motion”

A loudspeaker with a supercapacitor PCB next to it

Hackaday Prize 2023: Supercapacitors Let Solar Speaker Work In Darkness

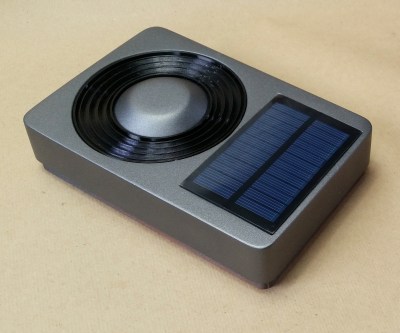
Solar panels are a great way to generate clean electricity, but require some energy storage mechanism if you also want to use their power at night. This can be a bit tricky for large solar farms that feed into the grid, which require enormous battery banks or pumped storage systems to capture a reasonable amount of energy. It’s much easier for small, handheld solar gadgets, which work just fine with a small rechargeable battery or even a big capacitor. [Jamie Matthews], for instance, built a loudspeaker that runs on solar power but can also work in the dark thanks to two supercapacitors.

The speaker’s 3D-printed case has a 60 x 90 mm2 solar panel mounted at the front, which charges a pair of 400 Farad supercaps. Audio input is either through a classic 3.5 mm socket or through the analog audio feature of a USB-C socket. That same USB port can also be used to directly charge the supercaps when no sunlight is available, or to attach a Bluetooth audio receiver, which in that case will be powered by the speaker.

A speaker's passive radiator next to a solar panel
The solar panel sits right next to the passive radiator before both are covered with speaker fabric.

The speaker’s outer shell, the front bezel, and even the passive radiator are 3D-printed and spray-painted. The radiator is made of a center cap that is weighed down by a couple of M4 screws and suspended in a flexible membrane. [Jamie] used glue on all openings to ensure the box remains nearly airtight, which is required for the passive radiator to work properly. Speaker fabric is used to cover the front, including the solar panel – it’s apparently transparent enough to let a few watts of solar power through.

A salvaged three-inch Bose driver is the actual audio source. It’s driven by a TI TPA2013D1 chip, which is a 2.7 W class-D amplifier with an integrated boost converter. This enables the chip to keep a constant output power level across a wide supply voltage range – ideal for supercapacitor operation since supercaps don’t keep a constant voltage like lithium batteries do.

[Jamie] has used the speaker for more than nine months so far and has only had to charge it twice manually. It probably helps that he lives in sunny South Africa, but we’ve seen similar solar audio projects work just fine in places like Denmark. If you’re taking your boombox to the beach, a sunscreen reminder feature might also come in handy.