The gorgeous Shoji-style lamps you’re seeing here aren’t made of wood or paper. Beyond the LEDs illuminating them from within, the lamps are completely 3D printed. There aren’t any fasteners or glue holding them together either, as creator [Dheera Venkatraman] used authentic Japanese wood joinery techniques to make their components fit together like a puzzle.
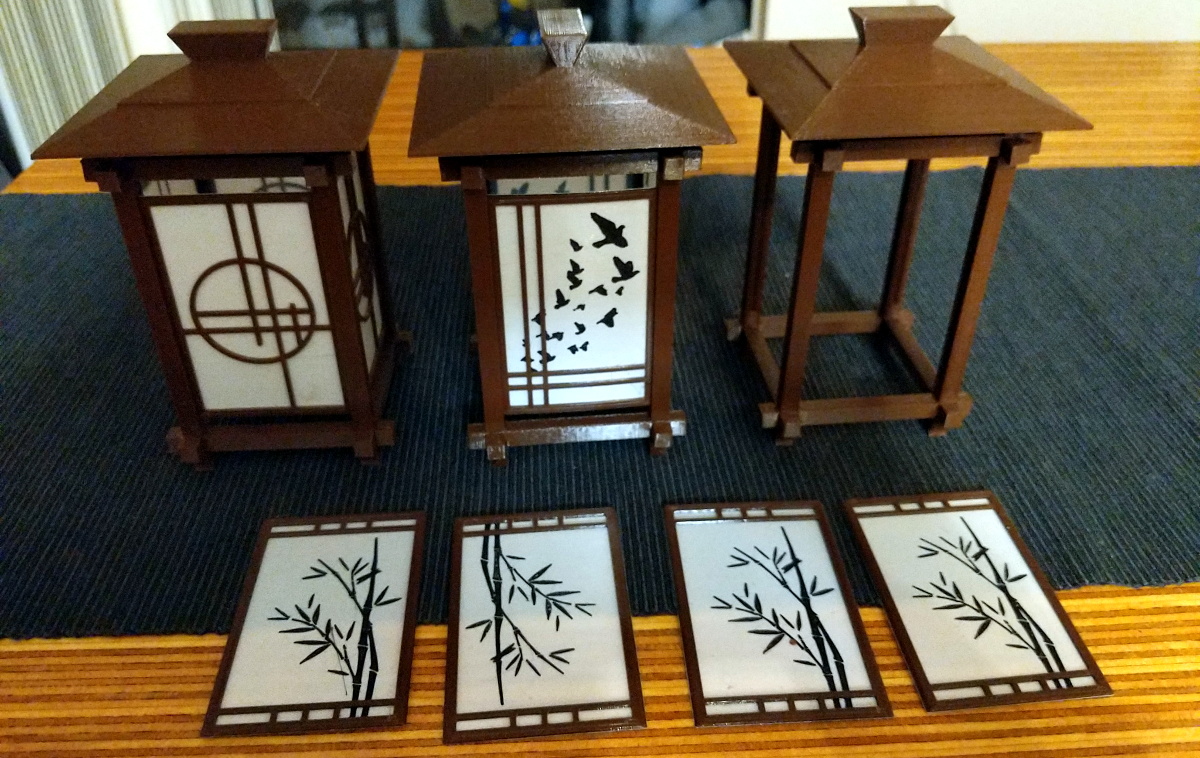 While we’re usually more taken with the electronic components of the projects that get sent our way, we have to admit that in this case, the enclosure is really the star of the show. [Dheera] has included a versatile mounting point where you could put anything from a cheap LED candle to a few WS2812B modules, but otherwise leaves the integration of electronic components as an exercise for the reader.
All of the components were designed in OpenSCAD, which means it should be relatively easy to add your own designs to the list of included panel types. Despite the colorful details, you won’t need a multi-material printer to run them off either. Everything you see here was printed on a Prusa i3 MK3S in PETG. Filament swaps and careful design were used to achieve the multiple colors visible on some of the more intricate panels.
If the timeless style of these Japanese lanterns has caught your eye, you’ll love this beautiful sunrise clock we covered last year.