A Robotic 808 Drum Machine

If you spent the 1980s hanging out at your local record store, and you don’t have a hankering for spandex and bouffant rock-god hairstyles, the chances are you’ll have more than a few pieces of electronic music from the period in your collection. The proliferation of electronica during that era came through the arrival of relatively inexpensive mass-market digital polyphonic instruments, edging out the sounds of monophonic analog synthesisers for a subsequent generation to rediscover in a later decade. Individual instrument models became icons and entered the musical vernacular of the day, the Ensoniq Mirage sampling synthesiser, the Yamaha DX7 FM synthesiser, or the Roland TR-808 drum machine.

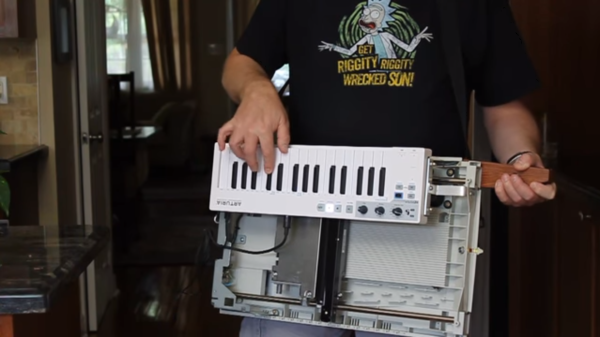
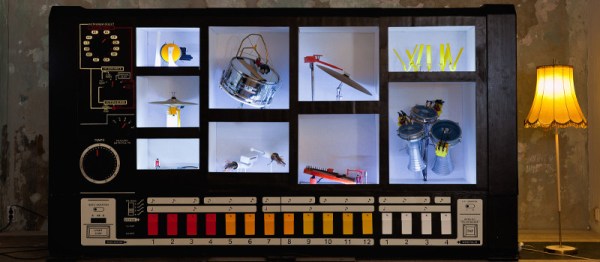
It is the Roland TR-808 that inspired today’s subject, the MR-808 robotic drum machine, from [Moritz Simon Geist]. A percussion sequencer featuring real instruments all built into a cabinet styled to resemble a huge Roland 808. Originally built as a performance instrument, but since reinvented as a piece of installation artwork that visitors can program for themselves.

Block diagram of the MR-808

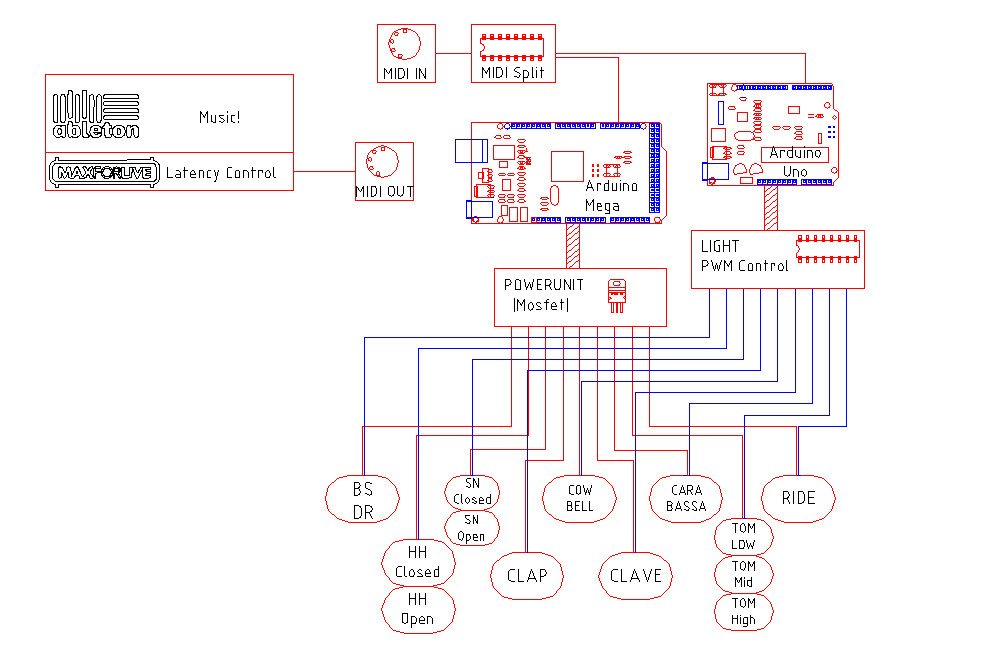
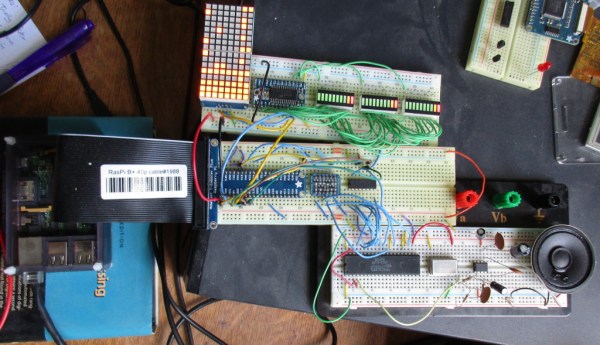
There is a comprehensive description of the machine’s design and build on the creator’s website, as well as a more high-level introduction. A significant amount of effort was put in to creating mechanical instruments as close as possible to the Roland sounds, with each instrument being operated by solenoids driven by a MIDI-controlled Arduino Mega. A second Arduino, this time an Uno, controls lighting that follows the instruments.

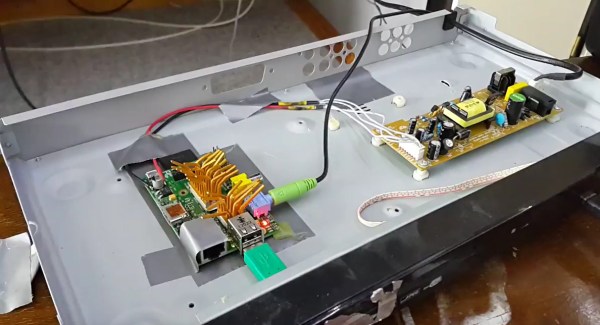
The interactive part of the installation comes from a sequencer front-end running in a web browser on a Nexus 7 tablet, this appears to be served from a Raspberry Pi which supplies MIDI to the MR-808.

The results can be seen in the video below the break, and judging by the reaction of the audience the machine is rather popular.

Continue reading “A Robotic 808 Drum Machine”

A Helmet To Make Daft Punk Jealous

If you’ve been paying even a little bit of attention to popular music over the past couple of decades, then you’re surely aware of the electronic music duo Daft Punk. Of course, their success isn’t just a result of their music – a big part of it is also their iconic costumes and persona. What makes those costumes iconic is the robot helmets that the musicians wear. What initially began as a desire to hide their faces ended up becoming their most distinctive trait.

The helmets that the duo wears have changed over the years, but an homage helmet created by [Mike Michelena] puts them all to shame. It maintains the aesthetic elements of Daft Punk’s helmets, while improving on the tech aspects in every way. 210 RGB LEDs, a microprocessor, and 14 amp hours worth of battery give it complete customizability and 5 hours of use.

Continue reading “A Helmet To Make Daft Punk Jealous”

Music Player For The Ability-Impaired

Most of the hacks we come across here at Hackaday don’t require much more than being “cool” to get our attention. But, every so often we find something that goes a step beyond that and does something truly good for the world. This is one such project, and its goal couldn’t be anymore altruistic: to allow the elderly to enjoy music, even when their declining vision and motor skills make traditional devices difficult to use.

It’s hard to overstate how important music is to people; there are few forms of art more emotionally effective. So, it was a major loss when an elderly relative of [DusteD] was no longer able to operate their CD player. Luckily, [DusteD] was there with an ingenious solution that uses RFID cards to play music from an always-on Raspberry Pi.

Continue reading “Music Player For The Ability-Impaired”

Raspberry Pi Chiptune Player Rocks A Sound Chip From The 80’s

Sometimes it’s worth doing something in an inefficient way. For example, it might be worth it in order to learn something new, or just to use a particular part. [Deater] did just that with the Raspberry Pi AY-3-8910 Chiptune Player (with LED visualizers!)

The venerable General Instrument AY-3-8910 series sound chips were common in older hardware like home computers and game consoles as well as sound cards for the Apple II family. They were capable of generating three channels of square waves with various effects. Developers eventually squeezed every little bit of performance out with clever hacks. The Raspberry Pi has more than enough power to do all this in software, but as [Deater] puts it, it’s far more interesting to use an actual AY-3-8910 from the 80’s. Some LED bar graphs and matrices round out the whole system.

All the code for the Raspberry Pi AY-3-8910 chiptune player can be found on [deater]’s github repository for the project. A video of the player banging out some sounds is embedded after the break.

Continue reading “Raspberry Pi Chiptune Player Rocks A Sound Chip From The 80’s”

Bare-bones Musical Tesla Coil Is Tiny And Tinny

We’ve seen musical Tesla coils aplenty on these pages before, and we’ll be the first to point out that [Kedar Nimbalkar]’s musical high-voltage rig doesn’t quite qualify as a Tesla coil. But it’s dirt cheap, and might make a pretty cool rainy-afternoon-with-the-kids project.

Chances are good you have the parts needed for this build lying around the house. All that’s needed is an audio power amplifier and a high-voltage source. [Kedar] used a Class D amp board and a 3V to 7kV high-voltage module sourced from eBay for a couple of bucks; if you really want to go cheap, tear down that defunct electronic fly swatter gathering dust on top of your fridge and harvest the high-voltage module inside. The output of the amp feeds the high-voltage module, the HV leads are placed close together to get an arc, and the glorious high-fidelity sound will wash over you. Or not – sounds pretty awful to us. Still, it looks like a fast, fun build.

If this project gets you in the mood to go the full Tesla, check out this coil big enough to produce 12-foot arcs, or even this musical Tesla hat.

Continue reading “Bare-bones Musical Tesla Coil Is Tiny And Tinny”

An Organ Made From Back-Driven Steppers

[Josh] wrote in to tell us about an experimental instrument he’s been working on for a couple of months. We’re glad he did, because it’s a really cool project. It’s an organ that uses the principle of back-drive—applying torque to the output shaft of a motor—to create sounds.  [Josh] is back-driving four octaves worth of stepper motors with spinning wooden disks, and this generates alternating current. At the right speeds, the resulting sinusoidal waveform falls within the range of human hearing and can be amplified for maximum musical enjoyment.

[Josh] built this organ from the ground up, including the keys which are made from oak and walnut. Each of the forty-nine stepper motors has a corresponding wooden disk. The larger the wooden disk in the stack, the higher the resulting pitch. [Josh] says that if he built it for a full 88 keys, the highest note’s disk would be sixteen feet in diameter.

This stack of disks is driven independently by a separate DC motor, and the speed determines the key it will play in. When [Josh] plays a note, that note’s lever is actuated and its stepper motor makes contact with its disk in the stack. When they meet, the motor is back-driven by the spinning disk. In other words, they work in concert to produce some cool, eerie sounds.

Here’s a somewhat similar sort of build made from lasers and fans, if you consider that both instruments create music from objects that weren’t built to do so. Watch [Josh] play his stepper organ after the break. He has several build videos on his YT channel, and we’ve also embedded the one that covers the motor, power, and electronics part of the build.

Continue reading “An Organ Made From Back-Driven Steppers”

Keytar Made Out Of A Scanner To Make Even The 80s Jealous

Do any of you stay awake at night agonizing over how the keytar could get even cooler? The 80s are over, so we know none of us do. Yet here we are, [James Cochrane] has gone out and turned a HP ScanJet Keytar for no apparent reason other than he thought it’d be cool. Don’t bring the 80’s back [James], the world is still recovering from the last time.

Kidding aside (except for the part of not bringing the 80s back), the keytar build is simple, but pretty cool. [James] took an Arduino, a MIDI interface, and a stepper motor driver and integrated it into some of the scanner’s original features. The travel that used to run the optics back and forth now produce the sound; the case of the scanner provides the resonance. He uses a sensor to detect when he’s at the end of the scanner’s travel and it instantly reverses to avoid collision.

A off-the-shelf MIDI keyboard acts as the input for the instrument. As you can hear in the video after the break; it’s not the worst sounding instrument in this age of digital music. As a bonus, he has an additional tutorial on making any stepper motor a MIDI device at the end of the video.

If you don’t have an HP ScanJet lying around, but you are up to your ears in surplus Commodore 64s, we’ve got another build you should check out.