Programmable Air Makes Robotics A Breeze

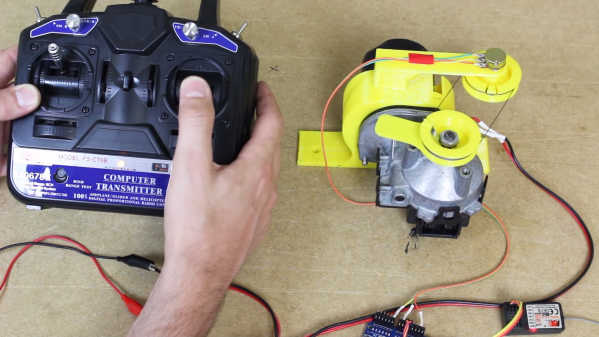
[Amitabh] was frustrated by the lack of options for controlling air pressure in soft robotics. The most promising initiative, Pneuduino, seemed to be this close to a Shenzhen production run, but the creators have gone radio silent. Faced with only expensive alternatives, he decided to take one for Team Hacker and created Programmable Air, a modular system for inflatable and vacuum-based robotics.

The idea is to build the cheapest, most hacker-friendly system he can by evaluating and experimenting with all sorts of off-the-shelf pumps, sensors, and valves. From the looks of it, he’s pretty much got it dialed in. Programmable Air is based around $9 medical-grade booster pumps that are as good at making vacuums as they are at providing pressurization. The main board has two pumps, and it looks like one is set to vacuum and the other to spew air. There’s an Arduino Nano to drive them, and a momentary to control the air flow.

Programmable Air can support up to 12 valves through daughter boards that connect via right-angle header. In the future, [Amitabh] may swap these out for magnetic connections or something else that can withstand repeated use.

Blow past the break to watch Programmable Air do pick and place, control a soft gripper, and inflate a balloon. The balloon’s pressurization behavior has made [Amitabh] reconsider adding a flow meter, but so far he hasn’t found a reasonable cost per unit. Can you recommend a small flow meter that won’t break the bank? Let us know in the comments.

Continue reading “Programmable Air Makes Robotics A Breeze”

Grawler: Painless Cleaning For Glass Roofs

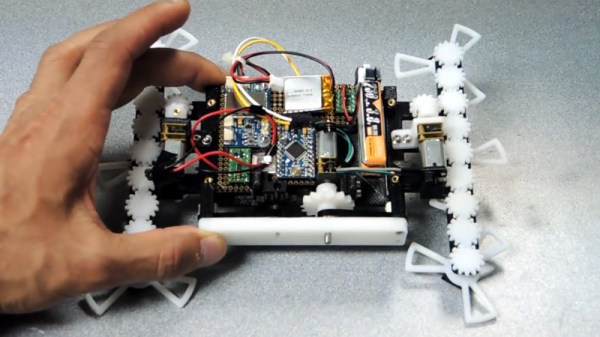
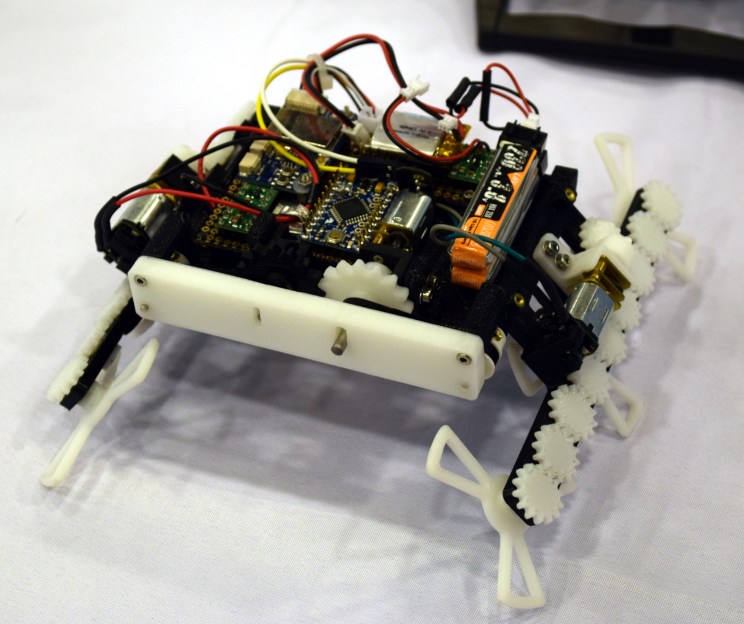
Part of [Gelstronic]’s house has a glass roof. While he enjoys the natural light and warmth, he doesn’t like getting up on a ladder to clean it every time a bird makes a deposit or the rainwater stains build up. He’s tried to make a cleaning robot in the past, but the 25% slope of the roof complicates things a bit. Now, with the addition of stepper motors and grippy tank treads, [Gelstronic] can tell this version of GRawler exactly how far to go, or to stay in one place to clean a spot that’s extra dirty.

GRawler is designed to clean on its way up the roof, and squeegee on the way back down. It’s driven by an Arduino Pro Micro and built from lightweight aluminium and many parts printed in PLA. GRawler also uses commonly-available things, which is always a bonus: the brush is the kind used to clean behind appliances, and the squeegee blade is from a truck-sized wiper. [Gelstronic] can control GRawler’s motors, the brush’s spin, and raise/lower the wiper blade over Bluetooth using an app called Joystick BT Commander. Squeak past the break to see it in action.

As far as we can tell, [Gelstronic] will still have to break out the ladder to place GRawler and move him between panels. Maybe the next version could be tethered, like Scrobby the solar panel-cleaning robot.

Continue reading “Grawler: Painless Cleaning For Glass Roofs”

Internet Of Laundry — Let The ESP8266 Watch Your Dirty Drawers Get Clean

When you think of world-changing devices, you usually don’t think of the washing machine. However, making laundry manageable changed not only how we dress but how much time people spent getting their clothes clean. So complaining about how laborious our laundry is today would make someone from the 1800s laugh. Still, we all hate the laundry and [Andrew Dupont], in particular, hates having to check on the machine to see if it is done. So he made Laundry Spy.

How do you sense when the machine — either a washer or a dryer — is done? [Andrew] thought about sensing current but didn’t want to mess with house current. His machines don’t have LED indicators, so using a light sensor wasn’t going to work either. However, an accelerometer can detect vibrations in the machine and most washers and dryers vibrate plenty while they are running.

The four-part build log shows how he took an ESP8266 and made it sense when the washer and dryer were done so it could text his cell phone. He’d already done a similar project with an Adafruit HUZZAH. But he wanted to build in some new ideas and currently likes working with NodeMCU. While he was at it he upgraded the motion sensor to an LIS3DH which was cheaper than the original sensor.

[Andrew] already runs Node – RED on a Raspberry Pi, so incorporating this project with his system was a snap. Of course, you could adapt the approach to lots of other things, as well. The device produces MQTT messages and Node – RED subscribes to them. The Pushover handles the text messaging. Node – RED has a graphical workflow that makes integrating all the pieces very intuitive. Here’s the high-level workflow:

You might wonder why he didn’t just have the ESP8266 talk directly to Pushover. That is possible, of course, but in part 2, [Andrew] enumerates some good reasons for his design. He wants to decouple components in the system for easier future upgrades. And MQTT is simple to publish on the sensor side of things compared to API calls which are handled by the Raspberry Pi for now.

Laundry monitoring isn’t a unique idea and everyone has a slightly different take on it, even some Hackaday authors. If phone notification is too subtle for you, you can always go bigger.

Video Of The Arduino FPGA Board Demo At Maker Faire

This week, Arduino announced a lot of new hardware including an exceptionally interesting FPGA development board aimed at anyone wanting to dip their toes into the seas of VHDL and developing with programmable logic. We think it’s the most interesting bit of hardware Arduino has released since their original dev board, and everyone is wondering what the hardware actually is, and what it can do.

This weekend at Maker Faire Bay Area, Arduino was out giving demos for all their wares, and yes, the Arduino MKR Vidor 4000 was on hand, being shown off in a working demo. We have a release date and a price. It’ll be out next month (June 2018) for about $60 USD.

But what about the hardware, and what can it do? From the original press releases, we couldn’t even tell how many LUTs this FPGA had. There were a lot of questions about the Mini PCIe connectors, and we didn’t know how this FPGA would be useful for high-performance computation like decoding video streams. Now we have the answers.

The FPGA on board the Arduino Vidor is an Altera Cyclone 10CL016. This chip has 16k logic elements, and 504 kB memory block. This is on the low end of Altera’s FPGA lineup, but it’s still no slouch. In the demo video below, it’s shown decoding video and identifying QR codes in real time. That’s pretty good for what is effectively a My First FPGA™ board.

Also on board the Vidor is a SAMD21 Cortex-M0+ microcontroller and a uBlox module housing an ESP-32 WiFi and Bluetooth module. This is a really great set of chips, and if you’re looking to get into FPGA development, this might just be the board for you. We haven’t yet seen the graphic editor that will be used to work with IP for the FPGA (for those who don’t care to write their own VHDL or Verilog), but we’re looking forward to the unveiling of that new software.

It’s Not Morning Until Green O’clock

[JohnathonT] has a two-year-old who can’t reliably tell time just yet. Every morning, he gets up before the rooster crows and barges into his parents’ room, ready to face the day.

In an effort to catch a few more Zs, [JohnathonT] built a simple but sanity-saving clock that tells time in a visual, kid-friendly way. Sure, this is a simple build. But if a toddler is part of your reality, who has time to make one from logic gates? The hardware is what you’d expect to see: Arduino Nano, a DS1307 RTC, plus the LEDs and resistors. We think an RGB LED would be a nice way to mix up the standard stoplight hues a bit.

At a glance, little Mr. Rise and Shine can see if it’s time to spread cheer, or if he has to stay in his room and play a bit longer. At 6:00AM, the light powers on and glows red. At 6:50, it turns yellow for 10 minutes. At the first reasonable hour of the day, 7:00AM, it finally turns green. In reading the code, we noticed that it also goes red at 8:00PM for 45 minutes, which tells us it also functions as a go-to-sleep indicator.

When his son is a little older, maybe [JohnathonT] could build him  a clock that associates colors with activities.

Arduino Just Introduced An FPGA Board, Announces Debugging And Better Software

Today ahead of the Bay Area Maker Faire, Arduino has announced a bevy of new boards that bring modern features and modern chips to the Arduino ecosystem.

Most ambitious of these new offerings is a board that combines a fast ARM microcontroller, WiFi, Bluetooth, and an FPGA. All this is wrapped in a package that provides Mini HDMI out and pins for a PCIe-Express slot. They’re calling it the Arduino MKR Vidor 4000.

Bringing an FPGA to the Arduino ecosystem is on the list of the most interesting advances in DIY electronics in recent memory, and there’s a lot to unpack here. FPGA development boards aren’t new. You can find crates of them hidden in the storage closet of any University’s electronics lab. If you want to buy an FPGA dev board, the Terasic DE10 is a good starter bundle, the iCEstick has an Open Source toolchain, and this one has pink soldermask. With the release of the MKR Vidor, the goal for Arduino isn’t just to release a board with an FPGA; the goal is to release a tool that allows anyone to use an FPGA.

The key to democratizing FPGA development is Arduino’s work with the Arduino Create ecosystem. Arduino Create is the company’s online IDE that gives everyone the ability to share projects and upload code with Over-the-Air updates. The MKR Vidor will launch with integration to the Arduino Create ecosystem that includes a visual editor to work with the pre-compiled IP for the FPGA. That’s not to say you can’t just plug your own VHDL into this board and get it working; that’s still possible. But Arduino would like to create a system where anyone can move blocks of IP around with a tool that’s easy for beginners.

A Facelift for the Uno WiFi

First up is the brand new Arduino Uno WiFi. While there have been other boards bearing the name ‘Arduino Uno WiFi’ over the years, a lot has changed in the world of tiny radio modules and 8-bit microcontrollers over the past few years. The new Arduino Uno WiFi is powered by a new 8-bit AVR, the ATMega4809. The ATMega4809 is a new part announced just a few months ago, and is just about what you would expect from the next-generation 8-bit Arduino; it runs at 20MHz, has 48 kB of Flash, 6 kB of SRAM, and it comes in a 48-pin package. The ATMega4809 is taking a few lattices of silicon out of Microchip’s playbook and adds Custom Configurable Logic. The CCL in the new ATMega is a peripheral that is kinda, sorta like a CPLD on chip. If you’ve ever had something that could be more easily done with logic gates than software, the CCL is the tool for the job.

But a new 8-bit microcontroller doesn’t make a WiFi-enabled Arduino. The wireless power behind the new Arduino comes from a custom ESP-32 based module from u-blox. There’s also a tiny crypto chip (Microchip’s ATECC508A) so the Uno WiFi will work with AWS. The Arduino Uno WiFi will be available this June.

But this isn’t the only announcement from the Arduino org today. They’ve been hard at work on some killer features for a while now, and now they’re finally ready for release. What’s the big news? Debuggers. Real debuggers for the Arduino that are easy to use. There are also new boards aimed at Arduino’s IoT strategy.

Continue reading “Arduino Just Introduced An FPGA Board, Announces Debugging And Better Software”

Reflowduino: Put That Toaster Oven To Good Use

There are few scenes in life more moving than the moment the solder paste melts as the component slides smoothly into place. We’re willing to bet the only reason you don’t have a reflow oven is the cost. Why wouldn’t you want one? Fortunately, the vastly cheaper DIY route has become a whole lot easier since the birth of the Reflowduino – an open source controller for reflow ovens.

This Hackaday Prize entry by [Timothy Woo] provides a super quick way to create your own reflow setup, using any cheap means of heating you have lying around. [Tim] uses a toaster oven he paid $21 for, but anything with a suitable thermal mass will do. The hardware of the Reflowduino is all open source and has been very well documented – both on the main hackaday.io page and over on the project’s GitHub.

The board itself is built around the ATMega32u4 and sports an integrated MAX31855 thermocouple interface (for the all-important PID control), LiPo battery charging, a buzzer for alerting you when input is needed, and Bluetooth. Why Bluetooth? An Android app has been developed for easy control of the Reflowduino, and will even graph the temperature profile.

When it comes to controlling the toaster oven/miscellaneous heat source, a “sidekick” board is available, with a solid state relay hooked up to a mains plug. This makes it a breeze to setup any mains appliance for Arduino control.

We actually covered the Reflowduino last year, but since then [Tim] has also created the Reflowduino32 – a backpack for the DOIT ESP32 dev board. There’s also an Indiegogo campaign now, and some new software as well.

If a toaster oven still doesn’t feel hacky enough for you, we’ve got reflowing with hair straighteners, and even car headlights.