[Greg] implemented a simple ray tracer for Arduino as a fun exercise and a way to benchmark the processor. He started out with the Moller-Trumbore algorithm, a common ray-tracing algorithm that calculates the intersection of a ray with a triangular plane without doing any pre-calculation of the planes. His code supports one static light and one static camera, which is enough to render a simple scene.
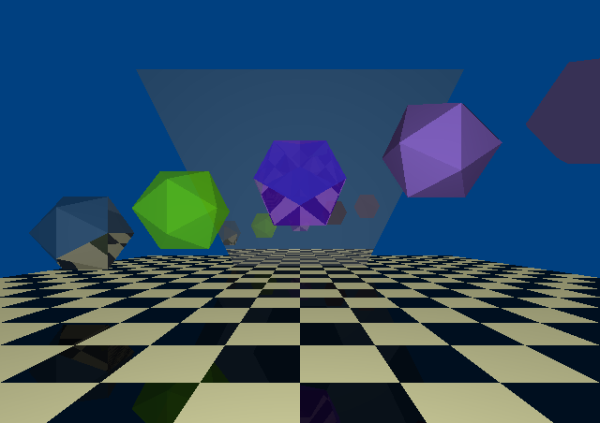
[Greg] started out with a small scene composed of a few polygons, but just finished up a scene with 505 vertices, 901 faces, and reflective surfaces (shown above). He made the above render on his PC emulator, but estimates that it would take just over 4 days to render on the Arduino. [Greg]’s project supports multiple bounces of light, which differentiates his ray tracer from some we’ve covered before (and which explains why it takes so long to render).
The ray tracer is implemented entirely with double-precision floats. This translates to a ton of software float emulation instructions, since the Arduino doesn’t have a floating-point unit. While this ray tracer can’t render anything near real-time graphics due to the slowness of the microcontroller, it’s still a great proof of concept.
The title image for this post was rendered on a modern PC, taking 263 seconds to complete. The same scene, at 64×64 resolution, was rendered on the Arduino, taking 4008 seconds to complete. That render is below.


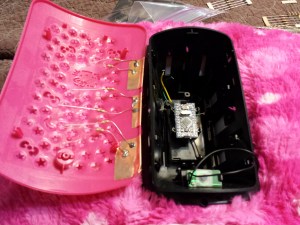 As a thing whose one purpose was to shine bright starry patterns on a child’s wall at night, the pillow failed miserably. [Dan] Wondered why his daughter’s toy couldn’t live up to reasonable expectations all while sucking batteries dry, so he opened the large pink plastic casing in the center of the pillow to find a rather minimal board driving three very dim LEDs. The LEDs that faded on and off to create mixtures of different colors weren’t even red, green and blue either. The makers of the toy used yellow instead of the slightly more expensive blue color. Having none of this, [Dan] replaced these sad innards with an Arduino Pro Mini which he programmed to drive an old salvaged speaker and three bright RGB LEDs borrowed from the end of a light strip. For the unnecessary but cool part, he used the additional pins of the Arduino micro-controller to add four touch sensitive buttons on the outside of the pink casing. These small capacitive tiles made from copper tape activate sound and change the color of the LEDs when touched, making the pillow a lot more reactive than it was before.