486 Gets Animated Turbo Button Thanks To Arduino

There was a point in time, excruciatingly brief, in which desktop computers often had a large “TURBO” button on their front panel. Some even featured an LED display that would indicate the current CPU frequency, providing visual conformation that your machine had leaped to a blistering 66 MHz.

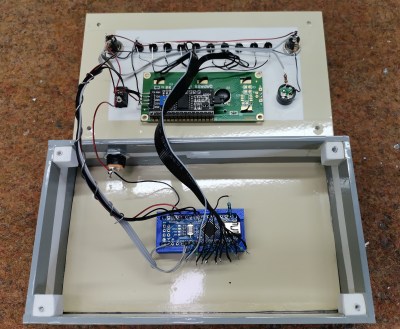
The 486 that [someyob] is restoring had the Turbo button, but sadly there was just a simple LED to show whether or not it was engaged. But there was a window in the front panel where it seemed like a numerical display was intended to go, so they decided to wire up their own CPU indicator by sensing the state of the Turbo LED with an Arduino Pro Mini.

Now to modern audiences, this might seem like cheating. After all, the Arduino isn’t actually measuring the CPU speed, nor is it directly controlling it (that’s still done by the original Turbo button wiring). But the truth is, even back in the day, the CPU frequency displays faked it — they just toggled between showing two predefined frequencies depending on the state of the button. The arrangement [someyob] has come up with does the same thing, except now there’s some extra processing power in the mix, so the display can show some slick animations as it switches between 33 and 66 Mhz.

In the GitHub repository, [someyob] has provided the Arduino source code and schematics showing how the microcontroller was shoehorned into the existing front panel wiring without compromising its functionality. There’s even a brief video below that shows the display in operation.

Like the idea but don’t have a 486 laying around? Don’t worry. We’ve seen a similar panel built for modern machines that  just doesn’t look the part, it actually manages to be functional.

Continue reading “486 Gets Animated Turbo Button Thanks To Arduino”

Shake, Rattle, Roll, With Your Own Seismograph

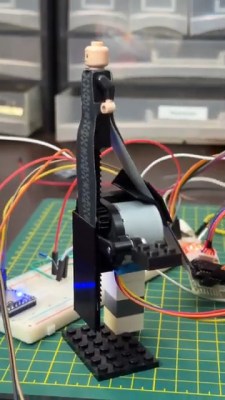
We always love to see projects where you can build your own lab equipment so [CompactDIY’s] homemade seismograph caught our eye. The design uses an Arduino with an accelerometer and builds on one of their earlier projects. You can see a video of the device below.

The principle is simple. A hobby servo controls a pen and a stepper motor rolls paper, creating a makeshift strip recorder. Its software uses the Visuino system, which is a flowchart-like system, but it outputs Arduino code. Honestly, we would probably have just plotted the data on a PC, but there’s a certain charm to the strip recorder and the idea would work for other types of data recording projects, too. We thought if you rearranged the stepper motor and cut a paper disk out, you could also have a circular chart recorder easily, which wouldn’t need to friction transport the paper. A clock motor would make it even less dependent on software, too.

If this project interests you, try a Raspberry shake, which isn’t as delicious as it sounds. Or, keep an eye on the entire globe, if you prefer.

Continue reading “Shake, Rattle, Roll, With Your Own Seismograph”

Punched Cards Are In The Cloud, With This Arduino

Grizzled veterans of the computing industry will relate stories of submitting projects on stacks of punched cards, something those of us who stored their 8-bit works on audio cassettes could only imagine. But for those who fancy experimenting with the format it’s still possible to make a basic card reader using LEDs and light sensors, as [Nino Ivanov] has done using an Arduino Uno as the brains. And these aren’t just for show, each of his cards holds a LISP program that runs in a cloud service.

The Uno does the job of reading, passing its data over its USB serial port to a tablet. On the tablet the serial data is piped to a cloud API to a LISP interpreter. It seems a needlessly complex way to run a factorial program and it’s certainly a little over the top, but on the other hand we love it as a glorious combination of the old and the new. With only 23 characters per card it’s quite an impressive feat to even fit a program on the format, perhaps writing code to fit on minimalist punched cards like this could become a programming challenge in its own right for a generation accustomed to mega-and gigabytes.

If you fancy a go yourself, this isn’t the first punched card reader we’ve shown you.

Continue reading “Punched Cards Are In The Cloud, With This Arduino”

Moon Phase Lamp Uses Rotating Shade

The Moon has fascinated humanity for centuries. These days, though, it’s a trial and a bore to go outside and stare upwards to check on the natural satellite. Instead, why not bring the Moon to your bedside with this rotating phase lamp?

The build comes to us from [payasa_manandhar], who did a good job of replicating the Moon in both form and function. It’s based around a lithophane of the lunar surface, which adequately duplicates the Moon’s grey pockmarked visage thanks to topographical data sourced from NASA. It looks a treat when backlit from the inside. However, this is no mere ornamental lamp. With the aid of a stepper motor controlled by an Arduino, a shade inside the lamp actually rotates to shadow the Moon as per the appropriate phase.

It’s a build that is both fun and educational, in both the electronic and astronomical disciplines. We’ve seen some other great Moon lamps before, too.

Electronic Connect 4 Console Doesn’t Use LCD

You might think that making your own electronic games would require some kind of LCD, but lately, [Mirko Pavleski] has been making his using inexpensive 8X8 WS2812B LED panels. This lets even a modest microcontroller easily control a 64-pixel “screen.” In this case, [Mirko] uses an Arduino Nano, 3 switches, and a buzzer along with some 3D printed components to make a good-looking game. You can see it in action in the video below.

The WS2812B panels are easy to use since the devices have a simple protocol where you only talk to the first LED. You send pulses to determine each LED’s color. The first LED changes color and then starts repeating what you send to the next LED, which, of course, does the same thing. When you pause a bit, the array decides you are done, and the next train of pulses will start back at the first LED.

It looks like the project is based on a German project from [Bernd Albrecht], but our German isn’t up to snuff, and machine translation always leaves something to be desired. Another developer added a play against the computer mode. This is a simple program and would be easy to port to the microcontroller of your choice. [Mirko]’s execution of it looks like it could be a commercial product. If you made one as a gift, we bet no one would guess you built it yourself.

Of course, you could play a real robot. You could probably repurpose this hardware for many different games, too.

Continue reading “Electronic Connect 4 Console Doesn’t Use LCD”

Handheld PC Looks Great

[Bytewelder] fondly remembers the Palm III and Sharp HC-4500, so taking on the design of Decktility, a custom handheld cyberdeck , was a natural next step. The blog post goes into much detail about the design decisions and challenges throughout the project. The end result, though, looks great.

The device uses a Raspberry Pi CM4 and an IPS touchscreen. The bulk of the design work was to get the power system working. There is a custom FET board and an Arduino that manages charging and battery state.

Continue reading “Handheld PC Looks Great”

Hackaday Prize 2023: Uno Plus+ Updates A Classic

As an introduction to embedded electronics and programming in a straightforward environment, there isn’t much out there that can hold a torch to the Arduino Uno. Cheap (especially if you count the clones), easy to find, and quick to deploy, with countless support libraries, it’s a go-to for many a hack. This scribe simply can’t remember how many he’s bought, hacked, and deployed over the years. But can it be improved? [John Loeffler] thinks so, and his 2023 Hackaday Prize entry, the Uno Plus+ could be the one.

If this is too much bling for you, there is a version with LEDs adjacent to non-illuminated headers.

After clearing the top deck of extraneous components (by shoving them on the bottom) there was much more space to expand the header labeling, so there can be no accidental misplacement of those DuPont wires this thing will inevitably sprout randomly.

The board also has an additional Stemma/Qwiic connector and a Neopixel LED for indication duties. Also sitting on the PCB bottom are a ton of opamps, to drive the header indicators. Yes, this board has a full set of colour-coded LED bling indicators, showing the logical state of each and every pin on all headers, giving an easy way to check the desired activity is occurring. Plus it looks cool. Illuminated headers? YES!

Think the Uno too light on resources to perform any meaningful modern workloads? Think again!