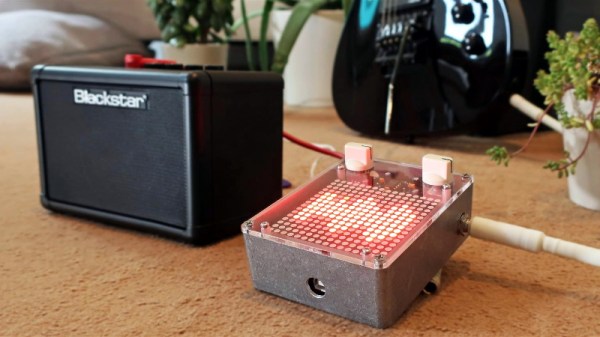
Over the summer [ElectroSmash] put the finishing touches on the Arduino Audio Meter, a shield for the Arduino Uno that visualizes various aspects of an incoming audio signal on a set of four 8×8 LED dot matrices. Obsentisibly it’s for use on a guitar pedalboard, but thanks to the incredible documentation and collection of example code provided by the team, the project promises to be an excellent platform for all sorts of audio experimentation.
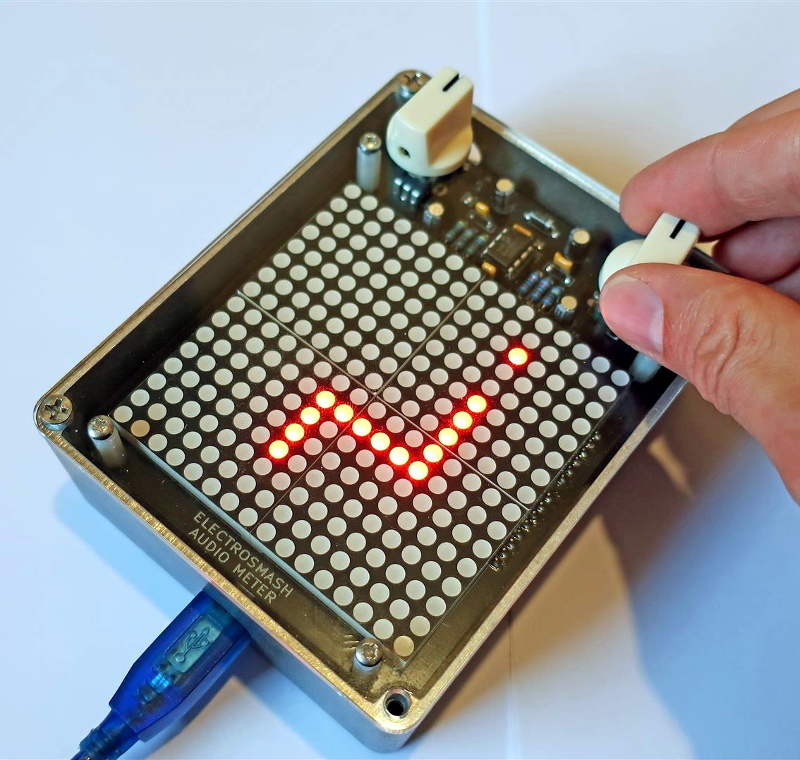 Incoming audio is amplified with an MCP6002 and fed into the Uno’s Analog to Digital Converter, where it’s processed via whatever Sketch the user has uploaded. User input is provided by a digital encoder with push-button. A set of four MAX7219 chips control the entire 256-pixel matrix with just three pins on the Arduino. The resolution of the display allows the Arduino Audio Meter to show more than just a simple VU meter, it can even do text and basic graphics.
[ElectroSmash] provides various Sketches for use with the Arduino Audio Meter that provide the expected repertoire of audio visualizations, but they also provide a number of interesting Sketches to expand the capabilities of the device in unexpected ways. Some of them could be useful for a stage musician, such a tool to tune your guitar, whereas others are fun uses of the hardware such as a game of “Snake”.
With the entire project released as open source, users are free to run wild with the Arduino Audio Meter. Writing your own custom software is an obvious first step to making the project your own, but adding additional hardware features and functions certainly aren’t out of the question either.
Our very own [Lewin Day] once walked us through the effort involved in building boutique guitar pedals, and while the Audio Audio Meter’s capabilities are somewhat limited as it doesn’t have the ability to change the audio going through it, we’re still interested in seeing what the community will come up with once they have an easy way to bring their ideas to life.
Continue reading “A Hard Rocking Arduino Visualization Shield”