It’s that time of year again, with the holidays fast approaching friends and family will be hounding you about what trinkets and shiny baubles they can pretend to surprise you with. Unfortunately there’s no person harder to shop for than the maker or hacker: if we want it, we’ve probably already built the thing. Or at least gotten it out of somebody else’s trash.
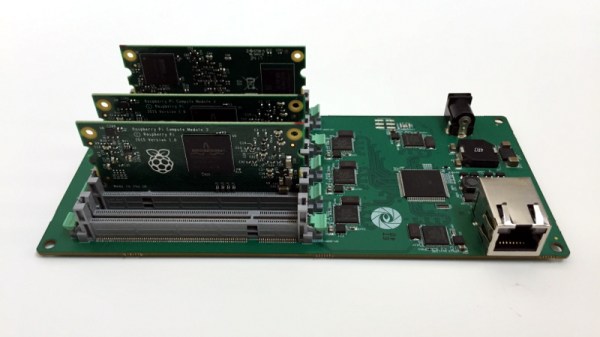
 But if they absolutely, positively, simply have to buy you something that’s commercially made, then you could do worse than pointing them to this very slick Raspberry Pi cluster backplane from [miniNodes]. With the ability to support up to five of the often overlooked Pi Compute Modules, this little device will let you bring a punchy little ARM cluster online without having to build something from scratch.
The Compute Module is perfectly suited for clustering applications like this due to its much smaller size compared to the full-size Raspberry Pi, but we don’t see it get used that often because it needs to be jacked into an appropriate SODIMM connector. This makes it effectively useless for prototyping and quickly thrown together hacks (I.E. everything most people use the Pi for), and really only suitable for finished products and industrial applications. It’s really the line in the sand between playing around with the Pi and putting it to real work.
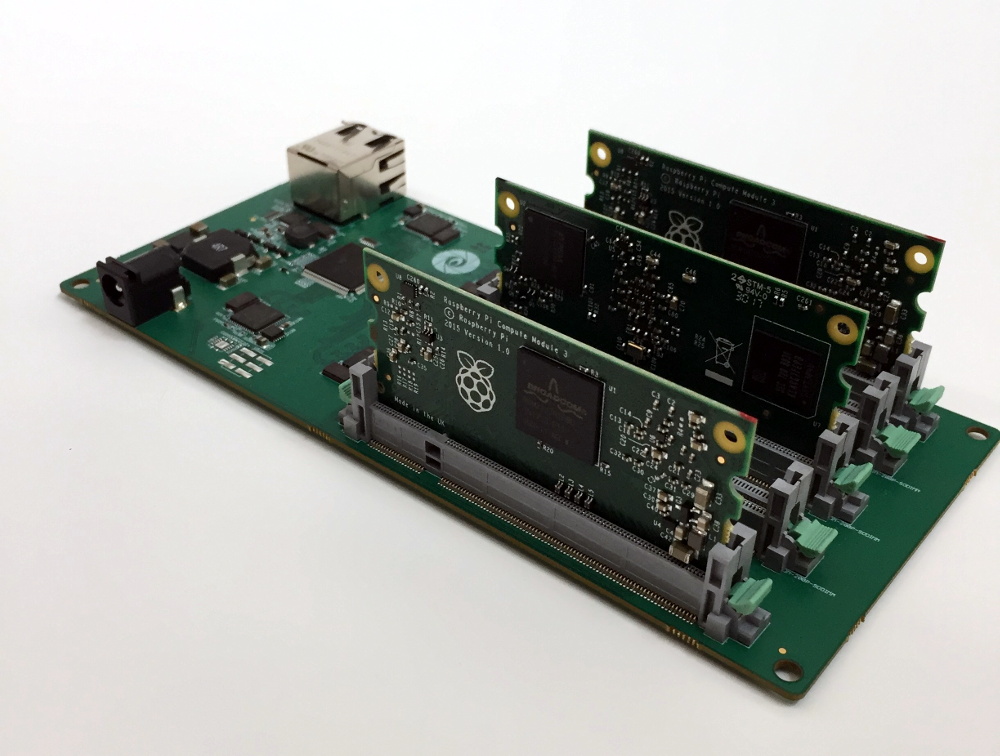
[miniNodes] calls their handy little device the Carrier Board, and beyond the obvious five SODIMM slots for the Pis to live in, there’s also an integrated gigabit switch with an uplink port to get them all connected to the network. The board powers all of the nodes through a single barrel connector on the side opposite the Ethernet jack, leaving behind the masses of spider’s web of USB cables we usually see with Pi clusters.
The board doesn’t come cheap at $259 USD, plus the five Pi Compute Modules which will set you back another $150. But for the ticket price you’ll have a 20 core ARM cluster with 5 GB of RAM and 20 GB of flash storage in a 200 x 100 millimeter (8 x 4 inch) footprint, with an energy consumption of under 20 watts when running at wide open throttle. This could be an excellent choice for mobile applications, or if you just want to experiment with parallel processing on a desktop-sized device.
Amazon is ready for the coming ARM server revolution, are you? Between products like this and the many DIY ARM clusters we’ve seen over the years, it looks like we’re going to be dragging the plucky architecture kicking and screaming into the world of high performance computing.
[Thanks to Baldpower for the tip.]