Return Of The Logic Probe

We live in a day when it is very inexpensive to buy an oscilloscope, especially one with modest performance that hooks to a laptop. However, there was a time when even a surplus scope was out of reach for many people who liked to build things. A common alternative was the logic probe. At the low end, this could be an inverter and an LED, although it was more common to have a little extra circuitry to actually do a comparison to a reference voltage and present some indication of fast pulses — you might not be able to tell the frequency of a clock, but you could tell it wasn’t stuck. Of course, today with a microcontroller you can make a very sophisticated probe with less circuitry than a classic probe. We’ve seen a few takes on this and the latest is the DigiLogicProbe from [TheRadMan].

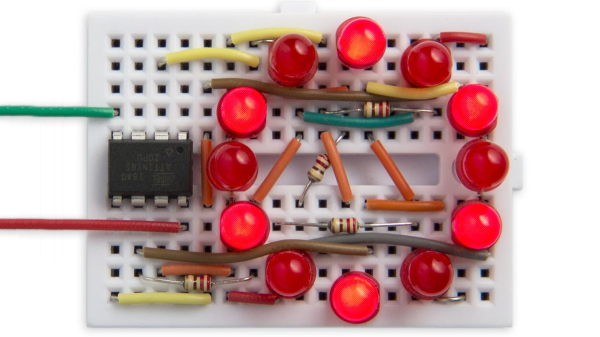
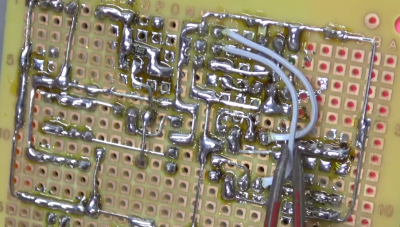
The probe is just a ATtiny85 board with a handful of components. A resistor and diode help protect the probe and the circuit under test. There are also a few LEDs and a buzzer. The rest of the project is software.

Continue reading “Return Of The Logic Probe”

The Solderdoodle Open Source Iron Rides Again

Over the last year or so, cordless portable soldering irons have become all the rage. In fact, at this point a good number of Hackaday readers out there have likely traded in their full-size AC irons for a DC iron that’s only slightly larger than a pen. But before the big boom in portable irons, in the ye olden days of 2014, we brought you word of the open source Solderdoodle created by [Isaac Porras]. Based upon the Weller BP645 and featuring a 3D printed case, the DIY iron was designed to be charged from a standard USB port.

Now, [Isaac] is back with an updated version he calls the Solderdoodle Plus. It’s still based on the heating element from the Weller BP645, but now boasts twice the power, an improved 3D printed case, an intuitive touch-based user interface, and even some LED blinkenlights for good measure. As with the original Solderdoodle the hardware and software for the device are open source and you’re invited to build your own, though kits are also available through an already fully-funded Kickstarter campaign.

[Isaac] says that the temperature control functions on traditional corded soldering irons waste energy due to the large thermal mass they have to bring up to temperature. But with less thermal mass and a system of variable duty cycle pulsed power, he says the Solderdoodle Plus can do the same work as an old-school 60 watt iron while only consuming 10 watts. This allows the iron to maintain a constant 500°C for over an hour on the dual internal Panasonic NCR18500A lithium-ion batteries, and means you can charge it up with nothing more exotic than a micro USB cable.

Continue reading “The Solderdoodle Open Source Iron Rides Again”

Lighting Up A Very Wiry Candle

Entries into the Circuit Sculpture Contest tend to be pretty minimalist by nature, and this LED candle by [Amal Mathew] is a perfect example. The idea here was to recreate the slim and uncomplicated nature of a real candle but with a digital twist, and we think he’s pulled it off nicely with a bare minimum part count and exaggerated wire length that gives it the look of a thin pillar candle.

To give the LED a fading effect, [Amal] uses a ATtiny85 programmed with the Arduino IDE. His code uses the analogWrite() in a loop to gradually increase and then decrease the PWM frequency. With the LED connected directly to one of the pins on the ATtiny85, the simple program achieves the fading effect without needing any additional components.

On the opposite side of the candle, connected by long copper wires, is the single CR2032 which provides power for the circuit. In a nice touch, [Amal] has turned the battery 90 degrees relative to the rest of the circuit, so it can serve as a weighted base. We imagine getting it to stand up might be a little fiddly from the looks of it, but once it’s up and merrily fading in and out, it really helps sell the candle idea.

The finished product might look fairly straight-forward, but in his write-up on Hackaday.io, [Amal] gives detailed instructions on how to build your own version if you’re not a bare microcontroller wizard. This includes direction on how to program the ATtiny85 using an Arduino Uno; a neat trick to know even if you aren’t planning on making any candles in the near future. The next logical step is making it so you can “blow out” the LED, which should only take the addition of a resistor and some updated code.

There’s still plenty of time to enter your own functional piece of art in the Circuit Sculpture Contest. Just write it up on Hackaday.io and submit it before the January 8th, 2019 deadline.

Continue reading “Lighting Up A Very Wiry Candle”

Quick And Dirty MIDI Interface With USBASP

[Robson Couto] recently found himself in need of MIDI interface for a project he was working on, but didn’t want to buy one just to use it once; we’ve all been there. Being the creative fellow that he is, he decided to come up with something that not only used the parts he had on-hand but could be completed in one afternoon. Truly a hacker after our own hearts.

Searching around online, he found documentation for using an ATtiny microcontroller as a MIDI interface using V-USB. He figured it shouldn’t be too difficult to adapt that project to run on one of the many USBASP programmers he had laying around, and got to work updating the code.

Originally written for the ATtiny2313, [Robson] first had to change around the pin configuration so it would work on the ATmega8 in the USBASP, and also updated the USB-V implementation to the latest version. With the code updated, he programmed one of the USBASP adapters with a second one by connecting them together and putting a jumper on the J2 header.

He had the software sorted, but there was still a bit of hardware work to do. To provide isolation for the MIDI device, he put together a small circuit utilizing a 6N137 optoisolator and a couple of passive components on a piece of perf board. It’s not pretty, but it does fit right into the programming connector on the USBASP. He could have fired up his PCB CNC but thought it was a bit overkill for such a simple board.

[Robson] notes that he hasn’t implemented MIDI output with his adapter, but that the code and the chip are perfectly capable of it if you need it for your project. Finding the schematic to hook up to the programmer’s TX pin is left as an exercise for the reader.

If you don’t have a USBASP in the parts bin, we’ve seen a very similar trick done with an Arduino clone in the past.

Drawing On An OLED With An ATtiny85, No RAM Buffers Allowed

Small I2C OLED displays are common nowadays, and thanks to the work of helpful developers, there are also a variety of graphics libraries for using them. Most of them work by using a RAM buffer, which means that anything one wants to draw gets written to a buffer representing the screen, and the contents of that buffer are copied out to the display whenever it is updated. The drawback is that for some microcontrollers, there simply isn’t enough RAM for this approach to work. For example, a 128×64 monochrome OLED requires a 1024 byte buffer, but that’s bad news if a microcontroller has only 512 bytes of RAM in total like the ATtiny85. [David Johnson-Davies] has two solutions: a Tiny Graphics Library that needs no RAM buffer and an even slimmer Tiny Function Plotter, which we’ll discuss in order.

Tiny Function Plotter works on both SSD1306 and SH1106-based displays.

[David]’s Tiny Graphics Library works by taking advantage of a feature of SH1106 driver-based displays: the ability to read the display over I2C as well as write to it. With the ability to perform read-modify-write on a section at a time, using a large RAM buffer can be avoided. The only catch is that the library only works with OLEDs using the SH1106, but the good news is that these are very common at the usual Chinese resellers. ([David] notes that SH1106 is sometimes misspelled as “SSH1106”, so keep that in mind when searching.)

What about all those other SSD1306-based OLED displays out there? Are they out of luck? Not quite. [David] has one more trick up his sleeve: his Tiny Function Plotter works on the SSD1306 and also requires no RAM buffer. It’s unable to write text, but it can easily handle drawing graphs plotting things like values over time while needing very little overhead.

Another approach we’ve seen for using OLEDs driven by microcontrollers with limited memory is the solution [Michael] used in Tiny Sideways Tetris, which was done in part by realizing the smallest screen element he needed was a 4×4 block, and using that premise as the basis of a simple compression scheme.

I2C Bootloader For ATtiny85 Lets Other Micros Push Firmware Updates

There are a few different ways of getting firmware onto one of AVR’s ATtiny85 microcontrollers, including bootloaders that allow for firmware to be updated without the need to plug the chip into a programmer. However, [casanovg] wasn’t satisfied with those so he sent us a tip letting us know he wrote an I2C bootloader for the ATtiny85 called Timonel. It takes into account a few particulars of the part, such as the fact that it lacks a protected memory area where a bootloader would normally reside, and it doesn’t have a native I2C interface, only the USI (Universal Serial Interface). He’s just released the first functional version for the ATtiny85, but there’s no reason it couldn’t be made to work with the ATtiny45 and ATtiny25 as well.

Timonel is designed for systems where there is a more powerful microcontroller or microprocessor running the show (such as an ESP8266, Arduino, or even a board like a Raspberry Pi.) In designs where the ATtinys are on an I2C bus performing peripheral functions such as running sensors, Timonel allows the firmware for these peripheral MCUs to be updated directly from the I2C bus master. Embedded below is a video demo of [casanovg] sending simple serial commands, showing a successful firmware update of an AVR ATtiny85 over I2C.

Continue reading “I2C Bootloader For ATtiny85 Lets Other Micros Push Firmware Updates”

The Crustacean Battle Bot Of Your Nightmares

We’ve all seen a movie or TV show that got our imagination going, and the more studious of us might get fired up over a good book (one without pictures, even). You never know were inspiration might come from, which is why it’s so hard to track down in the first place. But one place we don’t often hear about providing many hackers with project ideas is the grocery store. But of course the more we learn about [Michael Kohn], the more we realize he’s got a very unique vision.

On a recent trip to the grocery store, [Michael] saw a two pack of frozen lobsters and thought they would make fine battling robots. You know, as one does. Unfortunately the process of taking a frozen lobster and turning it into a combat droid (which incidentally does include eating the thing at some point in the timeline) ended up being so disgusting that he only finished one of them. Whether that makes this poor fellow the winner or loser though…that’s a question that will require some contemplation.

The first step was cooking and eating the beast, and after that came cleaning the shell of as much remaining meat and innards as possible. He then baked it in a toaster oven for 40 minutes and let it sit for a couple of days to make sure it didn’t have any residual smell. Once he confirmed the shell was clean, he glued it back together and got started on mounting it to his hardware.

A wooden frame under the lobster holds the dual HD-1711MG mini servos that power the karate chop action of the claws, as well as the electronics. [Michael] used a ATtiny85 and NTD4963N MOSFETs to make a basic RC platform which responds to IR from a Syma S107 toy helicopter controller. He tried to power everything with AAA and then AA batteries, but found they just didn’t give him the juice he needed once the bot got going. So the final version utilizes a 5 V regulator and a standard RC 7.2v LiPO battery pack.

If you’re not big on shellfish, never fear. He’s created similar roving contraptions based around sausages and carrots too. One could say he’s truly a man of refined…taste.

Continue reading “The Crustacean Battle Bot Of Your Nightmares”