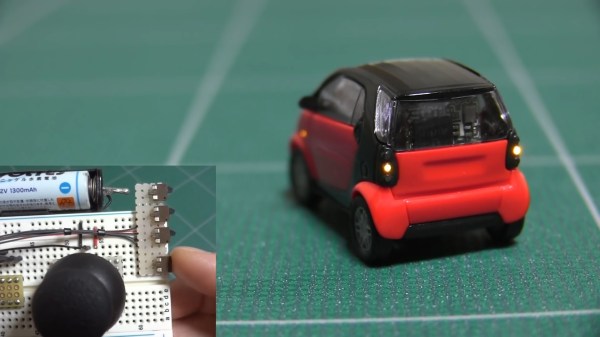
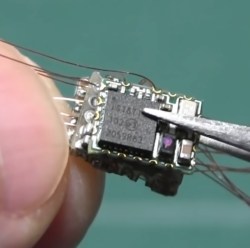
RC car without a top, showing electronics inside.

Fast Indoor Robot Watches Ceiling Lights, Instead Of The Road

[Andy]’s robot is an autonomous RC car, and he shares the localization algorithm he developed to help the car keep track of itself while it zips crazily around an indoor racetrack. Since a robot like this is perfectly capable of driving faster than it can sense, his localization method is the secret to pouring on additional speed without worrying about the car losing itself.

The regular pattern of ceiling lights makes a good foundation for the system to localize itself.

To pull this off, [Andy] uses a camera with a fisheye lens aimed up towards the ceiling, and the video is processed on a Raspberry Pi 3. His implementation is slick enough that it only takes about 1 millisecond to do a localization update, netting a precision on the order of a few centimeters. It’s sort of like a fast indoor GPS, using math to infer position based on the movement of ceiling lights.

To be useful for racing, this localization method needs to be combined with a map of the racetrack itself, which [Andy] cleverly builds by manually driving the car around the track while building the localization data. Once that is in place, the car has all it needs to autonomously zip around.

Interested in the nitty-gritty details? You’re in luck, because all of the math behind [Andy]’s algorithm is explained on the project page linked above, and the GitHub repository for [Andy]’s autonomous car has all the implementation details.

The system is location-dependent, but it works so well that [Andy] considers track localization a solved problem. Watch the system in action in the two videos embedded below.

Continue reading “Fast Indoor Robot Watches Ceiling Lights, Instead Of The Road”

Ford Maverick Welcomes DIY Spirit

We’ve featured a lot of car hacks on these pages, most would void the warranty and none of it with explicit factory support. Against that background, Ford’s upcoming Maverick is unique: a major manufacturer has invited owners to unleash their do-it-yourself spirit. It is one of several aspects that led [Jason Torchinsky] of Jalopnik to proclaim The 2022 Ford Maverick Is An Honest, Cheap, Multitool Of A Vehicle And I’m All For It.

There are two primary parts to Ford’s DIY invitation. Inside the cabin are several locations for a dovetail mount called “Ford Integrated Tether System” (FITS). Naturally Ford will be selling their own FITS accessories, but they also expect people to create and 3D-print designs addressing needs unmet by factory kits. CAD files for FITS dimensions are promised, but any maker experienced with a caliper should have little trouble.

Another part of Ford’s DIY invitation is in the cargo area, whose sides were stamped with slots for lumber beams supporting projects like a ~$45 bike rack. There are also threaded bolt holes already in the bed, no drilling or tapping into sheet metal necessary. Behind a few small plastic doors are wires to supply 12 V DC power without the risk of splicing into factory harnesses.

There will always be wild car hacks like turning a sedan into a pickup truck. But it’s great to lower the barrier of entry for milder hacks with these small and very welcome features. QR codes on a sticker takes us to Ford’s collection of video instructions to get things started. Naturally if this idea takes off other people will post many more on their own YouTube channels. We like where Ford wants to go with this, and we would love to see such DIY-friendliness spread across the auto industry. A few Ford videos explaining design intent in this area after the break.

[Title image: Ford Motor Company]

Continue reading “Ford Maverick Welcomes DIY Spirit”

Exploring An Aftermarket LED Headlight Retrofit Kit

There’s plenty of debate about drop-in LED headlight bulbs, especially when they’re used with older reflector housings that were designed for halogen bulbs. Whether or not you personally feel the ultra-bright lights are a nuisance, or even dangerous, one thing we can all agree on is that they’re clearly the result of some impressive engineering.

Which is why we were fascinated to see the teardown [TechChick] did on a “Ultra 2 LED” retrofit from GTR Lighting. Apparently one of the diodes was failing, and as part of the warranty replacement process, she was informed she had to make it completely inoperable. Sounds like a teardown dream come true. If a manufacturer ever told us we needed to take something apart with extreme prejudice and provide photographic evidence that the deed was done, we’d be all too happy to oblige.

The driver itself ended up being completely filled with potting compound, so she doesn’t spend much time there. Some will no doubt be annoyed that [TechChick] didn’t break out the small pointy implements and dig all that compound out, but we all pretty much know what to expect when it comes to driving LEDs. The real interesting bit is the bulb itself.

As is common with these high-output automotive LEDs, the Ultra 2 is actively cooled with a small fan that’s actually enclosed within the heatsink. With the fan and the two-piece heatsink removed, she’s able to access the LED module itself. Here, two PCBs are sandwiched back to back with a hollow copper chamber that leads out of the rear of the module. When [TechChick] cut into the copper she said she heard a hiss, and assumed it was some kind of liquid cooling device. Specifically we think it’s a vapor chamber that’s being used to pull heat away from the diodes and into the heatsink at the rear of the module, which speaks to the advanced technology that makes these bulbs possible.

While laser headlights are arguably the future of automotive lighting, it’s going to be quite some time before they trickle down to those of us that don’t own supercars. Until then, when used responsibly, these LED retrofits can inject a bit of cutting-edge tech into your old beater without breaking the bank.

Continue reading “Exploring An Aftermarket LED Headlight Retrofit Kit”

Nissan Leaf Zooms By with 110KW power after Inverter swap and hack

Open Source Hot Rod Mod Gives More Power To EV Owners

Meet [Daniel Öster]. [Daniel] is a self-professed petrolhead. In other words, he’s a hot rodder who can’t leave well enough alone. Just because he’s driving a 2012 Nissan Leaf doesn’t mean he isn’t looking for a bit more kick. Having already upgraded the battery, [Daniel] turned his attention to upgrading the 80KW inverter. Not only was [Daniel] successful, but the work has been documented and the Open Source code made available on GitHub. Part of [Daniel]’s mission is to open up otherwise closed ecosystems and make EV hacking and repair approachable by mere mortals.

To get an extra 50hp, [Daniel] could have just swapped in the 110KW drivetrain from a 2018 or newer Leaf, but a less expensive route of swapping in only the 110KW inverter was chosen. By changing out just the inverter, the modification becomes more affordable for others to do. [Daniel] expertly documents how the new 110KW inverter has to be matched to the existing motor by setting a resolver correction value in the inverter.

Swapping Connectors for the new Inverter
Not for the faint of heart, the inverter swap requires changing connectors to a later style.

Cutting into the wiring harness of a vehicle that one is still making payments on is an exercise reserved for only the most dedicated modders, but a change in connectors between 2012 and 2018 made it necessary. The only tools needed were wire cutters, a soldering iron, heat shrink, and perhaps some liquid courage.

Although the hack was successful, no performance gains were had initially, because the CAN bus signal going to the inverter never told it to provide more than the original 80KW. A CAN bus Man In The Middle attack was done by adding a CAN bridge device that listens to traffic on the CAN bus and bends it to [Daniel]’s will. By multiplying the KW signal by 1.3, the 80KW signal becomes 110KW, and full Ludicrous Speed is achieved! Excellent gains in  0-100kph times are seen, but [Daniel] isn’t done. His next hack will be to put in a 160KW inverter for even more go-pedal madness.

Be sure to watch the introduction video below the break. You might also be interested in Nissan Leaf hacks we’ve featured previously such as retrofitting a fast charging port, salvaging batteries from wrecks, and partly resolving serious charging flaws.

Continue reading “Open Source Hot Rod Mod Gives More Power To EV Owners”

Tesla Door Handle Improvements

Automotive engineer and former Tesla employee [SuperfastMatt] takes at look at the notorious Tesla door handle design and how it’s changed over the years (see the video below the break). The original handle design consisted of many moving parts, switches and wires which were prone to failure.  Strictly speaking, the door handle is located on the outside of the car’s interior. While it’s sheltered from direct exposure to the elements, it still experiences the extremes of temperature, humidity, and condensation. The handles were so prone to failure that a cottage industry sprang up to provide improved parts and replacements.

Tesla made various improvements over the years, culminating in the latest version which [Matt] reviews in this video. Nearly all the failure points have been eliminated, and the only moving parts, other than the handle itself, is a magnetic sensor to detect handle motion (previously this was sensed by microswitches). [Matt] indelicately opens up the control module, and discovers an NXP programmable angle sensor ( KMA215 ). This all-in-one sensor detects the angle of a magnetic field, and reports it over an automotive communications bus that’s become more and more common over the last ten years: Single Edge Nibble Transmission (SENT) aka SAE J2716. SENT is a low-cost, transmit-only protocol designed for sensors to send data to the ECU. Check out [Matt] decoding it on the oscilloscope and Raspberry Pi in the video — it looks pretty simple at first glance.

We agree with [Matt]’s conclusion that the door handle design has been significantly improved with this latest iteration, questions of whether one needs a retracting door handle aside. If you’d like to learn more about SENT, here is a tutorial written by IDT (now Renasas) applications engineer Tim White. This isn’t [Matt]’s first encounter with a Tesla door handle — back in 2012 we covered his project which used one to dispense beer. Thanks to [JohnU] for sending in this tip.

Continue reading “Tesla Door Handle Improvements”

Lithium Mine To Battery Line: Tesla Battery Day And The Future Of EVs

After last year’s Tesla Battery Day presentation and the flurry of information that came out of it, [The Limiting Factor] spent many months researching the countless topics behind Tesla’s announced plans, the resource markets for everything from lithium to copper and cobalt, and what all of this means for electrical vehicles (EVs) as well as batteries for both battery-electric vehicles (BEVs) and power storage.

A number of these changes are immediate, such as the use of battery packs as a structural element to save the weight of a supporting structure, while others such as the shift away from cobalt in battery cathodes being a more long-term prospective, along with the plans for Tesla to set up its own lithium clay mining operation in the US. Also impossible to pin down: when the famous ‘tabless’ 4680 cells that Tesla plans to use instead of the current 18650 cells will be mass-produced and when they will enable the promised 16% increase.

Even so, in the over 1 hour long video (also linked below after the break), the overall perspective seems fairly optimistic, with LFP (lithium iron phosphate) batteries also getting a shout out. One obvious indication of process to point out is that the cobalt-free battery is already used in Model 3 Teslas, most commonly in Chinese models.

Continue reading “Lithium Mine To Battery Line: Tesla Battery Day And The Future Of EVs”

Making A Car Key From A Ratcheting Wrench

Car keys these days are remarkably complex beasts. Covered in buttons and loaded with security transponders, they often cost hundreds of dollars to replace if you’re unlucky enough to lose them. However, back in the day, keys used to just be keys — a hunk of metal in a mechanical pattern to move some levers and open a door. Thus, you could reshape a wrench into a key for an old car if that was something you really wanted to do.

The concept is simple. Take a 12mm ratcheting wrench, and shape the flat section into a profile matching that of a key for an older car without any electronic security features. The first step is to cut down the shaft, before grinding it down to match the thickness and width of the original key.

The profile of the key is then drawn onto the surface, and a Dremel used with a cutting disc to create the requisite shape.  Finally, calipers are used to mark out the channels to allow the key to slide into the keyway, before these are also machined with the rotary tool.

Filing and polishing cleans up the final result to create a shiny, attractive ratchet wrench key. Even better, it does a great job of opening the car, too.

Similar machining techniques can be used to duplicate a key from just a photo (something I did back in 2019 to prank my friend). Alternatively, 3D printing can be great for reproducing even high-security keys. Video after the break.

Continue reading “Making A Car Key From A Ratcheting Wrench”