Nissan 300zx Dash Given A New Language

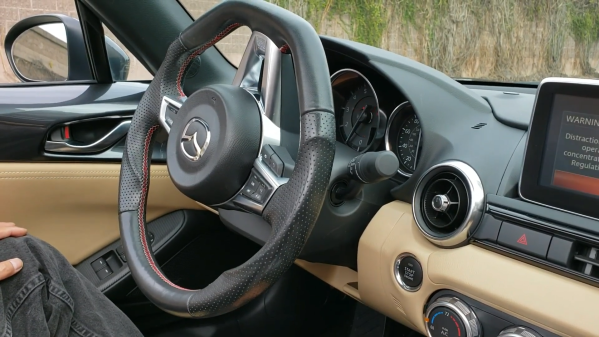
You don’t have to be a car enthusiast to recognize that the 1984 Nissan 300x dash is a work of art. The graceful swoops and multisegment VFDs evoke an aesthetic that reminds us of a particular era. Rather than replace his dash with something drab and modern, [Evan] modified his dash to accept input from newer devices. Many of the sensors that feed directly into the dash are becoming harder to find as the years wear on, and rather than spoof every old device, [Evan] looked at each gauge.

Temperature and oil pressure are variable resistance sensors, and by removing half the voltage divider, it becomes a variable voltage sensor, as modern temperature sensors can output a voltage from 0 to 5. The tachometer required tracing the signal through the PCB as it expects a pulse every time a cylinder fires. By simulating cylinder pulses with a function generator, [Evan] found the filtering circuit and the microcontroller pin monitoring it. An optoisolator to protect the delicate MCU makes it easy to pipe the signal directly in.

Of course, not everything needed to be modified. A vacuum sensor provides a signal to the dash to indicate how much power the engine produces, which is pretty easy to spoof with a teensy connected to the CAN bus. All these mods are easily reversible and allow [Evan] to keep rocking the iconic dash with a more modern engine.

It’s an incredible hack that offers a view into how to trace, understand, and hack old electronics. Of course, if you’re keeping old built-in car bits, why not keep the carphone but connect it to your smartphone?

Photo of the head unit , with "Hacked by greenluigi1" in the center of the UI

Hacking A Hyundai Ioniq’s Infotainment System Again After Security Fixes

These days modern cars are nothing if not a grouping of networked software held together by bits of hardware. This is reflected not only in the rapidly increasing number of ECUs, but also infotainment systems and all-glass cockpits. For better or worse, this offers many exciting hacking possibilities, which [greenluigi1] was more than happy to explore with their new 2021 Hyundai Ioniq SEL last year. Naturally, Hyundai then proceeded to ‘fix’ these vulnerabilities, offering the exciting chance to test the Hyundai engineers’ homework, and proceed to bypass it again.

When we last left off in [greenluigi1]’s adventures, the Hyundai D-Audio 2V Linux-based infotainment system (formally called in-vehicle entertainment, or IVI) in question had been convinced to run custom applications after a fair bit of effort to get root access via the Engineering Menu and some firmware image hacking. Joyous hacking and exploration of the car’s CAN network and RPC messaging system ensued. Then Hyundai released a new firmware image, after months of silence and all old firmware images pulled from the download page.

In this new firmware image, big changes were visible right off the bat, with two different ZIP files instead of the single one from before. One of these ZIP files also couldn’t be decrypted any more with the old key. Unfortunately for Hyundai, the curse of backwards compatibility with older IVIs meant that the ZIP targeting headunits running the older firmware also contained the key for the new ZIP file.

Other changes included some further obfuscation to this key and the public key used for firmware hash verification, which also involved using a Micom RPC call via the CAN bus to obtain some vehicle specific information. Unfortunately, this is where Hyundai’s engineers seemed to have stopped copying reference code samples, and used a unique RSA private key to sign firmware images with. Fortunately, they did not bother to check whether the updater actually always verifies the signature, allowing for unsigned code to be installed.

All in all, a fascinating bit of reverse-engineering and sheer stubborn persistence, just so that the IVI that’s in your car can run the applications which you developed. We’re looking forward to the next installments in this series as the ball is once again firmly in Hyundai’s court.

Converting On-Grid Electronics To Off-Grid

Husband and wife team [Jason & Kara] hail from Canada, and in 2018, after building their own camper, sold up their remaining earthly goods and headed south. If you’re not aware of them, they documented their journey on their YouTube channel, showing many interesting skills and hacks along the way. The video we’re highlighting today shows a myriad of ways to power all the DC-consuming gadgets this they lug along with them.

LiFePO4 batteries are far superior to lead acid for mobile solar installations.

Their heavily modded F-550 truck houses 12kWh of LiFePO4 batteries and a 1.5kW retractable solar array, with a hefty inverter generating the needed AC power. They weren’t too happy with the conversion losses from piles of wall warts that all drained a little power, knowing that the inverter that fed them was also not 100% efficient. For example, a typical laptop power brick gets really hot in a short time, and that heat is waste. They decided to run as much as possible direct from the battery bank, through different DC-DC converter modules in an attempt to streamline the losses a little. Obviously, these are also not 100%

Home, sorry, truck automation system

efficient, but keeping the load off the inverter (and thus reducing dependency upon it, in the event of another failure) should help stem the losses a little. After all as [Jason] says, Watts saved are Watts earned, and all the little lossy loads add up to a considerable parasitic drain.

One illustration of this is their Starlink satellite internet system consumes about 60W when running from the inverter, but only 28W when running direct from DC. Over the course of 24 hours, that’s not far off 1kWh of savings, and if the sun isn’t shining, then that 12kWh battery isn’t going to stretch as far.

There are far too many hacks, tips, and illustrations of neat space and power-saving solutions everywhere, to write here. Those interested in self-build campers or hacking a commercial unit may pick up a trick or two.

Continue reading “Converting On-Grid Electronics To Off-Grid”

Ask Hackaday: Why Do Self Driving Cars Keep Causing Traffic Jams?

Despite what some people might tell you, self-driving cars aren’t really on the market yet. Instead, there’s a small handful of startups and big tech companies that are rapidly developing prototypes of this technology. These vehicles are furiously testing in various cities around the world.

In fact, depending on where you live, you might have noticed them out and about. Not least because many of them keep causing traffic jams, much to the frustration of their fellow road users. Let’s dive in and look at what’s going wrong.

Continue reading “Ask Hackaday: Why Do Self Driving Cars Keep Causing Traffic Jams?”

A view of the inside of a car, with drivers wheel on the left and control panel in the middle, with red LED light displayed in the floor area under the drivers wheel and passenger side.

Bass Reactive LEDs For Your Car

[Stephen Carey] wanted to spruce up his car with sound reactive LEDs but couldn’t quite find the right project online. Instead, he wound up assembling a custom bass reactive LED display using an ESP32.

A schematic of the Bass LED reactive circuit, with an ESP32 on a breadboard connected to a KY-040 encoder module, a GY-MAX4466 microphone module and LED strips below.

The entirety of the build is minimal, consisting of a GY-MAX4466 electret microphone module, a KY-040 encoder for some user control and an ESP32 attached to a Neopixel strip. The only additional electronic parts are some passive resistors to limit current on the data lines and a capacitor for power line noise suppression. [Stephen] uses various enclosures from Thingiverse for the microphone, rotary encoder and ESP32 box to make sure all the modules are protected and accessible.

The magic, of course, is in the software, with the CircuitPythyon ulab library used to do the heavy lifting of creating the spectrogram and frequency filtering. [Stephen] has made the code is available on GitHub for those wanting to take a closer look.

It wasn’t very long ago that sound reactive LEDs used to be a heavy lift, requiring optimized FFT libraries or specialized components to do the spectrogram. With faster and cheaper microcontroller boards, we’re seeing many great projects, like the sensory bridge or Raspberry Pi driven LED spectrogram, that can now take spectrograms and Fourier transform calculations as basic infrastructure to build on top of them. We’re happy to see [Stephen] leverage the ESP32’s speed and various circuit Python libraries to create a very cool LED car hack.

Video after the break!

Continue reading “Bass Reactive LEDs For Your Car”

A first-generation car phone connected to a piece of prototype board with a BlueTooth module

Custom Bluetooth Adapter Brings 1990s Car Phone Back Online

[Jeff Lau]’s Mitsubishi 3000GT comes with all the essential features you’d expect in a fancy sports car from 1993: pop-up headlights, movable spoilers, and a fully-functional telephone handset in the center console. The phone was fully functional until North America’s first-generation AMPS cellular network was shut down back in 2008, since then, it hasn’t done much but show “NO SVC” on the display. That is, until [Jeff] decided to build a Bluetooth adapter that lets it connect to a modern smartphone.

The easy solution would have been to simply connect the handset’s speaker and microphone to a standard Bluetooth headset, but that would have destroyed the 1990s aesthetic it had going on. So what [Jeff] did instead was construct a plug-in module that hooks up to the phone’s base station in the trunk and communicates directly with all the existing systems. That way, the phone works in exactly the same way it always did: the radio is automatically muted during calls, the buttons on the steering column work as expected, and you can even dial and store numbers using the buttons on the handset.

A car phone base station and wiring in the trunk of a Mitsubishi 3000GT
No modifications required: the BlueTooth module is connected using the factory-installed cabling

It took a lot of reverse-engineering to figure out the technical details of the DiamondTel Model 92 that came with the car as a factory option. [Jeff] helpfully documented all of his findings on the project’s GitHub page, making it easy for anyone with a similar system to implement their own upgrades. The main components of the upgrade kit are a BM62 Bluetooth module that connects to a modern phone, a PIC18F27Q43 microcontroller to implement the car phone’s interface and menus, and several analog chips to process the audio. All of these are mounted on a piece of prototype board and housed in a standard plastic enclosure that neatly fits on top of the existing equipment in the trunk.

While the hardware mod is a pretty neat job already, the real strength of this project is in the software. [Jeff] worked hard to implement all relevant features and mimic the original interface as much as possible, even using 1G phone test equipment to simulate incoming calls from the long-gone network. He also added menu features to enable Bluetooth pairing, use voice assistants, and even play games including versions of Snake and Tetris stripped down to match the handset display’s constraints.

As classic phone conversions go, this is definitely one of the most impressive. [Jeff]’s extensive documentation should come in handy if you’ve got a similar model, but if you don’t, there’s still plenty of ways to connect modern electronics without defacing your classic ride’s interior.

Continue reading “Custom Bluetooth Adapter Brings 1990s Car Phone Back Online”

A red Tesla Model 3 converted into a pickup truck with a black lumber rack extending over the roof of the cab sits in a grey garage. A black and silver charging robot is approaching its charging port from the right side attached to a black cable. The charging bot is mostly a series of tubes attached to a wheeled platform and the charging connector itself is attached to a linear actuator to insert the charging device.

Truckla Gets An Open Source Charging Buddy

More than three years have passed since Tesla announced its Cybertruck, and while not a one has been delivered, the first Tesla truck, Truckla, has kept on truckin’. [Simone Giertz] just posted an update of what Truckla has been up to since it was built.

[Giertz] and friend’s DIT (do-it-together) truck was something of an internet sensation when it was revealed several months before the official Tesla Cybertruck. As with many of our own projects, while it was technically done, it still had some rough edges that kept it from being truly finished, like a lack of proper waterproofing or a tailgate that didn’t fold.

Deciding enough was enough, [Giertz] brought Truckla to [Marcos Ramirez] and [Ross Huber] to fix the waterproofing and broken tailgate while she went to [Viam Labs] to build Chargla, an Open Source charging bot for Truckla. The charging bot uses a linear actuator on a rover platform to dock with the charging port and is guided by a computer vision system. Two Raspberry Pis power handle the processing for the operation. We’re anxious to see what’s next in [Giertz]’s quest of “picking up the broken promises of the car world.”

If you want to see some more EV charger hacks, check out this Arduino-Based charger and the J1772 Hydra.

Continue reading “Truckla Gets An Open Source Charging Buddy”