 The 19th century was an absolutely electrifying era, including in a literal sense. Although the phenomenon of electricity had been known by that time for centuries, actually making it do useful work was a much taller order. Aside from big, coal-powered generators, there also was a need for a more compact electrochemical solution, such as in the form of a wet or dry cell. One of the first major commercial successes here came in the form of the Leclanché cell, such as the genuine version that [Big Clive] found in an old UK building’s attic and has now revived.
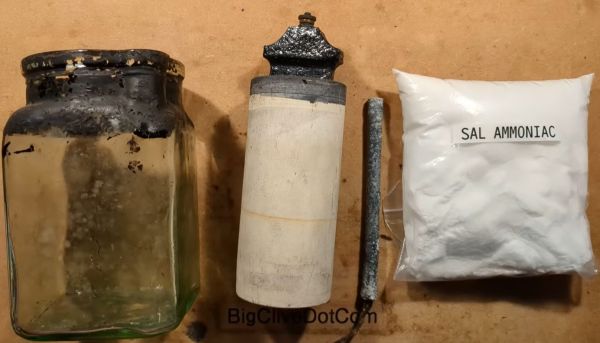
Invented in 1866 by French scientist Georges Leclanché, the Leclanché cell features an ammonium chloride electrolyte solution, carbon cathode and zinc anode. There’s also a manganese dioxide depolarizer for preventing hydrogen build-up. Here water is the solvent for the ammonium chloride (also known as sal ammoniac).
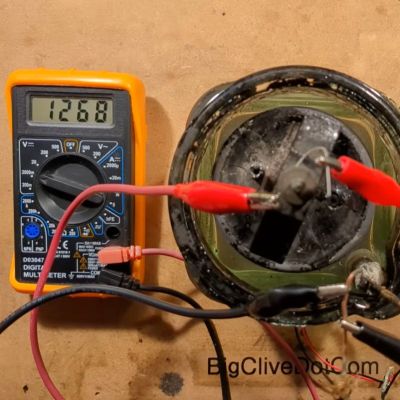
The version that [Clive] got his grubby mitts on features a glass container, an already partially consumed zinc electrode and a slightly cracked porous ceramic tub that contains the carbon electrode and the manganese dioxide. After placing the components inside the specially shaped glass jar and filling it with an electrolyte mixture of one part ammonium chloride and four parts water by weight, the cell starts generating its approximate 1.4 VDC.
This type of wet cell was very popular, being essentially ‘rechargeable’ by topping up the water and replacing the zinc electrode consumable. They did suffer from a voltage drop-off during use due to increasing internal resistance, something that got improved upon with the zinc-carbon dry cell. Itself effectively an evolution of the Leclanché wet cell.
From there zinc-carbon dry cells got replaced with alkalines, which itself got mostly replaced by NiMH and Li-ion cells. Despite more than a hundred years between the electrochemical cell that [Clive] featured in his video and today’s batteries, it’s clear that this wet cell was quite literally just the Victorian-era equivalent of an alkaline AA cell.
Continue reading “How To Rebuild An 1800s Victorian Leclanché Cell”