Amplifier Controlled Motorized Display

It’s easy to get jaded by gadgets like the Chromecast or Sonos, which let the user control AV equipment remotely from a mobile device or computer. You can pick something to play from your phone and send it off to your speakers via the magic of Wi-Fi. But it’s still nice to have a display to look at for music visualizations and that sort of thing, at least occasionally.

To address this only occasional desire to have a display on your media setup, you could follow in the footsteps of [Steven Elliott] and create a DIY motorized display which only pops up when needed. Inspired by seeing videos of TVs rising out of cabinets and other such trickery, he decided to create his own version using an old computer monitor he had lying around.

The monitor is lifted with a beefy linear actuator, which has been placed inside of a square metal fence post to keep from rotating. It already had a power supply and control board with relays for extending and retracting, so [Steven] just needed to find a convenient way of firing them off.

The answer came from a somewhat unconventional source: his amplifier. [Steven] explains that many amplifiers feature a “Trigger Output”, which uses a standard stereo 3.5mm connector and sends a 12V pulse to connected device. This is generally used to turn on downstream devices when the amplifier switches to the respective input. It’s too short and not nearly powerful enough to close the actuators relays, but it’s easy enough to detect.

[Steven] uses a LeoStick microcontroller to wait for the pulse from the amplifier, and then use that to raise or lower the display depending on the selected input. There’s also a SPST momentary switch which can be used to trigger the actuator manually. Beyond the fact the linear actuator is a bit loud, he says the setup works very well and prevents him from having to start up his projector if he just wants to take a quick glance at what’s playing or program his DVR.

We don’t see many motorized display lifts like this anymore, not since wall mounted LCDs became popular anyway. But it’s still a cool effect, and today made quite a bit easier thanks to the fact that TVs and monitors no longer weigh as much as a small car.

[Thanks to Baldpower for the tip.]

We Got Your Sega Chiptunes Right Here

Chiptunes are cool, but when you get into it, you realize you’re mostly dealing with Commodore SID tunes, Atari POKEY tracks for the cool kids, bleeps and bloops from a Game Boy, and maybe some NES tracks thrown in for good measure. There’s another option out there – the sound chip in the Sega Genesis. This thing could do drums, man, and [Aidan Lawrence] built the perfect player for the tuneful silicon tucked inside the classic 16-bit console.

[Aidan] had previously built a tiny little music player based on the YM3812 chip, the Yamaha chip found in SoundBlaster and Adlib sound cards. The chip inside the Sega Genesis, the Yamaha YM2612, is a bit different. The killer feature of this chip, PCM waveforms, aren’t stored as simple, small bits of code. These are massive blobs of binary data sent to the chip’s DAC. The SEGGGGAAAA intro of Sonic the Hedgehog, for example, used an eighth of the the cartridge space. You’re not going to build a Sega chiptune player with a tiny little microcontroller and 20kB of RAM.

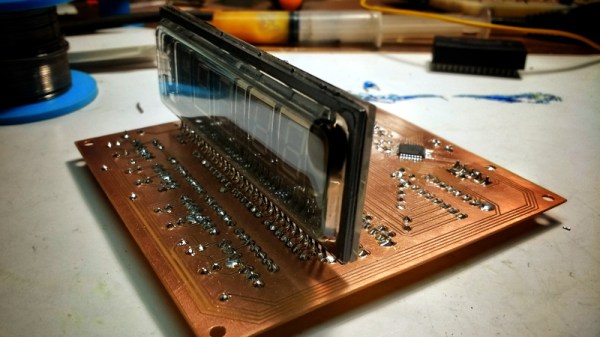
The solution came in the form of an external SPI RAM device. The 23LC1024 is a full 1 Megabit in size, and since it’s SPI, it’s more than fast enough to keep up with the sample speed. The rest of the circuit including the mixer, preamp and power amp are based on the Genesis’ actual schematics, with an SD card and OLED thrown in for good measure. How does it sound? There’s a great video below the break and yes, the soundtrack from Sonic 3 sounds just as good as it did twenty years ago.

Continue reading “We Got Your Sega Chiptunes Right Here”

Artistic Collaboration With AI

Ever since Google’s Deep Dream results were made public several years ago, there has been major interest in the application of AI and neural network technologies to artistic endeavors. [Helena Sarin] has been experimenting in just this field, exploring the possibilities of collaborating with the ghost in the machine.

This image was generated with a landscape model using a dataset containing covers of Japanese poetry books.

The work is centered around the use of Generative Adversarial Networks, or GANs. [Helena] describes using a GAN to create artworks as a sort of game. An apprentice attempts to create new works in the style of their established master, while a critic attempts to determine whether the artworks are created by the master or the apprentice. As the apprentice improves, the critic must become more discerning; as the critic becomes more discerning, the apprentice must improve further. It is through this mechanism that the model improves itself.

[Helena] has spent time experimenting with CycleGAN in the artistic realm after first using it in a work project, and has primarily trained it on her own original artworks to create new pieces with wild and exciting results. She shares several tips on how best to work with the technology, around the necessary computing and storage requirements, as well as ways to step out of the box to create more diverse outputs.

Neural networks are hot lately, with plenty of research going on in the field. There’s plenty of fun projects, too – like this cartoonifying camera we featured recently.

This Nixie Device Is Useless, But Pretty

Nixie clocks, they’re a bit of a cliché, aren’t they? But still, they’re pretty to look at.

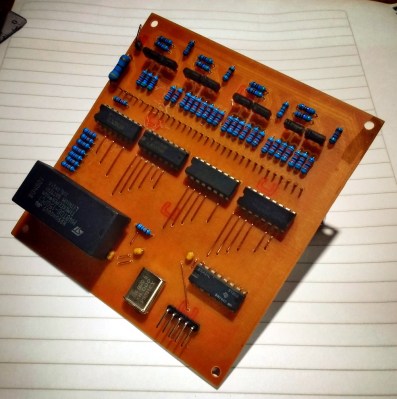
[Marcin Saj] has completely got our number, and with his Useless Nixie Device has stripped away any pretence of functionality from his Nixie  and concentrated solely on the looking pretty part. It’s a box that steps through the display on any Nixie tube through the use of a set of pluggable socket modules, and it’s encased in an extremely attractive lase-cut acrylic enclosure. Internally it’s an extremely simple device, with a trusty 555 oscillator clocking a 4518 counter that in turn feeds 74141 driver. There is a MAX1771 boost converter in there too to create some high voltage for the tubes.

So it’s a pretty device and you can plug almost any Nixie into it given the right adapter. We guess it might be useful if you have a warehouse full of Nixies to test, but beyond that it’s a pretty desk toy. Still, it’s nice to see a Nixie project that’s not just another clock.

Retrotechtacular: Here’s How They Programmed The EDSAC Computer

When you write a program for your computer, whether it is a desktop machine, a microcontroller, or a supercomputer, the chances are that you use software tools to help you get the job done. High level languages, compilers, linkers, assemblers, debuggers, and code libraries have become so integrated that in many cases you will barely be aware of their existence. To all intents and purposes this huge toolchain will be the computer. But the first computer programmers had none of these luxuries. They had to hand assemble their own binaries, check them by hand, and debug them by guessing what had happened when they failed.

EDSAC I, 1948, W.Renwick with 5 hole tape reader and Creed teleprinter. Copyright Computer Laboratory, University of Cambridge. Reproduced by permission. [CC BY 2.0 UK]
EDSAC (Electronic delay storage automatic calculator) was the first computer operated by the University of Cambridge in the UK and one of the first few computers in the entire world when it was built in the late 1940s. It is the subject of the 1951 film you’ll find embedded below. Originally produced for a conference, the video sports a 1976 introduction and narration from the machine’s creator Professor Maurice Wilkes. It doesn’t take us through the design of the machine itself, instead it concentrates on the workflow required to program it.

The Paper-Heavy Process of Programming EDSAC

To illustrate the programming process, a committee of people who would now call themselves computer scientists, but probably then called themselves mathematicians, breaking a formula into subroutines before the code is laboriously hand assembled. The linking process is performed manually too by the secretary who types the code into a teletype for transfer to a punched tape. When a library function is required she reaches into a filing cabinet for the roll of tape containing it before running it through a tape duplicator to add it to the program. Finally the completed tape is checked and added to a job queue that consists of a row of hooks on the wall. Never complain that your toolchain is unwieldy again!

The original EDSAC was decommissioned in the late 1950s after serving the university and spawning a commercial version, the LEO, which became the first ever computer manufactured for use in commerce. That was not the end of the EDSAC story though, because in this century a team at the National Museum of Computing at Bletchley Park set about recreating EDSAC as an exhibit. And as luck would have it a member of that team was at the recent Electromagnetic Field hacker camp to give a talk about their work which you will also find below.

Building a Faithful Reproduction of EDSAC

Tony Abbey gives us both a history of the machine and a description of its architecture, followed by a run through their efforts in rebuilding it. You may be surprised by some of the unexpected facts from the talk. For instance, while all the tubes used in the EDSAC are still available, their bases are not. Equivalents were sourced from China, but team members had to modify them with dental drills.

They also needed to manufact the 1940s-style tube chassis, and the solution to that problem happened to be just down the road. Bletchley is part of modern-day Milton Keynes, a post-war new town that is also home to another famous name: Marshall amplifiers. Tube amps are built in a surprisingly similar way, so they took on the manufactured challenge. Not all the parts of the new EDSAC are original though. The memory used mercury delay lines in 1949, but for 2018 recreation the computer has a delay line using nickel wire and modern components. Tony admits that even that has caused problems, and there is a simulator using a microcontroller.

You can see the restored EDSAC at the National Museum of Computing. We visited it in 2016, and you can read our review. Meanwhile if you are an FPGA wizard, you can even have a virtual EDSAC of your own.

Continue reading “Retrotechtacular: Here’s How They Programmed The EDSAC Computer”

Apple’s Best Computer Gets WiFi

The greatest computer Apple will ever make isn’t the Apple II, it isn’t the Bondi Blue iMac, it isn’t the trash can, and it certainly isn’t whatever overheating mess they’re pushing out now. The best computer Apple will ever make is the SE/30, at its time a server in a tiny portable shell, and capable of supporting 128 Megabytes of RAM thirty years ago.

Over the years, people have extended and expanded the SE/30 to absolutely ludicrous degrees, but now we have a simple way of adding WiFi to this classic computer. Over on the 68kmla forums, [ants] discovered a tiny cheap card that could easily serve as an Ethernet to WiFi bridge. After attaching this card to a Danaport Ethernet card and bending some aluminum for a bracket, they had a WiFi antenna sticking out of the back of a 30-year-old computer.

But adding a WiFi card to an old computer is nothing new — this could have been done with a Pi, or if you’re a hacker, a TP-Link router flashed with OpenWRT. To really do this right, you’ll need integration with the operating system, and that’s where this build goes off the rails. [ants] wrote a WiFi extension for System 7 (with the relevant GitHub)

The problem with the Vonets WiFi card is that configuration has to be done through a browser. Since there are no modern browsers for classic macs, this meant either pulling out a PowerBook or doing the configuration through your daily driver desktop PC. The WiFi extension gets around that by giving a classic mac the ability to configure the Vonets card almost automatically. This extension also looks like how you would configure the WiFi on a modern mac, complete with the WiFi icon in the toolbar. It’s beautiful, and one of the rare examples of modern 68k mac programming.

As for what you can do by adding WiFi to a 30-year-old computer with a 16MHz processor, the answer is a resounding, ‘not much’. Your choice of browsers is limited (iCab seems to be the best), but you can load the Google homepage slowly. HTTPS isn’t going to work, and the Internet right now is full of megabytes of Javascript cruft. If you find a nice, lightweight web page — such as the Hackaday Retro Edition, for example — you’re looking at a capable web browsing machine. Of course, the real use case for giving the SE/30 WiFi is file transfer around the home network, but still: it’s WiFi for the best computer Apple ever made.

Bask In The Warm Glow Of DIY Incandescent Bulbs

With most of the apparatus and instruments we now take for granted yet to be developed, the early pioneers of the Electric Age had to bring a lot to the lab besides electrical skills. Machining, chemistry, and metallurgy were all basic skills that the inventor either had to have or hire in. Most of these skills still have currency of course, but one that was once crucial – glassblowing – has sadly fallen into relative obscurity.

There are still practitioners of course, like [2SC1815] who is learning how to make homemade incandescent light bulbs. The Instructable is in both English and Japanese, and the process is explained in some detail. Basic supplies include soda-lime glass tubing and pre-coiled tungsten filaments. Support wires are made from Dumet, an alloy of iron, nickel, and cobalt with an oxidized copper cladding which forms a vacuum-tight seal with molten glass. The filament is crimped to the Dumet leads and pinched into a stem of glass tubing. A bulb is blown in another piece of tubing and the two are welded together, evacuated with a vacuum pump, and sealed. The bulbs are baked after sealing to drive off any remaining water vapor. The resulting bulbs have a cheery glow and a rustic look that we really like.

Of course, it’s not a huge leap from DIY light bulbs to making your own vacuum tubes. That’s how [Dalibor Farny] got started on his handmade Nixie business, after all.