When did computers arrive in schools? That should be an easy question to answer, probably in the years around 1980. Maybe your school had the Commodore Pet, the Apple II, or if you are British, the Acorn BBC Micro in that period, all 8-bit microcomputers running a BASIC interpreter. That’s certainly the case for the majority of schools, but not all of them. In early 1969 the BBC’s Tomorrow’s World visited a school with a computer, and in both technology and culture it was a world away from those schools a decade later that would have received those BBC Micros.
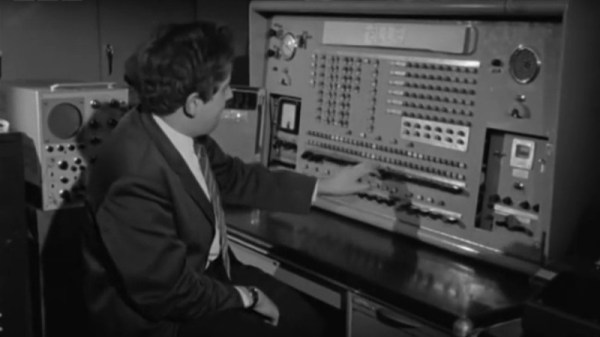
The school in question was The Forrest Grammar School, Winnersh, about 35 miles west of London, and the computer in question was a by-then-obsolete National Elliott 405 mainframe that had been donated four years earlier by the British arm of the food giant Nestlé. The school referred to it as “Nellie” — a concatenation of the two brand names. It seems to have been the preserve of the older pupils, but the film below still shows the concepts of its operation being taught at all levels. We get a brief look at some of their software too — no operating systems here, everything’s machine code on paper tape — as a teacher plays a reaction timer game and the computer wins at noughts and crosses (tic-tac-toe). One of them has even written a high-level language interpreter on which younger children solve maths problems. Of course, a 1950s mainframe with hundreds or thousands of tubes was never a particularly reliable machine, and we see them enacting their failure routine, before finally replacing a faulty delay line.
This is a fascinating watch on so many levels, not least because of its squeaky-clean portrayal of adolescent boys. This is what teenagers were supposed to be like, but by the late 1960s they must in reality have been anything but that away from the cameras. It’s a contrast with fifteen or twenty years later, the computer is seen as an extremely important learning opportunity in sharp opposition to how 8-bit computers in the 1980s came to be seen as a corrupting influence that would rot young minds.
Of course, these youngsters are not entirely representative of British youth in 1969, because as a grammar school the Forrest was part of the top tier of the selective education system prevalent at the time. There would certainly have been no computers of any sort in the local Secondary Modern school, and probably the BBC’s portrayal of the pupils would have been completely different had there been. In 1974 the Government abolished the grammar school system to create new one-size-fits-all comprehensive schools, one of which the Forrest school duly became. Following the vagaries of educational policy it is now an Academy, and there is probably not a room within it that does not contain a computer.
So what of Nellie? Because of the film there are plenty of online references to it in 1969, but we could only find one relating to its fate. It was finally broken up in 1971, with the only surviving component being a delay line. More than one Elliott machine survives in museum collections though, and your best chance in the UK of seeing one is probably at the National Museum Of Computing, in Bletchley.
Continue reading “Retrotechtacular: Nellie The School Computer” →