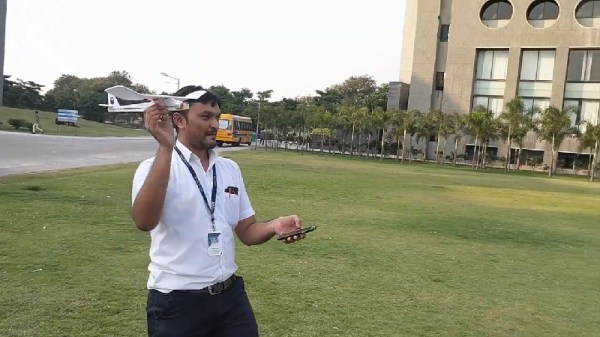
The world of radio controlled aircraft used to be an expensive and exclusive hobby, limited to those with the time and money to invest in difficult builds and pricey radio gear. More recently, the hobby has become more accessible, with cheap ready to fly planes available that can be flown in smaller spaces like suburban parks. [Ravi Butani] has built just such a plane, and you can even fly it with your smartphone!
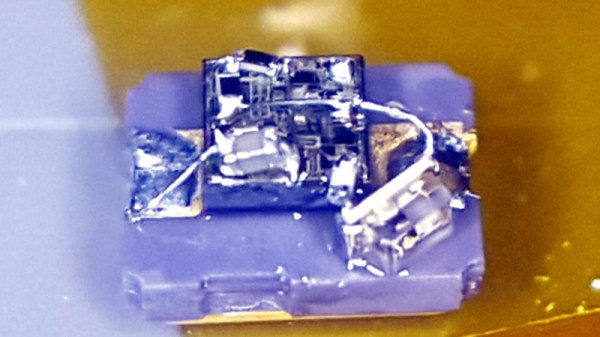
An ESP8266 does double duty here as both the brains and the communication system. A custom smartphone app communicates with the plane over WiFi. Touching the screen increases the throttle, while steering is achieved through tilting the phone. There’s also monitoring of signal strength and battery level, with the phone vibrating if the plane is getting out of range or low on battery.
Flight control is via differential thrust, with power coming courtesy of two small DC motors controlled by tiny SMD MOSFETs. The plane flies remarkably well in still conditions, and the WiFi connection is stable in an open park environment. [Ravi] reports that control is possible at a range of around 70 meters using a Motorola G5S smartphone.
Despite the simplicity of the build and the low cost of the components, the final product performs admirably. It would be a great weekend project, and at the end of it, you get to go and fly your new plane! If you’re worried about keeping your batteries charged, don’t worry – there’s a solution for that. Video after the break.
Continue reading “WiFi Controlled Plane Is Cheap Flying Fun”