Distorted Text Says A Lot

Getting bounced to a website by scanning a QR code is no longer an exciting feat of technology, but what if you scanned the ingredient list on your granola bar and it went to the company’s page for that specific flavor, sans the matrix code?

Bright minds at the Columbia University in the City of New York have “perturbed” ordinary font characters so the average human eye won’t pick up the changes. Even ordinary OCR won’t miss a beat when it looks at a passage with a hidden message. After all, these “perturbed” glyphs are like a perfectly legible character viewed through a drop of water. When a camera is looking for these secret messages, those minor tweaks speak volumes.

The system is diabolically simple. Each character can be distorted according to an algorithm and a second variable. Changing that second variable is like twisting a distorted lens, or a water drop but the afterimage can be decoded and the variable extracted. This kind of encoding can survive a trip to the printer, unlike a purely digital hidden message.

Hidden messages like these are not limited to passing notes, metadata can be attached to any text and extracted when necessary. Literature could include notes without taking up page space so teachers could include helpful notes and a cell phone could be like an x-ray machine to see what the teacher wants to show. For example, you could define what “crypto” actually means.

Continue reading “Distorted Text Says A Lot”

Flash Your Libre Firmware With A Libre Programmer

Whether or not you personally agree with all the ideals of the Free Software Foundation (FSF), you’ve got to give them credit: they don’t mess around. They started by laying the groundwork for a free and open source operating system, then once that dream was realized, started pushing the idea of replacing proprietary BIOS firmware with an open alternative such as Libreboot. But apparently, even that’s not enough, as there’s still more freedom to be had. We’re playing 4D Libre Chess now, folks.

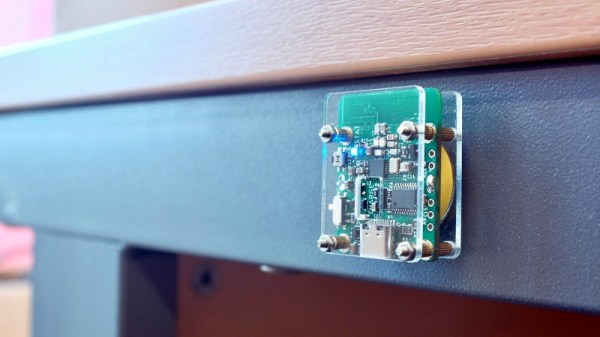
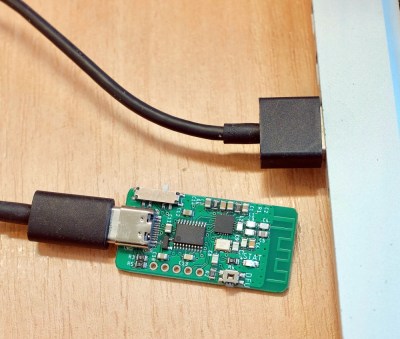
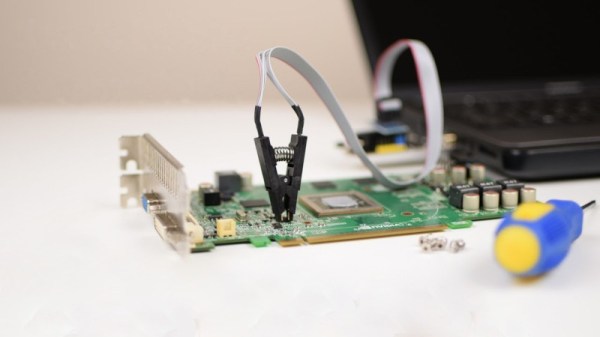
To flash your libre boot firmware on your libre OS running computer without any proprietary funny business, you’re going to need a libre chip programmer. Luckily, the FSF has just awarded the Zerocat Chipflasher their “Respects Your Freedom” certification, meaning every element of the product is released under a free license for your hacking enjoyment. According to the FSF, this is a major milestone towards their goal of providing users a truly free and open source computer, from the browser all the way down to the BIOS.

Of course, you don’t need to be Richard Stallman to appreciate a fully open chip programmer. With the software, wiring diagrams, and PCB files available on the Chipflasher’s website, the project is an excellent educational reference. Is also means that with a clone the Chipflasher’s Git repository, you’re well on the way to spinning up your own build of the device.

Given the roughly $350 USD price tag on the first generation Zerocat Chipflasher, it seems fairly likely we’ll be seeing some DIY builds of this device before too long. Not that we want to deprive Zerocat commercial success for this very neat piece of gear, but for many it’s a mighty steep price; even if you do get all the Freedoms.

It may use a device of slightly more nebulous morality than the Zerocat Chipflasher, but our own [Bryan Cockfield] documented the saga of getting Libreboot installed on a Thinkpad X200 if you’d like to know more about the high stakes world of BIOS replacement. Whatever it takes to get that Intel Management Engine off your penguin-powered box.

A Custom Keypad With Vision

A combination of cheap USB HID capable microcontrollers, the ability to buy individual mechanical keys online, and 3D printing has opened up a whole new world of purpose-built input devices. Occasionally these take the form of full keyboards, but more often than not they are small boards with six or so keys that are dedicated to specific tasks or occasionally a particular game or program. An easy and cheap project with tangible benefits to anyone who spends a decent amount of time sitting in front of the computer certainly sounds like a win to us.

But this build by [r0ckR2] takes the concept one step farther. Rather than just being a simple 3×3 keypad, his includes a small screen that shows the current assignments for each key. Not only does this look really cool on the desk (always important), but it also allows assigning multiple functions to each key. The screen enables the user to switch between different pages of key assignments, potentially allowing a different set of hot keys or macros for every piece of software they use.

The case is entirely 3D printed, as are the key caps. To keep things simple, [r0ckR2] didn’t bother to design a full enclosure, leaving all the electronics exposed on the back. Some might think it’s a little messy, but we appreciate the fact that it gives you easy access to the internals if you need to fix anything. Rubber feet were added to the bottom so it doesn’t slide around while in use, but otherwise the case is a pretty straightforward affair.

As for the electronics, [r0ckR2] went with an STM32 “Blue Pill” board, simply because it’s what he had on hand. The screen is a ST7735 1.44 inch SPI TFT, and the keys themselves are Cherry MX Red clones he got off of eBay. All in all, most of the gear came from his parts bins or else was only a couple bucks online.

If you’re looking for something a bit bigger, check out this gorgeous Arduino-powered version, or this far more utilitarian version. Both are almost entirely 3D printed, proving the technology is capable of more than making little boats.

[via /r/functionalprint]

Automatic I2C Address Allocation For Daisy-Chained Sensors

Many readers will be familiar with interfacing I2C peripherals. A serial line joins a string of individual I2C devices, and each of the devices has its own address on that line. In most cases when connecting a single device or multiple different ones there is no problem in ensuring that they have different addresses.

What happens though when multiple identical devices share an I2C bus? This was the problem facing [Sam Evans] at Mindtribe, and his solution is both elegant and simple. The temperature sensors he was using across multiple identical boards have three pins upon which can be set a binary address, and his challenge was to differentiate between them without the manufacturing overhead of a set of DIP switches, jumpers, or individual pull-up resistors. Through a clever combination of sense lines between the boards he was able to create a system in which the address would be set depending upon whether the board had a neighbour on one side, the other, or both. A particularly clever hack allows two side-by-side boards that have two neighbours to alternate their least significant bit, allowing four identical boards each with two sensors to be daisy-chained for a total of eight sensors with automatic address allocation.

We aren’t told what the product was in this case, however it’s irrelevant. This is a hardware hack in its purest sense, one of those which readers will take note of and remember when it is their turn to deal with a well-populated I2C bus. Of course, if this method doesn’t appeal, you can always try an LTC4316.

This Computer Is As Quiet As The Mouse

[Tim aka tp69] built a completely silent desktop computer. It can’t be heard – at all. The average desktop will have several fans whirring inside – cooling the CPU, GPU, SMPS, and probably one more for enclosure circulation – all of which end up making quite a racket, decibel wise. Liquid cooling might help make it quieter, but the pump would still be a source of noise. To completely eliminate noise, you have to get rid of all the rotating / moving parts and use passive cooling.

[Tim]’s computer is built from standard, off-the-shelf parts but what’s interesting for us is the detailed build log. Knowing what goes inside such a build, the decisions required while choosing the parts and the various gotchas that you need to be aware of, all make it an engaging read.

It all starts with a cubic aluminum chassis designed to hold a mini-ITX motherboard. The top and side walls are essentially huge extruded heat sinks designed to efficiently carry heat away from inside the case. The heat is extracted and channeled away to the side panels via heat sinks embedded with sealed copper tubing filled with coolant fluid. Every part, from the motherboard onwards, needs to be selected to fit within the mechanical and thermal constraints of the enclosure. Using an upgrade kit available as an enclosure accessory allows [Tim] to use CPUs rated for a power dissipation of almost 100 W. This not only lets him narrow down his choice of motherboards, but also provides enough overhead for future upgrades. The GPU gets a similar heat extractor kit in exchange for the fan cooling assembly. A fanless power supply, selected for its power capacity as well as high-efficiency even under low loads, keeps the computer humming quietly, figuratively.

Once the computer was up and running, he spent some time analysing the thermal profile of his system to check if it was really worth all the effort. The numbers and charts look very promising. At 100% load, the AMD Ryzen 5 1600 CPU levelled off at 60 ºC (40 ºC above ambient) without any performance effect. And the outer enclosure temperature was 42 ºC — warm, but not dangerous. Of course, performance hinges around “ambient temperature”, so you have to start getting careful when that goes up.

Getting such silence comes at a price – some may consider it quite steep. [Tim] spent about A$3000 building this whole system, thanks in part due to high GPU prices because of demand from bitcoin mining. But cost is a relative measure. He’s spent less on this system compared to several of his earlier projects and it let’s him enjoy the sounds of nature instead of whiny cooling fans. Some would suggest a pair of ear buds would have been a super cheap solution, but he wanted a quiet computer, not something to cancel out every other sound in his surroundings.

Friend In Need Gets Junk Bin PC For Cramped Quarters

If you doubt the power of the Hackaday community, check this one out. Stalwart reader and tipster [starhawk] has pitched in to help a friend in need, someone he met through Hackaday.io. Seems this friend’s current living arrangements are somewhat on the cramped side, and while he’s in need of a PC, even a laptop would claim too much space.

So with a quick trip to the store and a few items from the junk bin, [starhawk] whipped up an all-in-one PC the size of a tablet for his friend. As impressed as we are by the generosity, we’re more impressed by the quality of his junk bin. The heart of the compact machine is a motherboard from a Wintel CX-W8, scarcely larger than a Raspberry Pi model A. After the addition of a larger heatsink and fan, the board was attached via a sheet of plastic to the back of a 7-inch touchscreen, also a junk bin find. A cheap picture frame serves as the back of the all-in-one, complete with Jolly Wrencher, of course. Alas, the DC-DC converter was one of the only purchased items, bringing the cost for the build to all of $22, including the $15 for a wireless keyboard/touchpad on clearance from Walmart. After some initial power troubles, the fixes for which are described in this update, the machine was ready to ship.

Does this one seem familiar? It should — [starhawk] built a similar “laptop” for himself a while back when he was low on funds. Now it seems like he’s paying it forward, which we appreciate. For more details on how he pulled this all of, check out The Anytop, [starhawk’s] portable computer anyone can build. It was his 2017 Hackaday Prize entry!

Case Mod Takes “All In One” Printer To The Next Level

You’ve seen printers with scanners in them, printers with copiers in them, even ones with the ancient technology known as “facsimile” built-in. But have you ever seen a printer with a full gaming computer built into it? No? Well, you still haven’t, technically. There’s no printer to be had anymore inside this re-purposed HP Photosmart 6520 case, but it’s probably the closest we’re going to get.

[Jacob Lee] wrote in to share this awesome build with us, which sees the motherboard, graphics card, ATX power supply, and hard drives all fit seamlessly into the shell of a disused “All-in-one” style printer. Incredibly, he even managed to integrate an LCD into the top; which hinges open when in use and gives a look down into the madness that makes this build tick.

To say there’s a lot of hardware packed into this thing is an understatement. Which is all the more impressive when you consider that he] didn’t take the easy way out for any of it. He could have used a mini-ITX motherboard, or a slim PSU. He could have even dropped the graphics card for integrated. No, [Jacob] is clearly a subscriber to the “Go big or go home” ethos.

As if putting all this gear inside of a normal looking printer case wasn’t impressive enough, he even went as far as adding female ports for Ethernet, HDMI, and USB on the rear of the device to give it a stock look. He mentions there’s some room for improvement with the USB ports, but the power switch and IEC port really look like they could have been original components.

In the age of the Raspberry Pi and other diminutive computers, we don’t see too many proper desktop computer projects anymore. Fewer still that are so well executed and creative. We don’t know how many other people might be trying to stick a computer in a printer case, but if they’re out there, the bar has just been set pretty high.