Recovering Data From A Vintage MFM Drive

Even if you aren’t a vintage computer aficionado, you’re probably aware that older computer hard drives were massive and didn’t hold much data. Imagine a drive that weighs several pounds, and only holds 1/1000th of what today’s cheapest USB flash drives can. But what you might not realize is that if you go back long enough, the drives didn’t just have lower capacity, they utilized fundamentally different technology and relied on protocols which are today little more than historical footnotes.

A case in point is the circa 1984 Modified Frequency Modulation (MFM) drive which [Michał Słomkowski] was tasked with recovering some files from. You can’t just pop this beast into a USB enclosure; copying files from it required an interesting trip down computing’s memory lane, with a sprinkling of modern techniques that are sure to delight hackers who still like to dip their toes into the MS-DOS waters from time to time.

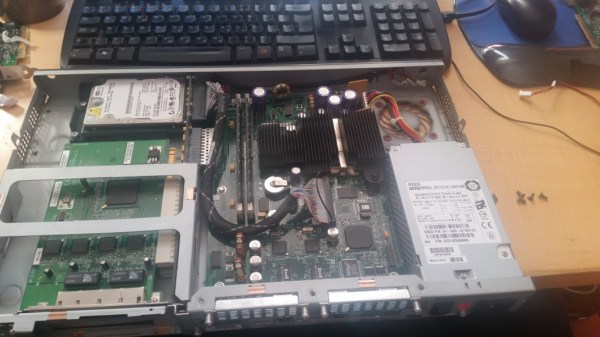
The drive, a MiniScribe 2012, has its own WD1002A-WX1 8-bit ISA controller card. [Michał] is the kind of guy who just so happens to have an ISA-compatible AT motherboard laying around, but he didn’t have the correct cooler for its Pentium processor. He stuck a random heatsink down onto it with a rubber band and set the clock speed as low as possible, which worked well enough to get him through the copying process.

Not wanting to fiddle with floppies, [Michał] then put together a setup which would let him PXE boot MS-DOS 6.22 under Arch Linux. He used PXELINUX, part of the syslinux package, and created an entry for DOS in the configuration file under the pxelinux.cfg directory. He then installed netboot which combines a DHCP and TFTP server into one simple package, and configured it for the MAC address of the AT machine’s 3com 3C905C-TXM network card.

With the hardware and operating system up and running, it was just a matter of getting the files off of the MFM drive and onto something a bit more contemporary. He tried to copy them to a secondary IDE drive, but it seemed there was some kind of conflict as both drives wouldn’t operate at the same time. So he pulled another solution from his bag of tricks: using a USB mass storage device on MS-DOS. By emulating a SCSI drive, he was able to get a standard flash drive plugged into a PCI USB card working, which ultimately dragged these ~35 year old files kicking and screaming into the 21st century.

We love keeping old hardware alive here at Hackaday, and documented methods to not only PXE boot DOS but use USB storage devices when you get it up and running will hopefully inspire some more hackers to blow the dust off that old 386 in the attic.

Retrotechtacular: Here’s How They Programmed The EDSAC Computer

When you write a program for your computer, whether it is a desktop machine, a microcontroller, or a supercomputer, the chances are that you use software tools to help you get the job done. High level languages, compilers, linkers, assemblers, debuggers, and code libraries have become so integrated that in many cases you will barely be aware of their existence. To all intents and purposes this huge toolchain will be the computer. But the first computer programmers had none of these luxuries. They had to hand assemble their own binaries, check them by hand, and debug them by guessing what had happened when they failed.

EDSAC I, 1948, W.Renwick with 5 hole tape reader and Creed teleprinter. Copyright Computer Laboratory, University of Cambridge. Reproduced by permission. [CC BY 2.0 UK]
EDSAC (Electronic delay storage automatic calculator) was the first computer operated by the University of Cambridge in the UK and one of the first few computers in the entire world when it was built in the late 1940s. It is the subject of the 1951 film you’ll find embedded below. Originally produced for a conference, the video sports a 1976 introduction and narration from the machine’s creator Professor Maurice Wilkes. It doesn’t take us through the design of the machine itself, instead it concentrates on the workflow required to program it.

The Paper-Heavy Process of Programming EDSAC

To illustrate the programming process, a committee of people who would now call themselves computer scientists, but probably then called themselves mathematicians, breaking a formula into subroutines before the code is laboriously hand assembled. The linking process is performed manually too by the secretary who types the code into a teletype for transfer to a punched tape. When a library function is required she reaches into a filing cabinet for the roll of tape containing it before running it through a tape duplicator to add it to the program. Finally the completed tape is checked and added to a job queue that consists of a row of hooks on the wall. Never complain that your toolchain is unwieldy again!

The original EDSAC was decommissioned in the late 1950s after serving the university and spawning a commercial version, the LEO, which became the first ever computer manufactured for use in commerce. That was not the end of the EDSAC story though, because in this century a team at the National Museum of Computing at Bletchley Park set about recreating EDSAC as an exhibit. And as luck would have it a member of that team was at the recent Electromagnetic Field hacker camp to give a talk about their work which you will also find below.

Building a Faithful Reproduction of EDSAC

Tony Abbey gives us both a history of the machine and a description of its architecture, followed by a run through their efforts in rebuilding it. You may be surprised by some of the unexpected facts from the talk. For instance, while all the tubes used in the EDSAC are still available, their bases are not. Equivalents were sourced from China, but team members had to modify them with dental drills.

They also needed to manufact the 1940s-style tube chassis, and the solution to that problem happened to be just down the road. Bletchley is part of modern-day Milton Keynes, a post-war new town that is also home to another famous name: Marshall amplifiers. Tube amps are built in a surprisingly similar way, so they took on the manufactured challenge. Not all the parts of the new EDSAC are original though. The memory used mercury delay lines in 1949, but for 2018 recreation the computer has a delay line using nickel wire and modern components. Tony admits that even that has caused problems, and there is a simulator using a microcontroller.

You can see the restored EDSAC at the National Museum of Computing. We visited it in 2016, and you can read our review. Meanwhile if you are an FPGA wizard, you can even have a virtual EDSAC of your own.

Continue reading “Retrotechtacular: Here’s How They Programmed The EDSAC Computer”

That TRS Jack On Your Graphing Calculator Does More Than You Think

It’s not Apple IIs, and it’s not Raspberry Pis. The most important computing platform for teaching kids programming is the Texas Instruments graphing calculator. These things have been around in one form or another for almost three decades, and for a lot of budding hackers out there, this was the first computer they owned and had complete access to.

As hacking graphing calculators is a favorite for Maker Faires, we were pleased to see Cemetech make it out to this year’s World Maker Faire in New York last weekend. They’re the main driving force behind turning these pocket computers with truly terrible displays into usable computing platforms.

As you would expect from any booth, Cemetech brought out the goods demonstrating exactly what a graphing calculator can do. The most impressive, at least from a soldering standpoint, is their LED cube controlled by a graphing calculator. The electronics are simple, and just a few 595s and transistors, but this LED cube is taking serial data directly from the link cable on a graphing calculator. Of course, the PCB for the LED cube is designed as an Arduino shield for ease of prototyping, but make no mistake: this is an LED cube controlled by a calculator.

If you can send serial data to a shift register from a graphing calculator, that means you can send serial data to anything, bringing us to Cemetech’s next great build featured this year. It’s an N-gauge model train, with complete control over the locomotive.

There’s a lot more to controlling model trains these days than simply connecting a big ‘ol variac to the tracks. This setup uses Direct Cab Control (DCC), a system that modulates commands for locomotives while still providing 12-15V to the tracks. There’s a good Arduino library, and when you have that, you can easily port it to a graphing calculator.

Cemetech is one of the perennial favorites at Maker Faire, and over the years we’ve seen everything from the Ultimate TI-83+ sporting an RGB backlight and a PS/2 port to a game of graphing calculator Whac-A-Mole. It’s all a great example of what you can do with the programmable computer every 90s kid had, and an introduction to computer programming education, something Cemetech is really pushing out there with some hard work.

IBM 1403 printer working again

Fixing An IBM 1401 Computer To Get It Printing Again

The IBM 1401 is a classic computer which IBM marketed throughout the 1960s, late enough for it to have used transistors rather than vacuum tubes, which is probably a good thing for this story. For small businesses, it was often used as their main data processing machine along with the 1403 printer. For larger businesses with mainframes, the 1401 was used to handle the slower peripherals such as that 1403 printer as well as card readers.

Broken germanium transistor

The Computer History Museum in Mountain View, CA has two working 1401s as well as at least one 1403 printer, and recently whenever the printer printed out a line, the computer would report a “print check” error. [Ken Shirriff] was among those who found and fixed the problem and he wrote up a detailed blog entry which takes us from the first test done to narrow down the problem, through IBM’s original logic diagrams, until finally yanking out the suspect board and finding the culprit, a germanium transistor which likely failed due to corrosion and an emitter wire that doesn’t look solidly connected. How do they know that? In the typical [Ken]-and-company style which we love, they opened up the transistor and looked at it under a microscope. We get the feeling that if they could have dug even deeper then they would have.

If you’re unfamiliar with the work of this team who maintain the machines at the museum, you’ll want to read up on how they recently got a 1401 to run FORTRAN II code.

C64 Keyboard Helps Keep The Memory Alive

To say that the Commodore 64 was an important milestone in the history of personal computing is probably a bit of an understatement. For a decent chunk of the 1980s, it was the home computer, with some estimates putting the total number of them sold as high as 17 million. For hackers of a certain age, there’s a fairly good chance that the C64 holds a special spot in their childhood; perhaps even setting them on a trajectory they followed for the rest of their lives.

At the risk of showing his age, [Clicky Steve] writes in to tell us about the important role the C64 played in his childhood. He received it as a gift on his fifth birthday from his parents, and fondly remembers the hours he and his grandfather spent with a mail order book learning how to program it. He credits these memories with getting him interested in technology and electronic music. In an effort to keep himself connected to those early memories, he decided to build a modern keyboard with C64 keycaps.

As you might expect, the process started with [Steve] harvesting the caps from a real Commodore, in fact, the very same computer he received as a child. While the purists might shed a tear that the original machine was sacrificed to build this new keyboard, he does note that his C64 had seen better days.

Of course, you can’t just pull the caps off of C64 and stick them on a modern keyboard. [Steve] found the STLs for a 3D printable C64 to Cherry MX adapter on GitHub, and had 80 of them professionally printed as he doesn’t have access to an SLS printer. He reports the design works well, but that non-destructively removing the adapters from the caps once they are pressed into place probably isn’t going to happen; something to keep in mind for others who might be considering sacrificing their personal C64 for the project.

[Steve] installed the caps on a Preonic mechanical keyboard, which worked out fairly well, though he had to get creative with the layout as the C64 caps didn’t really lend themselves to the keyboard’s ortholinear layout. He does mention that switches a bit heavier than the Cherry MX Whites he selected would probably be ideal, but overall he’s extremely happy with his functional tribute to his grandfather.

If you’re more of a purist, you can always adapt the C64 keyboard directly to USB. Or go in the complete opposite direction and put a Raspberry Pi into a C64 carcass.

ATX Adapter For The IBM PCJr Now Available

We’ve mentioned previously the challenges that come with maintaining vintage computers which in some cases are pushing 40 years old. Components, even high quality ones, eventually fail and need to be replaced. Now if it’s a fairly popular vintage machine, replacement parts usually aren’t too hard to come by. But what if you’re dealing with a machine that’s not just vintage, but was also such a commercial flop that parts are scarce?

Such is the life for anyone who owns one of the 500,000 IBM PCJrs that Big Blue managed to get out of the door during the year or so the product was on the market. As [AkBKukU] found, a replacement AC adapter for the odd-ball computer was going to cost more than what he paid for the thing, so he set to work on creating an adapter so he could use a modern ATX PSU on the machine. After a couple of months of ironing out the kinks, the design is finally ready for consumption.

In the end, the PCB design itself is quite simple. It’s really just a matter of switching around some pins from the standard ATX plug to the edge connector on the PCJr. There’s also a connector for powering a floppy drive, as well as headers for a fan and power switch.

[AkBKukU] has come up with two ways to use the adapter. You can either go with a standard ATX PSU, in which case it will need to sit outside the machine due to its size, or use a PicoPSU which allows you to keep the whole thing internal. If you don’t mind spending the cash, the PicoPSU method is a much cleaner installation that still provides plenty of power. Depending on which route you take, there are different 3D printed plates to adapt the computer’s rear panel to fit the new hardware.

All the files to build your own version are in the GitHub repository, and [AkBKukU] is doing some low volume runs of both kits and assembled adapter. If this project looks familiar, it’s because we reported on it back when it was still a hand-scratched PCB that didn’t always work as expected.

[Thanks to Gregg for the tip.]

Continue reading “ATX Adapter For The IBM PCJr Now Available”

Electromagnetic Field: TIM, A Relay Computer

We are probably all familiar with computing history to the extent that we know the earliest computers were surprisingly simple devices. While early electronic machines such as Colossus or ENIAC were hugely complex racks of tubes, once expressed as a schematic or as a network of logic gates they would be relatively straightforward for today’s electronic engineer to understand their operation. Those who have made an in-depth study of computing history may have heard of the work of Konrad Zuse in the mid-20th century, his relay-based machines predate their fully electronic cousins by several years.

A relay-based computer can be simple enough to be built by a home constructor, and at the recent Electromagnetic |Field hacker camp [Rory Mangles] outlined his TIM relay computer built while he was at school. It’s an engaging story starting from first principles and describing a series of TIM devices from a simple binary adder to the final fully Turing-complete computer. He describes the design process for his ALU, eventually going with a 1-bit serial design to economise on relays.

The machine has a Harvard architecture, with the program pathway consisting of a paper tape from which the code is run directly. The instruction set is called BLT, which of course means Basic Language of Tim, and there is a T++ assembly language. Loops and if statements are handled in a nod to the classical Turing machine by looping the paper tape. The original TIM is a few years old, but he reveals that he’s recently brought it out of storage and added a parallel port. Thus the finale of the talk is a demonstration, printing a “Hello World”.

We’ve placed the full video below the break, meanwhile we were lucky enough that [Rory] brought TIM along to the EMF Hackaday Readers village for our bring-a-hack, so the header image is from when we had a chance to examine it. If you’re curious to know more, he has a web site with some more TIM details.

Continue reading “Electromagnetic Field: TIM, A Relay Computer”