Hacking A Thermal Imager For Dual-use Of The Thermal Sensor

Sometimes a device doesn’t do quite what one needs, and in those cases a bit of tampering might do the trick. That’s what led to being able to record video from a HTI HT-A1 thermal imager despite the device not actually supporting that function, thanks to careful investigation and warranty violation.

Plugging in a custom USB cable allows a mobile phone app to access the thermal sensor, while the host device itself remains ignorant.

We’ve seen a teardown of the HT-A1 in the past, and it turns out that Seek — the manufacturer for the actual thermal sensor inside the device — released an OEM development kit and mobile phone app for their modules. Could this mean that the raw sensor module in the HT-A1 could be accessed via the developer kit app? One hacked together USB cable later showed that the answer is yes! Not only does the app allow viewing thermal imagery, but it makes it possible to do things like record video (a function the HT-A1 itself does not support.)

But even if the HT-A1 doesn’t allow recording, as a handheld thermal sensor with a screen it’s still pretty useful in its own way and it would be shame to gut the unit just for a raw sensor module. The best solution ended up being to put the sensor back into the HT-A1, and install some switching circuitry to disconnect the sensor from the HT-A1’s CPU and divert its data to the USB plug on demand. This means the HT-A1 can be used normally, but by plugging in a custom-made cable while the unit is off, the thermal sensor can be accessed by the mobile phone app instead. Best of both worlds. You can see a brief celebratory thermal cat video embedded below, proving it works.

Continue reading “Hacking A Thermal Imager For Dual-use Of The Thermal Sensor”

Optical Sensor Keeps Eye On Wandering Saw Blade

Over the last year or so, we’ve been checking in on the progress [Andrew Consroe] has been making with his incredible CNC scroll saw project. While we were already impressed with his first prototype version, he somehow manages to keep pushing the envelope forward with each new upgrade, and we’re always excited when one of his progress reports hits the inbox.

Recently he’s been struggling with the fact that the considerable flexing of the scroll saw’s ultra-thin blade introduces positional errors while cutting. To combat this, he’s developed an ingenious sensor that can track the movement of the blade in two dimensions without actually touching it. Utilizing the Raspberry Pi HQ camera, a 3D printed framework, and some precisely placed mirrors, [Andrew] says his optical sensor is able to determine the blade’s position to within 10 microns.

In the video below [Andrew] goes over how his “Split Vision Periscope” works, complete with some ray traced simulations of what the Pi camera actually sees when it looks through the device. After experimenting with different lighting setups, the final optical configuration presents the camera with two different perspectives of the saw blade set on a black background. That makes it relatively easy to pick out the blade using computer vision, and turn that into positional information.

The periscope arrangement is particularly advantageous here as it allows the camera and lens to be placed under the work surface and well away from the actual cutting, though we’re interested in seeing how it fares against the dust and debris that will inevitably be produced as the saw cuts. While he hit all of his design goals, [Andrew] does note that his mirrors do leave some room for improvement; but considering he hand cut them out of old hard drive platters we think the results are more than acceptable.

An incredible amount of progress has been made since the first time we saw the CNC scroll saw, and we’re eager to see this new sensor fully integrated into the next version of [Andrew]’s impressive long-term project.

Continue reading “Optical Sensor Keeps Eye On Wandering Saw Blade”

Adding Remote Controls To A Blackmagic Studio Camera Without Breaking The Bank

What to do when one ends up in the possession of a 4K studio camera, but without the requisite hardware and software to remotely control it? When [Glen Akins] ended up in this situation, he took the reasonable option here and developed his own knob-based remote control to adjust exposure and focus on the Blackmagic Designs Micro Studio Camera 4K. Without a remote control option, the only adjustment options are via fiddly small buttons on the camera itself, which wouldn’t have been a fun experience during the webcam usage that this camera would be used for.

This camera is normally controlled via the control channel on the SDI input which also handles the video output from the camera. For larger installations the proprietary ATEM software is commonly used, and there’s a $99 Arduino expansion board as well that’s apparently rarely stocked. With SDI not an option, the second option was LANC, which runs into pretty much the same issue with proprietary protocols and very expensive hardware.

Behind door number three is the more curious control option of the Futaba S.BUS protocol. Originally created for remotely controlling radio-controlled aircraft and similar remotely controlled systems, the thought here appears to be that this studio camera can also be used with systems that already have an S.BUS receiver, such as large drones.

With this S.BUS protocol having been reverse-engineered for a while now, it was a fairly straightforward procedure from there to create an MCU-based board with a lot of encoder knobs on it that map to a specific adjustment on the camera. The result of [Glen]’s labor can be found on GitHub.

Main image: The finished knob-box with the Blackmagic Designs camera. (Credit: Glen Akins)

Perfecting A 3D Printed Camera Motion Control Rig

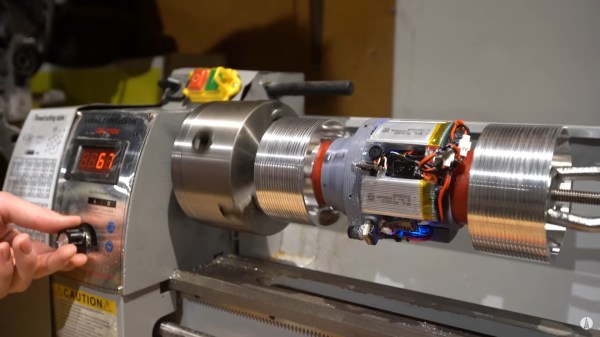
If you’ve ever watched one of those high production value YouTube videos and wondered how they’re able to get those smooth shots where the camera seems to be spinning around an object, you were probably looking at the product of an motorized camera motion system. There’s no question these rigs can produce visually striking shots, but their high cost usually keeps them out of the hands of us lowly hackers.

Unless of course you do like [Andy], and build your own. The latest version of this impressive rig features the ability to continuously rotate thanks to commercial 12-wire slip rings, with optical endstops so the machine can still be homed at the beginning of a move. An onboard Raspberry Pi and Arduino Uno are responsible for controlling the stepper motors, the configuration of which ends up being reminiscent of a standard 3D printer.

The MQTT remote can hold a phone for live video.

The software [Andy] has come up with lets him synchronize the camera rig with a small rotating platform he built, which allows for even more complex shots as demonstrated in the video below. It also supports a very slick MQTT-enabled remote controller that he built as a previous project, which makes taking direct control over the camera and monitoring its status much easier.

Want to add a little polish to your own project videos? [Andy] has released all of the files and information you’d need to build your own version of his motion control rig, though we wouldn’t blame you for feeling a bit intimidated by this one. It might not be the most elaborate camera motion control system we’ve seen, but it’s certainly up there. If you just want an overhead video and don’t need those fancy tracking shots, perhaps a modified VESA arm would fit the bill.

Continue reading “Perfecting A 3D Printed Camera Motion Control Rig”

Project Starline Realizes Asimov’s 3D Vision

Issac Asimov wrote Caves of Steel in 1953. In it, he mentions something called trimensional personification. In an age before WebEx and Zoom, imagining that people would have remote meetings replete with 3D holograms was pretty far-sighted. We don’t know if any Google engineers read the book, but they are trying to create a very similar experience with project Starline.

The system is one of those that seems simple on the face of it, but we are sure the implementation isn’t easy. You sit facing something that looks like a window. The other person shows up in 3D as though they were on the other side of the window. Think prison visitation without the phone handset. The camera is mounted such that you look naturally at the other person through your virtual window.

Continue reading “Project Starline Realizes Asimov’s 3D Vision”

Coffee Stirrers Act As Lens For This Digital Straw Camera

What happens when you mix over 23,000 coffee stirrers and a Raspberry Pi camera together? Probably nothing except for a mess, unless you very specifically pack the plastic straws and orient the camera just right. In that case, you get this very cool lenless digital straw camera that takes artfully ghostly images.

Image of Yoda photographed through many straws

Actually, lensless is a bit of a reach for [Adrian Hanft]’s creation. While the camera he’s using to grab the image has a lens, the objective, for lack of a better term, is just a tightly packed bundle of straws. We’ve seen this approach to photography before, but there the camera used film placed at the back of the straw bundles to capture the pixelated image.

Here, a ground glass screen stands in for the film; a long lightproof box behind that provide a place to mount a camera to capture the images. Cleverly, [Adrian] built the camera mount from Lego, allowing cameras and lenses to be quickly swapped out. A Nintendo gamepad controller talks to custom software running on a Raspberry Pi and allows the photographer to control exposure and scroll through pictures using a smartphone as a display. There’s a short build video below, for those who can’t get enough of straw-packing techniques.

As with the film version of this camera, we just love the look of the photographs that come from this — the texture of the straw honeycomb and the defocused subject make for a striking effect.

Continue reading “Coffee Stirrers Act As Lens For This Digital Straw Camera”

3D Printed Camera Crane For The Workshop

When you make a living building stuff and documenting the process camera setups take up a lot of time, breaking expensive equipment is an occupational hazard. [Ivan Miranda] knows this all too well, so he built a fully-featured camera crane to save his time and camera equipment. Video after the break.

The basic design is a vertical mast with a pivoting camera mounted to the end. The aluminum mast telescopes for increased vertical adjustability, and rides on a plywood base with caster wheels. The aluminum pivoting arm is counterweighed to offset the camera head, and a parallel bar mechanism allows the camera to hold a constant vertical angle with the ground. Thanks to the explosion of home gyms during the pandemic, gym weights were hard to find, so [Ivan] used an ammo can filled with sand and screws instead. A smaller sliding counterweight on top of the arm allows for fine-tuning. [Ivan] also wanted to be able to do horizontal sliding shots, so he added a pulley system that can be engaged with a clutch mechanism to keep a constant horizontal angle with the camera. Most of the fittings and brackets are 3D printed, some of them no doubt on his giant 3D printer.

We can certainly see this crane meeting its design objectives, and we can’t help but want one ourselves. [Alexandre Chappel] also built a camera crane a while back which utilized a completely different arm mechanism. As cool as these are, they still pale in comparison to [mingul]’s workshop-sized 8-axis CNC camera crane. Continue reading “3D Printed Camera Crane For The Workshop”