Flickr Photo Bike

Lifehacker’s [Gina Trapani] has one of Flickr’s photo bikes and wrote up how it works. As you ride, the bike automatically takes photographs, geotags them, and uploads them to Flickr. The handlebar unit contains a Nokia N95 cellphone. The rear is a solar powered charging unit. It has a custom python script that starts the photo taking sequence when it detects the bike is in motion using the phone’s accelerometer.

Most of the engineering seems to be for usability’s sake. We’re guessing they probably wanted to disguise that they’re bolting a $600 cellphone to a bike as well. Out of the box the Nokia N95 already does almost everything required. It has a 5 megapixel camera with an interval timer that can vary from 10 seconds to 30 minutes. It supports Flickr uploading, but with software like ShoZu you can streamline the geotagging and make all uploads automatic. Just build a solid mount for your N95 and you’ve pretty much got it, and when you park your bike you can take the phone with you.

Macro Photography With An IPhone


The camera lens on the iPhone is much like any other cameraphone lens in the fact that the lens has a fixed minimum and maximum focus length. If you want to get a little closer to your subject, you just might want to give [eastrain’s] macro camera mod a try.

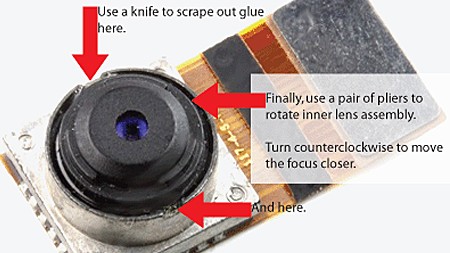
According to [eastrain] both first and second generation iPhone cameras have a screw type focus ring that has been glued to infinity from the factory. This was probably set so that 99% of your photos were roughly in focus.

Gaining access to the camera lens requires the disassembly of your phone and will undoubtedly void any type of warranty you may have had. Once the lens is in view you will need to break the 2 glue points that hold the lens at its current position.

Using needle nose pliers you can then rotate the lens counter clockwise to increase the zoom or clockwise to decrease it. Enabling the built in camera app allows you to see in real time your changes. When you’re satisfied, just put everything back together. Of course the next step should be an externally mounted ring to allow manual zooming on the fly.

Wiimoteless IR Whiteboard


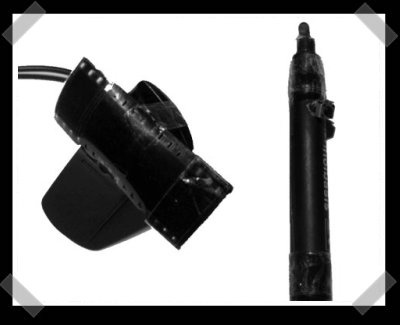
[Eduard] sent in his IR webcam whiteboard project. He wanted something like the Wiimote version, but without the expense of a Wiimote. He added some film negative to the camera to reduce the amount of visible light picked up by the CCD. (He notes that you might need to pull the IR filter from your camera to get a decent signal.) The pen is the usual IR LED with a power supply. To do the actual work, he wrote a custom application in Java.

Surveillance As Art


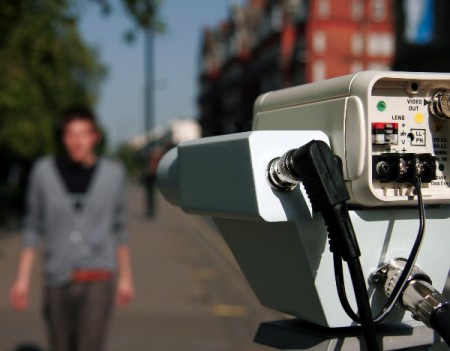
The Target Project is a graduate project from the Royal College of Arts in London. It is designed to make us question our relationship with surveillance technology and CCTV. This is a particularly meaningful demonstration for a country like Britain which is said to contain up to 4.2 million CCTV cameras or roughly 1 for every 14 people.

This project has two demonstrations on their site. The first is dubbed the RTS-2 (Racial Targeting System). This system is essentially a camera which follows faces and is able to analyze and interpret the person’s race. The second is SOLA. This system is able to quickly scan someone and calculate their body mass index then publish this information to the web. Both systems achieve their goal by blatantly pointing out a line in which more surveillance does not equate to more security. They also show the wealth of personal data that can be obtained about a person by a simple camera.

[via we make money not art]

Intervalometers And Timelapse Photography


Time lapse photography can seem out of reach for many of us who don’t have fancy cameras(or a hacked cannon point and shoot). We recently covered using a TI-83 as a timer, and now we’ve gathered a collection of DIY intervalometers to help you get clicking.

Up first, for those of you who don’t want to dismantle your camera, here are some mechanical ones that will work on any camera.

[Simplesimon] has done a fantastic job with this integrated system pictured above. He’s added an adjustable solenoid to click the shutter release. By including a second kit board to handle an RF remote, it has remote single shot capabilities too!

Continue reading “Intervalometers And Timelapse Photography”

StereoData Maker


So you got CHDK working on your camera, and the histograms, raw image files, variable shutter speeds and other added functions are amazing, but stereo imaging is what you really want. If you have two or more CHDK-ready cameras, it’s cheap and easy to run StereoData Maker, a system that synchronizes the shutter and flash of multiple cameras.

The first step in getting SDM to work is installing the software on your SD card. You’ll need to find the correct version for you camera; a list is available on the main SDM page. If you are running Windows XP or Vista, run the installer in the zip file. Otherwise, load the files on the SD card and run the installer directly from the camera. Then decide whether this will be the right or left camera and repeat the steps for your second camera.

Next, you’ll need to prepare a switch unit, essentially a set of synchronized USB remotes. There are many ready made commercial units available, but building one on your own shouldn’t be much trouble, and a few ideas are provided on the SDM instruction page.

You’re basically ready to start shooting stereo images, just take a few test shots to get used to it and to customize the configuration on the cameras.