This week in [Hackenings], we’ve got a full roster of interesting upcoming events scattered all over the world. Can’t afford airfare to India, but Dublin is in the next county over? We’ve got you covered.
KiCad in Bangalore
 IKP EDEN, in Bangalore, is hosting an Introduction to KiCad workshop on Sunday, Nov 13 from 10:00-2:00 pm. If you’re just getting started with PCB layout, or just want a quickstart learning KiCad, Hackaday contributor [Anool Mahidharia] will be there to show you how! Sign up on the link above, and bring your laptop with KiCad already installed.
Science in Dublin
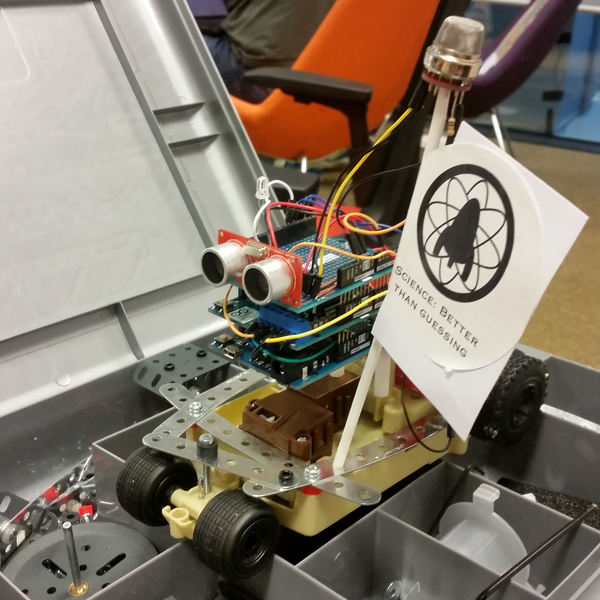
 TOG hackerspace in Dublin is putting on their fifth annual Science Hack Day, a 36-hour hardware and software hackathon on Nov 19 & 20th. Looking through their photos, past creations have included a laser mission-impossible crawl-through maze thing, some kind of freaky turtle, and many objects that move, make noise, or otherwise amuse.
“Each year we bring together, designers, coders, scientists, engineers and makers. Simply to make interesting things. Why? For adventure, for playfulness, for science!”
DevOppery (and Foppery) in Stuttgart
 Do you have what it takes to meet the needs of DevOps, Agile, and Cyber in the Enterprise Environment? Interested in Disruptive Cloud Computing or Mobile First Growth Hacking? Can you rub two buzzwords together and come up with marketing gold? Then you might have a fun time at the shack hackerspace in Stuttgart on Nov. 19th, for the eloop 2016 conference (translated here).
A full day’s talks include topics such as “Enterprise Patterns”, “Good Enough”, and the “Cult of Done Manifesto” as it relates to computer security. “What’s discussed at eloop today moves the digital markets of tomorrow.” YOLO!
Vote for Swindon
If you’re a UK citizen, you can vote to get the Swindon Makerspace some community funding so that they can furnish a new space. Why not?
Game Retro
And if you’re in Huntsville, Alabama, or environs, don’t forget Makers Local 256’s Retro Gaming night tonight (Saturday, 12th).
Hackenings? Hackenings!
[Hackenings] is our weekly Saturday morning (US, Pacific Time) roundup of what’s going to be going on in the hackerspace world in the upcoming week. If you’d like us to cover your event, email us at tips@hackaday.com and put [Hackenings] in the subject so that we don’t miss it. Thanks!