This excellent content from the Hackaday writing crew highlights recurring topics and popular series like Linux-Fu, 3D-Printering, Hackaday Links, This Week in Security, Inputs of Interest, Profiles in Science, Retrotechtacular, Ask Hackaday, Teardowns, Reviews, and many more.
It’s funny how quickly it can all come together. If there’s a hackerspace or makerspace in your area, I hope you’ve gone by to see what it’s like. If there isn’t, you can always start your own…
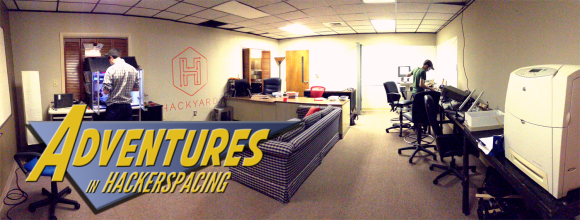
That notion seems so simple, doesn’t it? Round up a few like-minded folks, find a space—any space—shove them and some equipment into it. Two years of attempted round-ups and shove-ins, however, is enough to discourage the most passionate of would-be hackerspacers. By all predictions, the effort to start a hackerspace in Athens, GA was a marathon, a gradual advance culminating in a hard-earned workspace. But that’s not what happened. Hackyard Athens erupted into being.
A team based in Russia has developed a program that has passed the iconic Turing Test. The test was carried out at the Royal Society in London, and was able to convince 33 percent of the judges that it was a 13-year-old Ukrainian boy named Eugene Goostman.
The Turing Test was developed by [Alan Turing] in 1950 as an existence proof for intelligence: if a computer can fool a human operator into thinking it’s human, then by definition the computer must be intelligent. It should be noted that [Turing] did not address what intelligence was, but only tried to identify human like behavior in a machine.
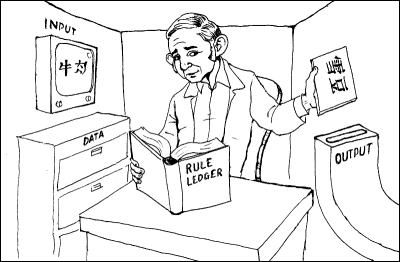
Thirty years later, a philosopher by the name of [John Searle] pointed out that even a machine that could pass the Turing Test would still not be intelligent. He did this through a fascinating thought experiment called “The Chinese Room“.
Yes, dogfighting with RC planes is cool. You know what’s even cooler? RC jousting. Considering these eight foot long planes are probably made of foam board or Depron, they’ll probably hold up for a fairly long time. The perfect application of RC FPV.
Home automation is the next big thing, apparently, but it’s been around for much longer than iPhones and Bluetooth controllable outlets and smart thermostats. Here’s a home automation system from 1985. Monochrome CRT display panel (with an awesome infrared touch screen setup), a rat’s nest of wiring, and a floor plan drawn in ASCII characters. It’s also Y2K compliant.
Here’s an idea for mobile component storage: bags. Instead of tackle and tool boxes for moving resistors and other components around, [Darcy] is using custom bags made from polyethylene sheets, folded and sealed with an impulse sealer. It’s not ESD safe, but accidentally zapping a LED with an ESD would be impressive.
Need a stepper motor test circuit? Easy, just grab one of those Polulu motor drivers, an ATtiny85, wire it up, and you’re done. Of course then you’re troubled with people on the Internet saying you could have done it with a 555 timer. This one is for them. It’s a 555, some wire, and some solder. Could have done it with discrete transistors, though.
Remember that “electronic, color sensing, multicolor pen” idea that went around the Internet a year or so ago? It’s soon to be a Kickstarter, and man, is this thing full of fail. They’re putting an ARM 9 CPU in a pen. A pen with a diameter of 15mm. Does anyone know if an ARM 9 is made in that small of a package? We’ll have a full, “this is a totally unrealistic Kickstarter and you’re all sheep for backing it” post when it finally launches. Also, this.
The flight controller is the nerve center of a drone. Drone flight control systems are many and varied. From GPS enabled autopilot systems flown via two way telemetry links to basic stabilization systems using hobby grade radio control hardware, there is an open source project for you.
Modern drone flight controllers can trace their roots back to R/C helicopters. Historically, R/C planes were controlled directly by the pilot’s radio. Helicopters added a new wrinkle to the mix: tail rotors. Helicopters use their tail (or anti-torque) rotor to counteract the torque of the main rotor attempting to spin the entire helicopter’s body. It all works great when the helicopter is hovering, but what about when the pilot throttles up to fly out? As the pilot throttles up, the torque increases, which causes the entire helicopter to do a pirouette or two, until the torque levels out again. The effect has caused more than one beginner pilot to come nose to nose with their R/C heli.
The solution to this problem was gyroscopes, heavy brass spinning weights that tilted in response to the helicopter’s motion. A hall effect sensor would detect that tilt and command the tail rotor to counteract the helicopter’s rotation. As the years wore on, mechanical gyros were replaced by solid state MEMS gyros. Microcontrollers entered the picture and brought with them advanced processing techniques. Heading hold gyros were then introduced. Whereas older “rate only” gyros would drift, weathervane, and wiggle, heading hold gyros would lock down the helicopter’s nose until the pilot commanded a turn. These single axis flight controllers were quickly adopted by the R/C helicopter community.
Today’s flight control systems have many sensors available to them – GPS, barometric pressure sensors, airspeed sensors, the list goes on. The major contributors to the flight calculations are still the gyros, coupled with accelerometers. As the name implies, accelerometers measure acceleration – be it due to gravity, a high G turn, or stopping force. Accelerometers aren’t enough though – An accelerometer in free fall will measure 0 G’s. Turning forces will confuse a system trying to operate solely on accelerometer data. That’s where gyros come in. Gyros measure rate of rotation about an axis. Just as our helicopter example above covered yaw, gyros can be used to measure pitch and roll of an aircraft. A great comparison of gyros and accelerometers is presented in this video from InvenSense.
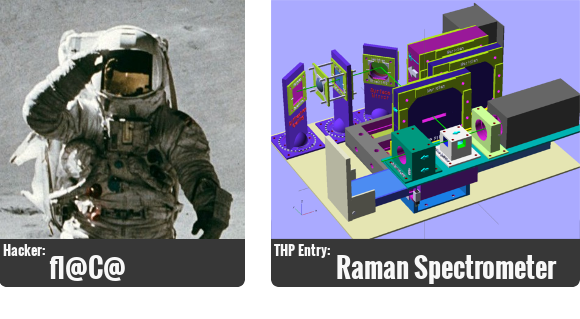
Now that we’re starting to get serious about The Hackaday Prize we thought we’d take a look at the lives of some of the hackers who have submitted entries. Meet fl@C@, who is working on a Raman Spectrometer which is largely 3D printed and uses a Raspberry Pi. He was kind enough to answer all of our questions, some serious and some not so.
Creating. It’s probably no surprise that I have many hobbies…but hardware hacking is my life. I got my first taste with my dads Imsai 8080 (showing my age, but I was fairly young!)..Then it was an Apple][.. I really dove into that. I built my own from a bare pcb to a working machine when I was around 11 or 12. Just moved up from there.. Really went nuts when I got a job at a surplus electronics store in the silicon valley.. I rarely took home a paycheck.. I have a few other hobbies, I’m a private pilot…love flying. I built a pretty cool device that allowed me to datalog my flights, my heartrate, keep track of the fuel, it speaks and connects to the comm to remind me when to switch tanks, etc.. I’ll have to put that up on the project page.
Well…For my day job, I am a Network Engineer.. I can’t really say for which company, but it’s big.
My Passion is Going Big
I would say my passion is going big..if it’s worth doing…..it’s worth overdoing. I love coming up with ideas that would make a difference. The spectrometer I am working on is actually only a small part of a larger project I am working toward. There are never enough hours, or dollars to cover all of my ideas…but I always work as hard as I can to get there.. TLDR- I’m excited every day to wake up and make another step towards changing the world.
I work from home, but in the office… it’s definitely the snack machine. Seriously? We can’t build a machine that dispenses snacks without getting them stuck?
I’d say linux. I’ve been a fan of ubuntu for a while.. lately I’ve been playing with xubuntu. I don’t care for messing with computers..lol. I love electronics, hardware, software and all that.. but I do not geek out over PC hardware..I consider them another tool…they need to work when I need them to work. lol
Not sure if you want a breakdown of what gear I have….I have quite a bit and a pretty elaborate lab setup..but I’m really a bit of a minimalist when it comes to day to day use.. I use my scope when it’s appropriate..my logic analyzer (saelae logic rocks) pretty often.. but I’d say my go to device is usually my DMM since it’s what I tend to use most often…I have a few, but I like to use the one that connects up to my PC so I can make screenshots, and/or see it from a distance..
I would have to default to the mBed for this one..for general purpose. I started out like most people probably with the basic stamp waaaay back…and went through a few others..and settled on the mBed when there was just one device, but now they have so many platforms that you can fit to whatever need..and some of them are dirt cheap. I’m using the ST Nucleo041RE for the spectrometer project, and it’s only $10 at mouser. I have just started peering into FPGA stuff, I hope to get some more time to work with them very soon, I see lots of potential.. I never really used Arduino’s until the past year or two when I got into quadcopters..they have a purpose..and are ok for quick and dirty stuff since you can source a pro mini on ebay for like 3 bucks..
Python has become my best friend. C++ is great and all, I’ve been forced to use VB6 for work…where they even use winbatch……. But python works.. and it’s easy to crank something out quickly, and you can build some pretty robust stuff with it..
Well, I have a couple that come to mind immediately that I honestly would love to share with the world…but won’t just yet.. =) So, I’ll go with what is left…hopefully it’s plenty for now..
I’d love to build a fusor. I built my first tesla coil when I was 17.. I’d love to take the hobby fusor to the next step..
A Moon Rover. Seriously. And the vehicle to get it there. I think we all agree rockets and gasoline both need to go away. Mankind needs to reach out beyond what we’re confortable with.
A fully autonomous multirotor. I actually started this project..have it all layed out..but it’s not high enough on my priority list to make it the rest of the way..I have probably 80% of the parts new in a box..I’ve started doing a writeup on it..and hope to get it up soon.
Learn the Value of Knowing Where and How to Find the Information [You] need
I wish that everyone would learn the value of knowing where and how to find the information they need to accomplish a goal. Schools typically force you to memorize facts and information that is often worthless. I would like for people to learn instead how to be adaptive in their approach to problems, and understand that there is always more than one answer.. and there is a huge resource out there that will enable you to make educated decisions and reach grander goals. We live in a great time with that…and in that way, the internet is underutilized…
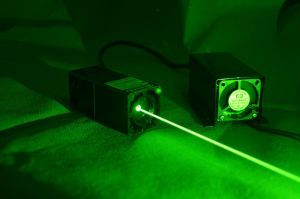
The timing was right…I thought this was an interesting and unique project..I had promised myself to try to be more open and share..this project was perfect since it has 3d parts people can print themselves, a raspberryPi, a sorta arduino and a cool laser…plus I figured there are several people out there that could either benefit from a low cost raman spectrometer, or at least benefit from some part of it..be it the parts I designed or just the understanding of how it works and what they’re used for…
I always keep an open mind, and consider any advice given.. There have been many aspects of this project that created a challenge.. This is my first serious venture into 3d printing this much stuff…I’ve never really worked with lasers and optics in such a way.. Avoiding spending thousands on optics was a major challenge. I have been doing all the research I can to understand the best approach to imaging…My first idea was to modify a webcam to take long exposures since the light reaching the camera will be fairly faint..after looking into that, it’s not just a lot of work and difficult to reproduce…but the cameras that others have modified are ancient and next to impossible to find. I wanted to go with a camera that anyone could find…the raspiCam kept surfacing as the best choice…so, the next challenge was how to get the long exposure…the raspiCam driver doesn’t really allow for 10-30 second exposures… so the next idea was to take several shots, and stack them to build a usable image.. so my latest approach is to take a 90fps video for a couple seconds, split that into individual frames, and stack those.. If anyone has suggestions in this area, I’d love to hear them.. I planned on using either mathematica or qtoctave from python, etc..
A Moon Rover. =) It’d probably most definately be a team effort.. But I think as a community, the skills are out there. And the google XPrize shouldn’t be the only game in town.. I think things are building up to this kind of stuff anyway, but someone’s got to be first.
Live Out Loud Every Day
I’d just like to say…putting this project on this site was a major debate for me. I grew up with parents that had secret clearances, and privacy was central. I’ve been trying to build up the courage to share my work and ideas with the world because I think it benefits everyone. This project is my first to share, and for it to be featured here, and for me to be honored with being the first the be featured is really amazing. I appreciate this whole community, I’ve learned a lot from it over the years and I hope to be able to give back and contribute more soon!
Why not round out our two-week Bay Area Maker Faire coverage with a Links post? This time around it’s video links. We mixed together a bunch of interesting clips that didn’t get their own video, as well as a dose of what it feels like to walk around the Faire all weekend. Join us after the break for the links.
We’re pretty sure that most of our readers already know it by now, but we’ll tell you anyway: the Hackaday community (writers and readers) is currently developing an offline password keeper, the Mooltipass. As it has been more than two weeks since we wrote an article about our progress, today’s will be about the Mooltipass front panels and our beta testers program.
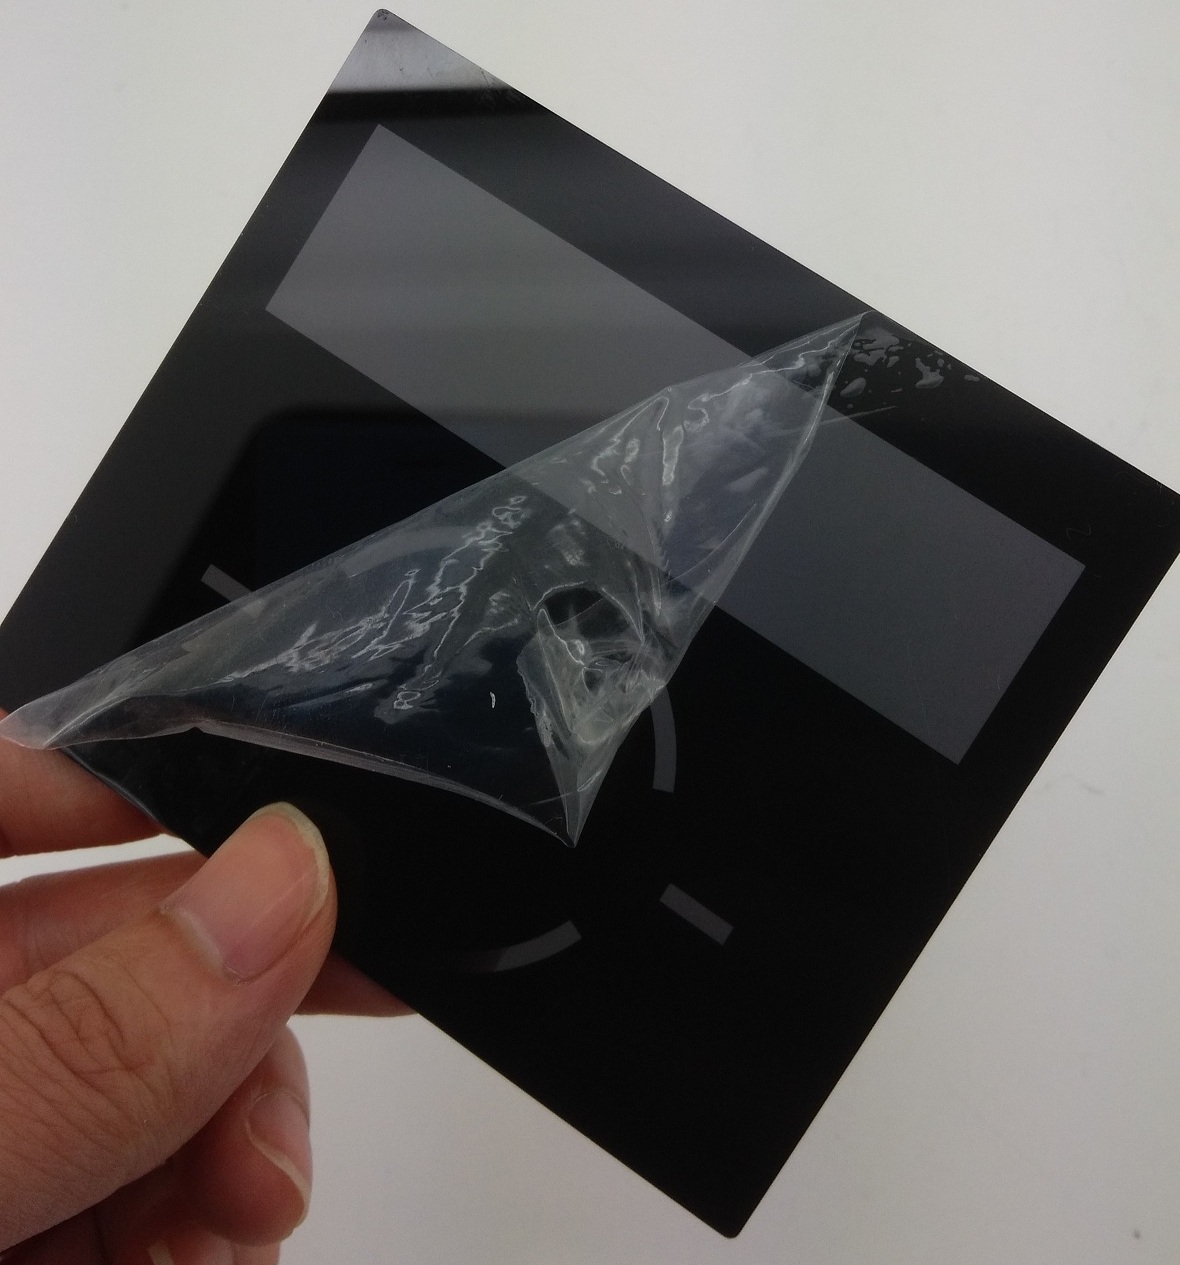
At the end of our mechanical design rundown article we showed that we were originally planning to put a slightly tinted acrylic panel on top of our device. We however could still make out the Mooltipass’ insides, which wasn’t in line with the nice professional look we wanted. We then designed another front panel, one which was transparent above the OLED screen/LEDs and opaque (black) on top of the rest. To our surprise the result still wasn’t as good as we had hoped, as the contrast between the front panel and the screens/LEDs was too big. We finally came up with the panel shown above (see GitHub repository folder) which combines the two techniques previously described. As it is still in China, we’ll show you the final result when we get it in our hands.
We launched around 10 case prototypes in production, they will soon be shipped to our current contributors/advisers together with the smart cards chosen by Hackaday readers. In the meantime we sent our official call for beta testers to our mailing list recipients and hackaday.io followers, in which we asked them to fill a small form that will allow us to know them a bit better. We asked about their home/work computer setup, their level of expertise, their willingness to contribute to the prototype cost and finally specifics about who would use the Mooltipass they’d receive. We are targeting a broad range of users but also testers that will provide us with detailed feedback and clear bug reports.
We also spent quite a while searching for cheaper alternate parts that could be sourced in relatively big quantities. This is usually an overlooked aspect of a project so we preferred to tackle this as soon as possible. In a few weeks the contributors and I will receive all the components required to assemble our final prototype (front panels / case / top & bottom PCBs / smart cards) and it will be time to write a new update. Want to stay informed? You can join the official Mooltipass Google Group or follow us on Hackaday Projects.




 The flight controller is the nerve center of a drone. Drone flight control systems are many and varied. From GPS enabled autopilot systems flown via two way telemetry links to basic stabilization systems using hobby grade radio control hardware, there is an open source project for you.
 Now that we’re starting to get serious about The Hackaday Prize we thought we’d take a look at the lives of some of the hackers who have submitted entries. Meet

 Well…For my day job, I am a Network Engineer.. I can’t really say for which company, but it’s big.

 I’d say linux. I’ve been a fan of ubuntu for a while.. lately
  I love electronics, hardware, software and all that.. but I do not geek out over PC hardware..I consider them another tool…they need to work when I need them to work. lol
 Not sure if you want a breakdown of what gear I have….I have quite a bit and a pretty elaborate lab setup..but I’m really a bit of a minimalist when it comes to day to day use.. I use my scope when it’s appropriate..my logic analyzer (saelae logic rocks) pretty often.. but I’d say my go to device is usually my DMM since it’s what I tend to use most often…I have a few, but I like to use the one that connects up to my PC so I can make screenshots, and/or see it from a distance..
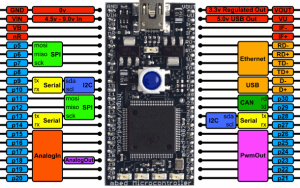
 Python has become my best friend. C++ is great and all, I’ve been forced to use VB6 for work…where they even use winbatch……. But python works.. and it’s easy to crank something out quickly, and you can build some pretty robust stuff with it..
 Well, I have a couple that come to mind immediately that I honestly would love to share with the world…but won’t just yet.. =) So, I’ll go with what is left…hopefully it’s plenty for now..
 The timing was right…I thought this was an interesting and unique project..I had promised myself to try to be more open and share..this project was perfect since it has 3d parts people can print themselves, a raspberryPi, a sorta arduino and a cool laser…plus I figured there are several people out there that could either benefit from a low cost raman spectrometer, or at least benefit from some part of it..be it the parts I designed or just the understanding of how it works and what they’re used for…

 A Moon Rover. =) It’d probably most definately be a team effort.. But I think as a community, the skills are out there. And the google XPrize shouldn’t be the only game in town.. I think things are building up to this kind of stuff anyway, but someone’s got to be first.
 I’d just like to say…putting this project on this site was a major debate for me. I grew up with parents that had secret clearances, and privacy was central. I’ve been trying to build up the courage to share my work and ideas with the world because I think it benefits everyone. This project is my first to share, and for it to be featured here, and for me to be honored with being the first the be featured is really amazing. I appreciate this whole community, I’ve learned a lot from it over the years and I hope to be able to give back and contribute more soon!