Fail Of The Week: Baby Monitor Hack Ends In Facepalm

fotw-baby-monitor-repaired-the-hard-way

Editor’s Note: This was the last Fail of the Week tip we had stored up. If you want to see the series continue on a weekly basis we need help finding more documented fails! Please look back through your projects and document the ones that didn’t go quite right. We also encourage you to send in links to other fails you’ve found. Just drop the links in our tips line. Thanks!

Now on with business. This is a baby monitor which [Eric] cleverly repaired, only to realize that he more than likely did it the hard way. The monitor was broken and went unused until his son figured out how to climb out of the crib, so he figured it was time to start monitoring again. Pulling the unit from the brink of the parts bin he set to work repairing the broken power connector.

Further inspection of the power adapter showed that it was spec’d to put out 5V at 1A. This falls in line with USB power, so he clipped the end off of a USB-B cable and used a hunk of proto-board to inject the 5V lines into the device. It was when it came time to reassemble the case that he flipped the board over and discovered an existing USB-B port. He could have just cut a hole in the case to get at the connector and plugged the un-altered cable in directly. Oh well… we’re sure it was fun figuring out his own custom solution!


2013-09-05-Hackaday-Fail-tips-tileFail of the Week is a Hackaday column which runs every Wednesday. Help keep the fun rolling by writing about your past failures and sending us a link to the story — or sending in links to fail write ups you find in your Internet travels.

3D Printering: Making A Thing With AutoCAD, Part I

printering

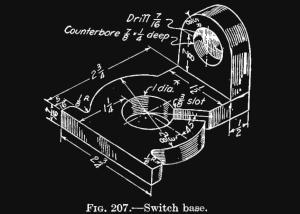
Octopodes and useless plastic baubles begone. It’s time yet again for another installment of learning how to make a thing with 3D design tools. This week, we’re making something with AutoCAD. It’s an amazing piece of software that costs $4000 per seat. Hilariously expensive for any home tinkerer, but if you go to a university with an engineering program, there’s a computer lab with machines running AutoCAD somewhere on campus.

Last week we took a look at making something with OpenSCAD. AutoCAD is much, much different. Where OpenSCAD is sorta, kinda like programming, AutoCAD is just a digital version of t-squares, triangles, straight edges, and people getting uppity when you don’t call their drawing device a ‘lead holder’.

I’ve broken this tutorial down into two parts: right now you’re reading the tutorial on drawing 2D objects in AutoCAD. This weekend I’ll publish the transformation of 2D objects into a 3D printable part. Read on for how to create a 2D object in AutoCAD.

Continue reading “3D Printering: Making A Thing With AutoCAD, Part I”

Developed On Hackaday: First Version Of The Hardware

mooltipass-schematic-featured

The Hackaday writers and readers are currently working hand-in-hand on an offline password keeper, the mooltipass (click to see the project description). 

Next in our Developed on Hackaday series, we present the first version of our schematics. There’s already been a lot of discussions going on in our dedicated Google group, mainly about the project’s basic functionality. Because our firmware developers wanted to get to work, we decided to send the first version of our hardware into production a few days ago. Before going through the schematics, let’s review the required list of the mooltipass’s core components:

  • an easily-readable screen
  • a read-protected smart-card
  • large flash memory to store the encrypted passwords
  • an Arduino-compatible microcontroller with USB connectivity

We’ve been drowning in component suggestions from motivated hobbyists, so we figured we’d make the mooltipass v1 as simple as possible and then move from there. Given this device is developed on Hackaday, we also wanted future users to modify it, building completely new projects based around these main components. Keep reading for our schematics…

Continue reading “Developed On Hackaday: First Version Of The Hardware”

Retrotechtacular: Films Used To Be Recorded On Film

retrotechtacular-movie-film-photo-finishing

We’re sure that this title makes some readers itch because there are still a number of well-respected directors who insist on shooting with film rather than digital, but the subject of this week’s Retrotechtacular shows a portion of the movie industry that has surely been relegated to life-support in the past few decades. Photo finishing, once the stronghold of chemical processes used by all to develop their photographs, has become virtually non-existent. This is the story of how film and photo finishing drove cinema for much of its life.

The reels seen above are negative and positive film. The negative film goes in the camera and captures the images. After developing and fixing the negative film, the process is repeated. Light shines through the fixed negative in order to expose a fresh reel of film. That film is finished and fixed to create the reel which can be used in a projector. This simple process is covered near the beginning of the clip found below. The 1940 presentation moves on to discuss the in-depth chemistry techniques used in the process. But you’re really in for a treat starting about half-way through when the old manual methods are shown, which have been replaced by the “modern laboratory”. We love those huge analog dials! The video concludes by showing the true industrialization of the film developing process.

We’re running out of Retrotechtacular topics. If you know of something that might be worth a feature please send in a tip!

Continue reading “Retrotechtacular: Films Used To Be Recorded On Film”

Developed On Hackaday: Setting Up The Project’s Infrastructure

2013-12_Developed_on_Hackaday

We’re pretty sure that most of our readers already know it by now, but we’ll tell you anyway: the Hackaday community (writers and readers) is currently developing an offline password keeper. In the first post of our first DoH series, we introduced the project and called for contributors. In the comments section, we received very interesting feedback as well as many feature suggestions that we detailed in our second write-up. Finally, we organized a poll that allowed everyone to vote on the project’s name.

The results came in: the project’s name will be mooltipass. We originally had thought of ‘multipass’ but [asheets] informed us that Apple and Canon had both applied for this trademark. [Omegacs] then suggested ‘mooltipass’ as an alternative, which we loved even more. A few days ago we set up a google group which is already very active.

An often under-estimated side of a community driven project is its infrastructure and management. (How) can you manage dozens of motivated individuals from all over the globe to work on a common project? How can you keep the community informed of its latest developments?

Continue reading “Developed On Hackaday: Setting Up The Project’s Infrastructure”

Fail Of The Week: Physical Pixel Display

fotw-physical-pixel-display

This physical pixel display reminds us of a couple of different hacks that we’ve seen over the years. It looks impressive, but [Matt] couldn’t quite get it to work. It wasn’t the Kinect sensor and image interpretation that was the problem. It was a failure to get the hardware components seen above to perform reliably.

If you can’t figure out what this is supposed to do, take at look at the inFORM morphing table or the pixel wall installed at the Hyundai expo last year. [Matt’s] attempt is much more modest with a grid of just 10×6. The pixels themselves are ballpoint pens (he gets bonus points for cheap and easy materials). The pens move in and out thanks to some Bowden cables connected to hobby servos. The mechanical engineers have probably already figured out the fail… the pixels seem to get hung up and despite several revisions in the materials used , it couldn’t be fixed.

The hobby servos were chosen because they are much less expensive than proper linear actuators. We thought maybe [Matt] should build his own solenoids but that’s not a great idea because you can’t have variable depth that way (can you?).  Perhaps the pens should be vertical and the servos could pull on a string attached to the pen via a pulley with gravity to return them to the starting position? There’s got to be an inexpensive and relatively simple way get this thing working. Let us know how you’d get the project back on track by leaving a comment below.


2013-09-05-Hackaday-Fail-tips-tileFail of the Week is a Hackaday column which runs every Wednesday. Help keep the fun rolling by writing about your past failures and sending us a link to the story — or sending in links to fail write ups you find in your Internet travels.

3D Printering: Making A Thing With OpenSCAD

This week, we’re starting off with OpenSCAD, a 3D modelling program that’s more like programming than drawing. A lot of useful 3D printable objects – including the parts for a lot of RepRaps – are designed in OpenSCAD, so hopefully by the end of this you’ll be able to design your own parts.

This isn’t meant to be a complete tutorial for OpenSCAD; I’m just demoing SCAD enough to build a simple part. Next week I’ll most likely be designing a part with AutoCAD, but if you have an idea of what software tools I should use as a tutorial to make a part, leave a note in the comments. Check out the 3D Printering guide to making a part with OpenSCAD below.

Continue reading “3D Printering: Making A Thing With OpenSCAD”