Trimmed PCB Makes The Ultimate Portable N64

One of the most impressive innovations we’ve seen in the world of custom handhelds is the use of “trimmed” PCBs. These are motherboards of popular video game consoles such as the Nintendo Wii and Sega Dreamcast that have literally been cut down to a smaller size. As you can imagine, finding the precise shape that can be cut out before the system stops functioning requires extensive research and testing. But if you can pull it off, some truly incredible builds are possible.

Take for example this absolutely incredible clamshell N64 built by [GMan]. After cutting the motherboard down to palm-sized dimensions, he’s been able to create a handheld system that’s only a bit larger than the console’s original cartridges.

Incidentally those original cartridges are still supported, and fit into a slot in the rear of the system Game Boy style. It’s still a bit too chunky for tossing in your pocket, but we doubt you could build a portable N64 any smaller without resorting to emulation.

In the video after the break, [Gman] explains that the real breakthrough for trimmed N64s came when it was found that the system’s Peripheral Interface (PIF) chip could be successfully relocated. As this chip was on the outer edge of the PCB, being able to move it meant the board could get cut down smaller than ever before.

But there’s more than just a hacked N64 motherboard living inside the 3D printed enclosure. [Gman] also designed a custom PCB that’s handling USB-C power delivery, charging the handheld’s 4250 mAh battery, and providing digital audio over I2S. It’s a fantastically professional setup, and you’d be forgiven for thinking the board was part of the original console.

Considering how well designed and built this N64 SP is, it probably will come as no surprise to find this isn’t the first time [Gman] has put something like this together. He used many of the same tricks to build his equally impressive portable Dreamcast last year.

Continue reading “Trimmed PCB Makes The Ultimate Portable N64”

You’ll Flip For This Toggle Switch Handheld Game

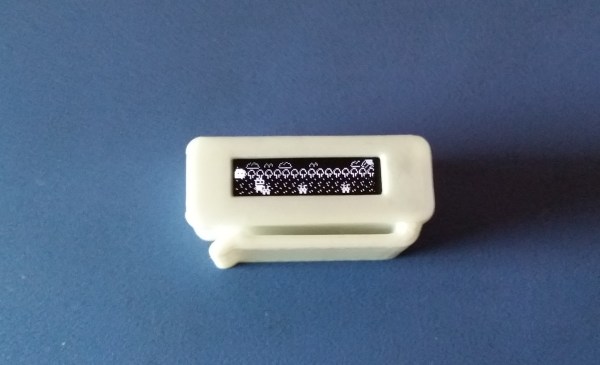
Teacher says that every time a toggle switch clunks, a hacker gets their wings. Or something like that. All we know is that there are few things the hardware tinkerer likes more than the satisfying action of a nice flip. Which by extension means this handheld game built by [Roman Revzin] and controlled by nothing more than three toggle switches will likely be a big hit at the hackerspace.

The parts list for this game, which [Roman] calls the ToggleBoss, is about as short as it gets. There’s a NodeMCU ESP8266 development board, a common SH1106 OLED display, and a trio of suitably clunky toggle switches. Add a bit of wire, toss it all into a 3D printed enclosure, and you’re halfway to thumb flicking nirvana.

Naturally, you might be wondering about the sort of games that can be played with three latching digital inputs; after all, it’s not exactly the most conventional controller layout. But there is where ToggleBoss really shines. Instead of trying to shoehorn traditional games into an exceptionally unconventional system, [Roman] has come up with several games which really embrace the limited input offered to the user.

In a platforming game not unlike the classic Mario Bros, the positions of the physical switches are mapped to virtual walls that are raised and lowered to control a character’s movement through the level. Another game shows the player three dots which correspond to the intended switch states, which they have to match as quickly and as accurately as possible. [Roman] has released the source code to his current lineup of games, which hopefully will inspire others to try their hand at creating software for this fascinating little system.

With the availability of cheap OLED displays and powerful microcontrollers, we’ve started to see more of these bespoke gaming systems. While some will undoubtedly prefer a pocket full of Nintendo’s classics, we think there’s something special about a game system that you can truly call your own.

Arduino Handheld Game System Gets A Grip

With little more than an Arduino, an OLED display, and some buttons, it’s easy to build your own faux-retro game system. There’s even a growing library of titles out there that target this specific combination of hardware, thanks in no small part to the Arduboy project. But unless you’re content to play Circuit Dude on a breadboard, at some point you’ll probably want to wrap the build up in a more convenient form.

Like many that came before it, the OLED handheld created by [Alex Zidros] takes inspiration from a Nintendo product; but it’s not the Game Boy. Instead, his design is based on a 3D printed grip for the Switch Joy-Cons that he found on Thingiverse. After tacking on a holder for the PCB, he had the makings of a rather unique system.

We especially like the offset SSD1306 OLED display. Not because we think a game system with an asymmetrical layout is a particularly sound design decision, but because it gives the whole build a rather cyberpunk feel. When combined with the exposed electronics, the whole system looks like it could have been cobbled together from a futuristic dumpster. Which is high praise, as far as we’re concerned.

Opposite the display is a LiPo pouch battery that [Alex] says was liberated from a portable speaker, and down below is an Adafruit Feather 328P. There are two tactile switches mounted to the front of the Feather, and in something of a departure from these sort of builds, there are two more on the shoulders of the 3D printed case. Everything is held together with nothing more exotic than a scrap of perfboard, making it easy for anyone who might want to build their own version.

If you prefer your Arduino and OLED gaming to come in a slightly more familiar form factor, the build that was done inside of a Dreamcast Visual Memory Unit (VMU) has always been a favorite around these parts.

A Miniature Laptop You Can Build Yourself

Over the last couple of years, we’ve seen more and more hackers building their own custom computers. We’re not just talking casemods here; enabled by advancements in desktop 3D printing and increasingly powerful boards such as the Raspberry Pi 4, these are machines designed and built from the ground up to meet the creator’s particular set of needs and desires.

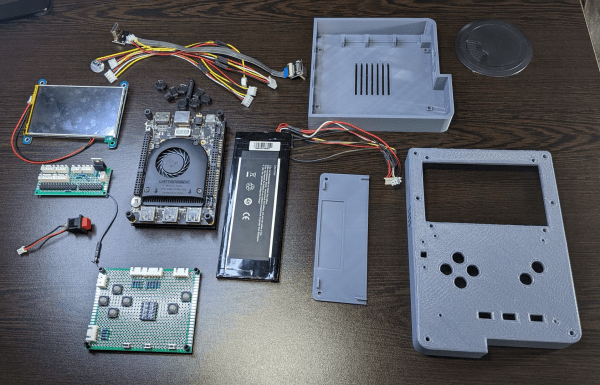
A perfect example of this trend is the Rasptop 2.0, a remarkably practical design for a 3D printed miniature laptop. Despite the name, you don’t even need to use the Raspberry Pi if you don’t want to. Creator [Morgan Lowe] has designed the Rasptop to take other single board computers (SBCs) such as the Asus Tinker Board or even the Intel Atom powered Up Board. So whether you want an energy efficient ARM machine running Linux for development, or a mobile Windows box for on the go gaming, you can use the same printed parts.

At the most basic level, the Rasptop 2.0 is just a hollow box with a hinged compartment for a screen mounted on top. You’re free to equip it with whatever hardware you chose. If you’re after maximum runtime you could fill all the free space with batteries, or maybe install multiple hard drives if you’re a data horder in need of a mobile terminal. Even the various SBCs that [Morgan] has tested are really just suggestions. The choice is yours.

Perhaps also our favorite feature of the Rasptop is how he worked a keyboard into the design. Rather than just leaving a big rectangle in the STL for you to shove a mobile keyboard into, the top surface is designed to mount the PCB and membrane keypad of one of those mini wireless keyboards you see on all the import sites. Aside from the fact it’s a good deal chunkier than what we expect from modern mobile devices, it has a very finished and professional overall look.

Of course if you’d rather use all these powerful tools to build a computer that’s somewhat farther off the beaten track, your design could abandon the traditional computer form factors altogether.

How Low Can An ESP32 Go?

Many of us have experimented with the ESP32 microcontroller, attracted by its combination of WiFi and a powerful processor core, but how many of us will have explored all of its many on-board features? One of the more interesting capabilities of this chip comes in the form of its ultra-low-power (ULP) co-processor, an extra core that allows an ESP32 to function while sipping tiny quantities of power with the ever-hungry main cores turned off.

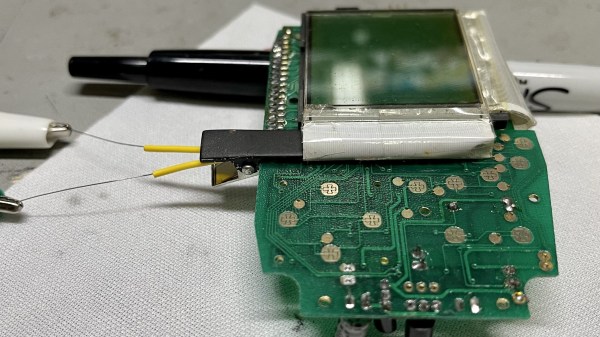
It’s a feature that [Max Kern] has used to great effect in his low power ESP32 handheld computer, where he’s paired the chip with a low-power Sharp Memory LCD and used the ESP32’s ULP core to keep the display alive while the ESP cores are sleeping. Software wise the device sports basic PDA and clock functionality including an RSS parser, all of which can be seen in the video below the break. Its inspiration came from Panic’s crank-equipped Playdate console, with which it shares the Sharp display.

Seeing this device reminds us of some of the badges featuring ESP32 power that we’ve seen over the last few years. An event badge creator has a constant battle to give the device enough battery life to last the distance. It’s a problem the designers of the SHA 2017 badge solved with an e-ink unit, but perhaps the Sharp display could offer a cost-effective alternative for new designs.

Continue reading “How Low Can An ESP32 Go?”

A Pocket-Sized Terminal For Mobile Python Hacking

Inspired by the good old days when your computer would boot directly into BASIC, [Le Roux Bodenstein] has created a handheld device he calls “DumbDumb” that can drop you into a MicroPython environment at a moment’s notice. If that doesn’t interest you, think of it this way: it’s a (relatively) VT100 compatible serial terminal with a physical keyboard that can fit in your pocket.

Being essentially just a dumb terminal (hence the name), there’s actually not a lot of hardware on the board. Beyond the 320×240 NewHaven 2.4 inch LCD, there’s just an STM32G071R8 microcontroller and a handful of passives. Plus the 57 tactile buttons that make up the keyboard, of course.

The MicroPython part comes in thanks to the spot on the back of the board that accepts an Adafruit Feather Wing. In this case, it’s the HUZZAH32 with an ESP32 on board, but it could work with other variants as well. With the wide array of Feather boards available, this terminal could actually be used for an array of applications.

So even if fiddling around with MicroPython isn’t your idea of a good time, there’s almost certainly some interesting software you could come up with for a tiny network-attached terminal like this. For example, it might be just what you need to start working on that LoRa pager system.

An Epic Quest To Build The Perfect Retro Handheld

It’s a good time to be a fan of classic video games. Most of us carry around a smartphone that’s more than capable of emulating pretty much everything from the 32-bit era on down, and if you want something a little more official, the big players like Sony and Nintendo have started putting out “retro” versions of their consoles. But even still, [Mangy_Dog] wasn’t satisfied. To get the portable emulation system of his dreams, he realized he’d have to design and build it himself.

The resulting system, which he calls the “Playdog Blackbone”, is without a doubt one of the most impressive DIY builds we’ve ever seen. While there are still some issues that he’s planning on addressing in a later version of the hardware, it wouldn’t be an exaggeration to say that there’s commercially available game systems that didn’t have half as much thought put into them as the Blackbone.

Which is, incidentally, how this whole thing got started. The original plan was to buy one of those cheap emulation handhelds, which invariably seem to come in the form of a PSP clone, and fit it with a Raspberry Pi. But [Mangy_Dog] quickly realized that not only were they too small to get everything he wanted inside, but they also felt terrible in the hand. Since he wanted the final product to be comfortable to play, his first step was to design the case and get feedback on it from other retro game enthusiasts.

After a few iterations, he arrived at the design we see today. Once he printed the case out on his SLA printer, he could move on with fitting all of his electronics inside. This takes the form of a custom PCB “motherboard” which an Orange Pi Zero Plus2 (sorry Raspberry fans) connects to. There’s actually a surprising amount of room inside the case, enough for niceties like dual speakers and a fan complete with ducting to keep the board cool.

Unsurprisingly, [Mangy_Dog] says a lot of people have been asking him if they can buy their own version of the Blackbone, and have suggested he do a crowdfunding campaign to kick off mass production. While he’s looking at the possibility of resin or injection molding the case so he can produce a few more copies, on the whole, his attention has moved on to new projects. Which frankly, we can’t wait to see.

If you’re interested in slightly more modern games, we’ve seen a number of handhelds based on “trimmed” Nintendo Wii’s which you might be interested in. While they might not have the sleek external lines of the Blackbone, the work that goes into the electronics is nothing short of inspirational.

Continue reading “An Epic Quest To Build The Perfect Retro Handheld”