SparkFun has a new wing of hardware mischief. It’s SparkX, the brainchild of SparkFun’s founder [Nate Seidle]. Over the past few months, SparkX has released breakout boards for weird sensors, and built a safe cracking robot that got all the hacker cred at DEF CON. Now, SparkX is going off on an even weirder tangent: they have released The Prototype. That’s actually the name of the product. What is it? It’s a HARP, a hardware alternate reality game. It’s gaming, puzzlecraft, and crypto all wrapped up in a weird electronic board.
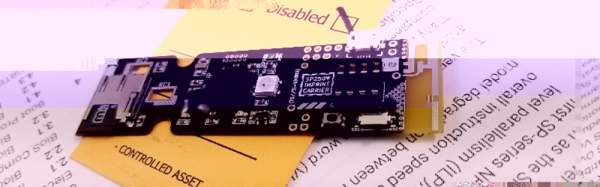
The product page for The Prototype is exactly as illuminating as you would expect for a piece of puzzle electronics. There is literally zero information on the product page, but from the one clear picture, we can see a few bits and bobs that might be relevant. The Prototype features a microSD card socket, an LED that might be a WS2812, a DIP-8 socket, a USB port, what could be a power switch, a PCB antenna, and a strange black cylinder. Mysteries abound. There is good news: the only thing you need to decrypt The Prototype is a computer and an open mind. We’re assuming that means a serial terminal.
The Prototype hasn’t been out for long, and very few people have one in hand. That said, the idea of a piece of hardware sold as a puzzle is something we haven’t seen outside of conference badges. The more relaxed distribution of The Prototype is rather appealing, and we’re looking forward to a few communities popping up around HARP games.