Cloning An Infrared Disarming Remote Of A $8 Home Security System

5

[Sylvio] decided to buy one of the cheap alarm systems you can find on the internet to have a look at its insides. The kit he bought was composed of one main motion sensor and two remote controls to arm/disarm it.

Communication between the remotes and the sensor is done by using infrared, requiring a direct line of sight for a signal to be received. Modern alarm systems typically use RF remotes with a typical frequency of 434MHz or 868MHz.  In his write-up, [Sylvio] first tries to replicate the IR signal with one of his ‘learning remote controls’ without success and then proceed to reverse engineering the remote circuit shown in the above picture. Hackaday readers may figure out just by looking at it that it is a simple astable multivibrator (read ‘oscillator’). Its main frequency is 38.5kHz, which is typical for IR applications. Therefore, if one of your neighbours had this ‘security system’ one could just disarm it with any of the same remotes…

[Sylvio] then explains different ways to replicate the simple IR signal, first with an Arduino then with a frequency generator and finally using the USB Infrared Toy from Dangerous Prototypes. We agree with his conclusion: “you get what you pay for”.

Organizing Transistors

SAMSUNG

Late last year, [matseng] set up an interesting challenge for himself: design a new PCB every week, send it off to a fab house, and build a new project. It’s a grueling endeavor, but some of these projects are actually very useful and cool. One of the best so far is the TraId – a board that identifies a transistor type and pinout with a nice LED interface.

This build was partly inspired by Dangerous Prototypes’ Part Ninja, a board that determines the pinouts and values of transistors, resistors, caps, and diodes. The TraId is a much more cut down version usable only for transistors, displaying the orientation of the pins and type of transistor on a set of 8 LEDs.

Although the design is very sparse, we could imagine something like this being very useful in a hackerspace, lab, or anywhere else the gremlins of chaos come to reorganize parts drawers. If you’d like to build your own, all the required files are up on the gits.

An Improved Bubble Display With RGB LEDs

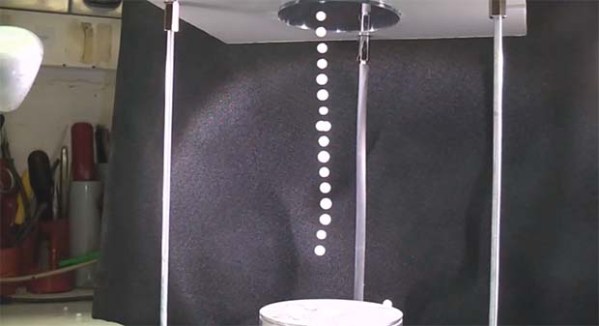
Making a bubble display is quite an undertaking, but [Jay] takes advantage of iterative design to construct this impressive (and at 60 tubes, massive) bubble display. The display functions by dispensing bubbles to serve as illuminated pixels in each tube as they rise through the fluid. His build log steps through the display’s construction with a keen attention to detail and above all, patience.

Rather than diving right in and slapping some tubes together, [Jay] took the time to research other bubble display projects, including one we featured a few years back that grew out of yet another HackaDay article. His prototypes started off small to test potential features: whether to use water or glycerin, timing for the air pumps and bubble size, and several others. [Jay] even filled the log with videos of every test, so you can watch the problems and solutions unfold at each step.

The finished display boasts sixty 30″ tall tubes, making it 64″ wide. [Jay] also installed RGB LEDs at every edge where the tubes meet to better distribute the light. You can watch one of the many videos of the display at work below.

Continue reading “An Improved Bubble Display With RGB LEDs”

Graffiti Briefcase For Stealth Tagging

We’re floored by painter and engineer [Bob Partington’s] graffiti briefcase, which proves how well art and tech can complement one another. Fear not, Arduino haters, [Bob]’s case is an analog dream: no microcontrollers here.

The guts consist of 2 components: a linear drive system and a trigger assembly. The former takes advantage of a small RC motor with a chain drive which slides the can’s mounting unit along two stainless steel rods. The latter includes a custom wound solenoid plugged into a 24V cordless drill battery, which slams down 5 pounds of force onto the can’s nozzle to fire the paint.

This all fits into an otherwise inconspicuous looking briefcase to provide some urban camouflage. The final component is a stencil, which slides into a rectangular hole on the bottom of the case. The paint can sprays downward through the stencil and tags the ground at the touch of a brass button located near the handle.  [Bob] has plenty of other cool inventions you should check out that are less illegal. Or, stick it to the man by automating your tagging with Time Writer.

Continue reading “Graffiti Briefcase For Stealth Tagging”

‘conus’ Mixes Media, Math And Mollusks

conusCA

We love art installations that use technology in ways probably never before considered, and Moscow media artist [Dimitry Morozov] has done just that with ‘conus’, which reads the surface of mollusk shells and translates the data into real-time audio and video. These shells are unique; their pigmentation generates natural cellular automata. (If you’ve never heard of cellular automata, Conway’s Game of Life is a good example, where a rule set determines whether a cell lives, dies, or regenerates.

[Dimitry’s] installation uses homemade digital microscopes to scan the naturally-created cellular automata of several shells, each rotating on its own disc. As the shell spins, the scans from the microscopes are fed into an algorithm which transforms the signals into data for multiple audio channels and three video monitors. You can watch the mathematical translation of the biologically-formed patterns in a video after the break.

Check out the MSP430 game of life shield for another example of cellular automata.

Continue reading “‘conus’ Mixes Media, Math And Mollusks”

Modifying The HC-05 Bluetooth Module Defaults Using AT Commands

The HC-05, a Bluetooth to serial bridge, can be found for around $5 on the internet and therefore may be the cheapest way to add Bluetooth connectivity to your project.

However, its default settings may need to be changed depending on your application. [Hazim] explains a way to enter the HC-05 AT command mode to benefit from the rich set of features that the device can provide. The process is fairly simple as it only consists of maintaining the key pin of the HC-05 high while powering on. The device then boots in AT command mode with a default 38400bits/s speed and listens for all of the AT command set (PDF). As an example [Hazim] provides a sketch allowing you to write the AT commands directly in your favorite terminal.

With the basics out of your way you may want to further research the hardware, especially if you will be using modules from different sources. They don’t always come with the same firmware.