New Part Day: Hackboard 2, An X86 Single-Board Computer

From the old Gumstix boards to everyone’s favorite Raspberry Pi, common single-board computers (SBCs) have traditionally had at least one thing in common: an ARM processor. But that’s not to say hackers and makers haven’t been interested in an SBC with a proper x86 processor. Which is why the $99 Hackboard 2 is so exciting. With a modern x86 chip at the core it’s akin to a small footprint desktop motherboard, but with all the extra features that we’ve come to expect in a hacker-friendly SBC.

So what’s the big deal? In a word, compatibility. The fact that these diminutive computing devices shied away from the x86 architecture that most of us have been using on our desktops and laptops since the 1980s originally introduced software compatibility issues, but this was largely outweighed by the advantages of ARM. The latest NVIDIA Jetson is running on an ARM chip for the same reason the smartphone in your pocket is: they’re smaller, cheaper, and more energy efficient than x86.

However they’re rarely more powerful. Even the latest and greatest Raspberry Pi 4, often touted as a viable desktop replacement thanks to its quad core Cortex-A72, will get absolutely trounced by the pokiest of Intel’s Celeron CPUs. The performance gap is just too great. While the Pi can admirably handle most of the tasks the hacker community asks of it, there will always be a call for a board that puts raw processing power before anything else.

Sucking down nearly 40 watts at full tilt, the Hackboard 2 isn’t the SBC you’d want to use for a solar powered weather station. But if you’re putting together a set top box to play back video and run the occasional emulator, its Celeron N4020 processor and Intel UHD 600 GPU represent the most powerful combination available for a device of this size.

Continue reading “New Part Day: Hackboard 2, An X86 Single-Board Computer”

Basics Of Remote Cellular Access – Choosing A Modem

These days, we’re blessed with cellular data networks that span great swathes of the Earth. By and large, they’re used to watch TV shows and argue with strangers online. However, they’re also a great tool to use to interact with hardware in remote locations, particularly mobile ones where a wired connection is impractical.

In this series, we’re taking a look at tips and tricks for doing remote cellular admin the right way. First things first, you’ll need a data connection – so let’s look at choosing a modem.

Options Abound

When shopping around for cellular data modems, it can be difficult to wade through the variety of options out there and find something fit for purpose. Modems in this space are often marketed for very specific use cases; at the consumer level, many are designed to be a no-fuss home broadband solution, while in the commercial space, they’re aimed primarily to provide free WiFi for restaurants and cafes. For use in remote admin, the presence of certain features can be critical, so it pays to do your research before spending your hard earned money. We’ve laid out some of the common options below.

Consumer Models

The Sierra Aircard 320U is ancient now, with limited frequency bands available. Its flimsy flexible connector is also a drawback. However, its ease of configuration with Linux systems makes it a dream to use in remote access situations. Unlike many others, it acts as a Direct IP connection, not appearing as a separate router.

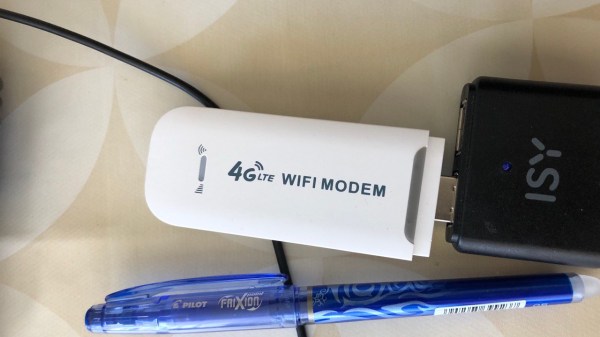
Many telecommunications providers around the world sell cheap USB dongles for connecting to the Internet, with these first becoming popular with the rise of 3G. They’re somewhat less common now in the 5G era, with the market shifting more towards WiFi-enabled devices that share internet among several users. These devices can often be had for under $50, and used on prepaid and contract data plans.

These devices are often the first stop for the budding enthusiast building a project that needs remote admin over the cellular network. However, they come with certain caveats that can make them less attractive for this use. Aimed at home users, they are often heavily locked down with firmware that provides minimal configuration options. They’re generally unable to be set up for port forwarding, even if you can convince your telco to give you a real IP instead of carrier-grade NAT. Worse, many appear to the host computer as a router themselves, adding another layer of NAT that can further complicate things. Perhaps most frustratingly, with these telco-delivered modems, the model number printed on the box is often not a great guide as to what you’re getting.

A perfect example is the Huawei E8327. This comes in a huge number of sub-models, with various versions of the modem operating in different routing modes, on different bands, and some even omitting major features like external antenna connectors.  Often, it’s impossible to know exactly what features the device has until you open the box and strip the cover off, at which point you’re unable to return the device for your money back.

All is not lost, however. The use of VPNs can help get around NAT issues, and for the more adventurous, some models even have custom firmware available on the deeper, darker forums on the web. For the truly cash strapped, they’re a viable option for those willing to deal with the inevitable headaches. There are generally some modems that stand out over others in this space for configurability and ease of use. This writer has had great success with a now-aging Sierra Aircard 320U, while others have found luck with the Huawei E3372-607. As per earlier warnings though, you don’t want to accidentally end up with an E3372-608 – thar be dragons.

Continue reading “Basics Of Remote Cellular Access – Choosing A Modem”

15 Volts To 110,000 Volts

There’s something satisfying about creating high voltages. Sure, there are practical uses like neon signs or doing certain experiments, but be honest — you really just want to see some giant arcs lighting up your dark mad scientist lair. [Mircemk] has just the prescription for what ails you. Using a two-stage approach, he shows a simple setup that generates about 110KV from a pretty tame 15V supply.

From the 15V, there is a stage that uses a flyback transformer and a switch to generate a reasonably high voltage. The final stage is a Cockroft-Walton voltage multiplier that can produce quite a bit of voltage. You can see the impressive arcs in the video below.

The multiplier circuit found fame with experiments by Cockroft and Walton, obviously, but was actually originated in the early 1900s with a physicist named Greinacher. The circuit uses diodes as switches and charges a bank of capacitors in parallel. The discharge, however, puts the capacitors in series. Neglecting losses and loads, the output voltage is equal to the peak-to-peak input voltage times the number of stages present. Real-world considerations mean you won’t quite get that voltage out of it, but it can still provide a potent punch. Click through the break for a video of the circuit in action!

Continue reading “15 Volts To 110,000 Volts”

DIY Automated Roller Blinds

Controlling blinds using off the shelf solutions can be expensive – more so if you have multiple blinds you want to control. [HumanSkunk87] felt the cost was too high, so they designed a controller to automatically open and close the blinds.

The main part of this build is a motor and a ball chain gear – a wheel that captures the balls of a ball chain so that the chain can be pulled. The wheel was designed using Fusion3D and then printed out. The motor requires enough power to pull the chain — [HumanSkunk87] figures it needs to be able to pull about 2.5kg in order to raise the blind. After giving up on stepper motors, a DC motor with a worm gear was found to have enough torque to work. A WEMOS D1 Mini controls the motor controller that drives the ball chain wheel. Two micro switches tell the WEMOS when to stop at the bottom and top of the window.

The WEMOS is programmed using ESPHome and it connects to [HumanSkunk87]’s HomeAssistant to complete the automation. Check out the descriptions in the link for the parts and the code used to run everything. There are many other creative ways to open your blinds, It’s even possible to automate curtains instead of blinds.

Continue reading “DIY Automated Roller Blinds”

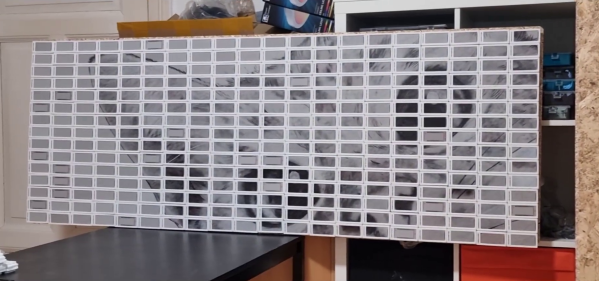
Incredible Discrete MOSFET Rover Has Maximum Blink

What do you get when you stick 1738 MOSFETs together? If your answer was a ‘4-bit CPU’, you would be totally correct. Available as a product over at Marutsu as the ‘CPU1738’, it seems to target beginners to computer theory, with build instructions that explain how the CPU is built up from individual MOSFETs that are combined into logic gates.

A CPU1738 NAND PCB.

While decidedly more compact in its SMD format than it would have been with pure through-hole parts, the use of countless small PCBs on top of the larger PCBs make for a pretty hefty package. Board after board build up the CPU, and the assembly continues with the addition of sensors, motors, and wheels. In the end, a robot emerges, albeit a somewhat wobbly-looking one.

Check out the video linked after the break, though before starting one up, note the 50,000 Yen (approximately $500) price tag for the CPU block alone. On the other hand, in addition to the 1738 MOSFETs, there are also 1070 LEDs, so you get what you pay for in blinkies.

Continue reading “Incredible Discrete MOSFET Rover Has Maximum Blink”

Game Cartridges And The Technology To Make Data Last Forever

Game cartridges are perhaps the hardiest of all common storage schemes. Short of blunt traumatic force or application of electrical surges to the cartridge’s edge connectors, damaging a game cartridge is hard to do by accident. The same is also true for the data on them, whether one talks about an Atari 2006 cartridge from the late 1970s or a 1990s Nintendo 64 cartridge.

The secret sauce here are mask ROMs (MROM), which are read-only memory chips that literally have the software turned into a hardware memory device. A mask layer unique to each data set is used when metalizing the interconnects during chip fabrication. This means that the data stored on them is as durable as the processor in the game console itself. Yet this is not a technology that we can use in our own hobby projects, and it’s not available for personal long-term data storage due to the costs associated with manufacturing what is essentially a custom chip.

Despite its value as truly persistent storage, MROM has fallen out of favor over the decades. You may be surprised to find a lot of what’s currently used in the consumer market is prone to data corruption over time spans as short as one year to one decade depending on environmental conditions.

So what are we to do if we need to have read-only data that should remain readable for the coming decades?

Continue reading “Game Cartridges And The Technology To Make Data Last Forever”

Templateize Your Timetable With EPaper Templates

To date, e-paper technology has been great for two things, displaying static black and white text and luring hackers with the promise of a display that is easy on the eyes and runs forever. But poor availability of bare panels has made the second (we would say more important) goal slow to materialize. One of the first projects that comes to mind is using such a display to show ambient information like a daily summary weather, train schedules, and calendar appointments. Usually this means rolling your own software stack, but [Christopher Mullins] has put together a shockingly complete toolset for designing and updating such parameterized displays called epaper_templates.

To get it out of the way first, there is no hardware component to epaper_templates. It presupposes you have an ESP32 and a display chosen from a certain list of supported models. A quick search on our favorite import site turned up a wide variety of options for bare panels and prebuilt devices (ESP32 and display, plus other goodies) starting at around $40 USD, so this should be a low threshold to cross.

Once you have the device, epaper_templates provides the magic. [Christopher]’s key insight is that an ambient display is typically composed of groups of semi-static data displayed in a layout that never changes. The only variation is updates to the data which is fully parameterized: temperature is always integer Fahrenheit, train schedules are lists of minutes and hours, etc. Layouts like this aren’t difficult to make, but require the developer to reimplement lots of boilerplate. To make them easy to generate, epaper_templates provides a fully featured web UI to let the user freely customize a layout, then exports it as JSON which the device consumes.

The sample layout configured in the video below

The web UI is shockingly capable, especially for by the standards of the embedded web. (Remember it’s hosted on the ESP32 itself!) The user can place text and configure fonts and styles. Once placed, the text can be set to static strings or tied to variables, and if the string is a timestamp it can be formatted with a standard strftime format string.

To round out the feature set, the user can place images and lines to divide the display. Once the display is described, everything becomes simple to programmatically update. The ESP can be configured to subscribe to certain MQTT topics from which it will receive updates, or if that is too much infrastructure there is a handy REST API which accepts JSON objects containing variables or bitmaps to update on device.

We’re totally blown away by the level of functionality in epaper_templates! Check out the repo for more detail about its capabilities. For a full demo which walks through configuration of a UI with train arrival times, weather, both instant temperature and forecast with icons, and date/time check out the video after the break. Source for the example is here, but be sure to check out examples/ in the repo for more examples.

Continue reading “Templateize Your Timetable With EPaper Templates”