A backyard swimming pool can be a great place to take a refreshing dip on a summer’s day. It can also be a place to freeze your giblets off if the sun has been hiding for even a few hours. That can make pools an iffy proposition unless they’re heated, and that starts to get really expensive in terms of upfront costs and ongoing charges for fuel or power. Unless you put the sun and the IoT to work for pool-heating needs.
Preferences vary, of course, but [Martin Harizanov] and his family clearly like their swims on the warm side. With nobody using the pool when it was below 25°C (77°F), [Martin] picked up a few bits to harness the sun to warm the water. Loops of PVC lawn irrigation tubing were tossed onto a shed roof with a favorable solar aspect and connected to the pool with a length of garden hose. The black thin-wall tubing is perfect for capturing the sun’s energy, and 200 meters of the stuff can really heat things up fast. A small pump is controlled by a microcontroller — it’s not explicitly stated but we suspect it’s a Raspberry Pi — with a pair of temperature sensors to sample the water in the pool and in the heating loop. Metrics are gathered and logged by Emoncms, an open source energy monitoring app. [Martin] says he’s harvesting about 10 kW from the sun on a good day, and that the pool water in the heating loop has gotten up to a steamy 55°C (131°F) without any other energy inputs other than the pump.
Plenty of others have made the leap to solar for pool season extension, with designs from the simple to the more complex. And if you live where the sun doesn’t shine, there’s always a compost water heater.
While “The Clapper” probably first conjures images of low-budget commercials, it was still a useful way to remotely switch lights and other things around the house. But if the lights you want to switch weren’t plugged into the wall, like a ceiling fan, for example, The Clapper was not going to help you. To add some functionality to this infamous device, [Robin] built one from scratch that has all the extra features built in that you could ever want.
First, the new Clapper attaches to the light switch directly, favoring mechanical action of the switch itself rather than an electromechanical relay which requires wiring. With this setup, it would be easy to install even if you rent an apartment and can’t do things like rewire outlets and it has the advantage of being able to switch any device, even if it doesn’t plug into the wall. There’s also a built-in microphone to listen for claps, but since it’s open-source you could program it to actuate the switch when it hears any sound. It also includes the ability to be wired in to a home automation system as well.
If the reason you’ve stayed out of the home automation game is that you live in a rental and can’t make the necessary modifications to your home, [Robin]’s Clapper might be just the thing you need to finally automate your living space. All the files are available on the project site, including the 3D printing plans and the project code. Once you get started in home automation, though, there’s a lot more you can do with it.
In 2017 Spotify finally deprecated their public vanilla C SDK library, libspotify, and officially replaced it with dedicated SDKs for iOS and Android and this new-fangled web thing we’ve all heard so much about. This is probably great for their maintainability but makes writing a native application for a Linux or a hardware device significantly harder, at least without an application process and NDA. Or is it? Instead of using that boring slab of glass and metal in their pocket [Dani] wanted to build a handy “now playing” display and remote control interface but was constrained by the aforementioned SDK limitations. So they came up with a series of clever optimizations resulting in the clearly-named ESP8266 Spotify Remote Control.
The Spotify Remote Control has a color LCD with a touchscreen. Once attached to a Spotify account it will show the album art of the currently playing track (with a loading indicator!) and let you play/pause/skip tracks from its touch screen, all with impressively low latency. To get here [Dani] faced two major challenges: authorizing the ESP to interact with a user’s Spotify account, and low latency LCD drawing.
2 Bit Cover Art
If you’re not on iOS or Android, the Spotify web API is the remaining non-NDA’d interface available. But it’s really designed to be used on relatively rich platforms such as fully featured web browsers, not an embedded device. To that end, gone are the days of asking a user to enter their username and password in a static login box, the newer (better) way is to negotiate for a per-user token (which is individually authorized per application), then to use that to authenticate your interaction. With this regime 3rd party applications (in this case an ESP8266) never see a user’s password. One codified and very common version of this process is called OAuth and the token dance is called a “workflow”. [Dani] has a pretty good writeup of the process in their post if you want more detail about the theory. After banging out the web requests and exception handling (user declines to authorize the device, etc) the final magic ended up being using mDNS to get the user’s browser to redirect itself to the ESP’s local web server without looking up an IP first. So the setup process is this: the ESP boots and displays a URL to go to, the user navigates there on a WiFi connected device and operates the authorization workflow, then tokens are exchanged and the Remote Control is authorized.
The second problem was smooth drawing. By the ESP’s standards the album art for a given track at full color depth is pretty storage-large, meaning slow transfers to the display and large memory requirements. [Dani] used a few tricks here. The first was to try 2 bit color depth which turned out atrociously (see image above). Eventually the solution became to decompress and draw the album art directly to the screen (instead of a frame buffer) only when the track changed, then redraw the transport controls quickly with 2 bit color. The final problem was that network transfers were also slow, requiring manual timesharing between the download code and the display drawing routing to ensure everything was redrawn frequently.
Check out [Dani]’s video after the break, and take a peek at the sources to try building a Spotify Remote Control yourself.
What is suspicious about the books in the image above? Is it that there is no bookend? How about the radio waves pouring out of them? [Clay Weiland] does not like the way a bare router looks in the living room, but he appreciates the coverage gained by putting it in the middle of his house. He added a layer of home decorating camouflage in the form of some second-hand book covers to hide the unsightly bit of tech.
There isn’t a blog post or video about this particular build anywhere. The photos were submitted to our tip line as-is with the note that a table-saw is involved. We can safely infer that book covers are stripped of their pages and filled with wooden blanks painted white and stuck together to look like a cluster of literature. The takeaway from this example is that our tech does not have to be hidden away like a secret, or disrupt the decor, it can be placed as functionally as possible without sacrificing Feng Shui.
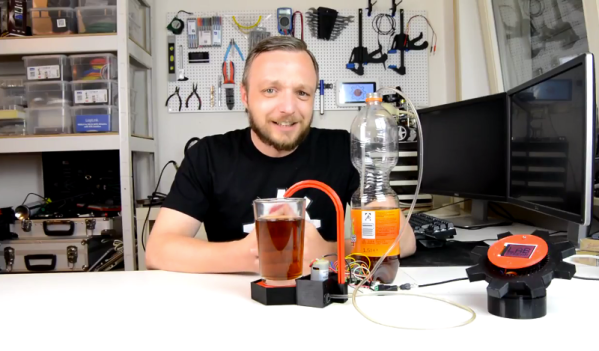
If you’re tired of having to make small talk with random people in the office break room every time you need a cup of coffee, or simply don’t have the time to get up to pour yourself some more, it would be nice if there was a way you could have your cup filled for you, right at your desk. With this new drink dispenser, you won’t have to get up or even pour your drinks yourself!
We’ve certainly seen plenty of automatic drink makers, but those are more suited to parties and complicated drink mixing. This beverage dispenser is more for the person who knows their tastes and simply wants to save some time. It’s also much simpler, using a peristaltic pump for serving a single liquid from a large bottle into a glass, and using a load cell to know when to stop filling. The peristaltic pump is a little slow though, so it’s best to set the glass back in the dispenser and let it top you off each time.
We’re a big fan of time savers around here, especially when it comes to improving workflow. Of course, the best time saver is a clean, well-organized shop which will help you out whether you’re building a drink dispenser or anything else.
Putting everything on the Internet is getting easier and easier, what with the profusion of Internet-ready appliances as well as cheap and plentiful IoT modules to integrate legacy devices. Think IoT light bulbs, refrigerators and dishwashers that can be controlled from a smartphone, and the ubiquitous Sonoff modules. But once these things are on the net, what are they talking about? Are they saying things behind your back? Are they shipping data about your fridge contents off to some foreign land, to be monetized against your will?
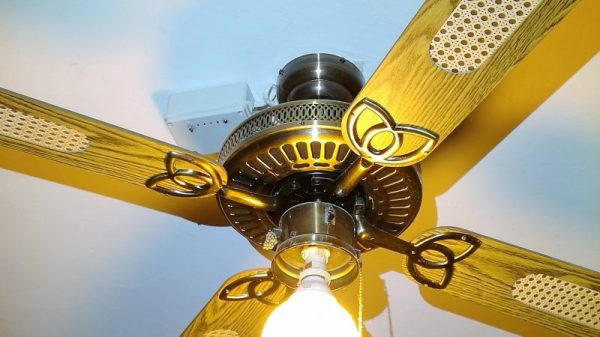
Maybe, maybe not, but short of a tinfoil helmet the only way to protect yourself is to build your own system. This IoT control for ceiling fans is a good example, with the added benefit that most wireless ceiling fan remotes are kind of lousy. [microentropie] didn’t like the idea of going the Sonoff route, so his custom controller is based on that IoT workhorse, the ESP8266. There are two versions, one switching the light and fan loads with relays, and one with triacs. The ESP serves up its own web page for control rather than using a cloud service, and is capable of setting up the fan to turn on and off automatically at preset times or temperatures. Everything sits in an unobtrusive box on the ceiling near the fan, but we bet this could be miniaturized enough to fit right inside the fan housing.
If some of [microentropie]’s code looks familiar, it might be because he borrowed it from his IoT rice cooker project.
Amazon Alexa, Google Home, and just about every electronic device manufacturer are jumping on the bandwagon of connected devices. They promise us the ability to turn on our toaster from another room, unlock our doors just by shouting at them from outside, and change the channel on our TV through perfectly enunciating a sentence instead of mashing the buttons on our remotes like chumps. And yet, despite all this new-fangled finger-less control, there is an unanswered question: does this technology save us energy in the long run?
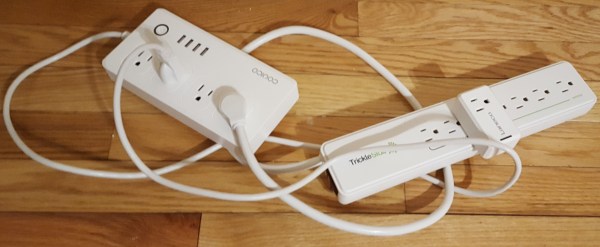
For years we’ve been hearing about vampire power and all the devices in our home that sit in standby, waiting for their masters to turn them on, quietly burning power to listen for that signal to wake. Fortunately the One Watt Initiative and general awareness and design for energy savings has cut out a lot of this phantom load. So how does the smart home, which essentially adds a bunch of connected vampires to our base load, end up saving money in the long run? And is it better than other alternatives or just good habits? I put these questions to the test with today’s smart power strips and controllable outlets.


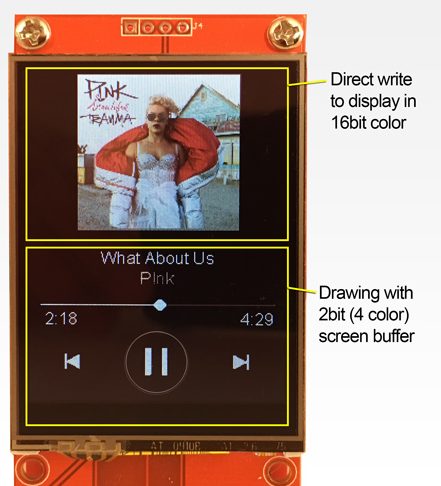 The second problem was smooth drawing. By the ESP’s standards the album art for a given track at full color depth is pretty storage-large, meaning slow transfers to the display and large memory requirements. [Dani] used a few tricks here. The first was to try 2 bit color depth which turned out atrociously (see image above). Eventually the solution became to decompress and draw the album art directly to the screen (instead of a frame buffer) only when the track changed, then redraw the transport controls quickly with 2 bit color. The final problem was that network transfers were also slow, requiring manual
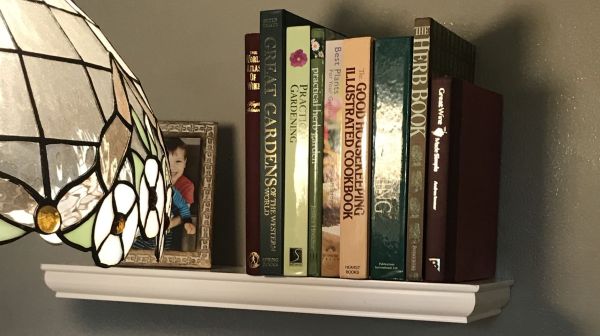
 submitted to