MilliOhm Measurement Made Easy

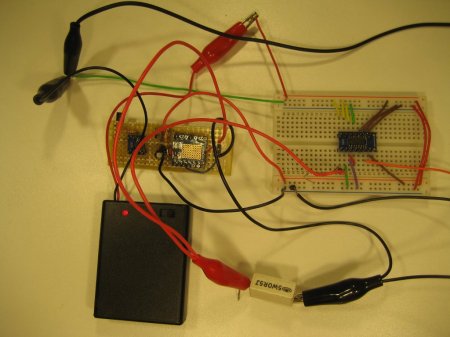
When [Kerry] wanted to measure some very small resistances very accurately he did not want to fork out the big bucks for a high end multimeter or a mico-ohmmeter, so he decided to build one himself. Measuring resistance is a simple enough concept, it directly implements Ohms law (V=IR). The problem with very small resistances is that when you apply a sensibly sized constant current to the load, the voltage to be measured is too small for conventional multimeter.

To overcome the problem [Kerry] designed a constant current source of very high accuracy using the AD8276 unity gain difference amplifier and the AD8603 high precision opamp. Then to boost the voltage across the load he used the LMP8358 programmable gain precision opamp, this allowed him to easily change the gain for different magnitude resistance, the circuit diagrams are all available on his site. Finally he used four point probes to eliminate probe wire resistance errors, ending up with the ability to measure small resistances with very high accuracy.

Eye See You.

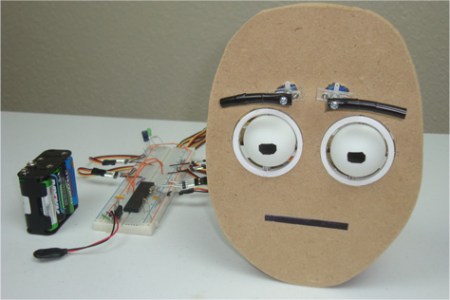
So you want to add animated eyes to your next robot? Now you can.. Using ping-pong balls, some scrap plastic and 6 servo motors [Chris] has created these animatronic eyes along with some nifty animated eyebrows. To get motion emulating realism [Chris] created a 2 axis gimbal using plastic rings and some nuts and bolts. The eyes (ping-pong balls) are held in the gimbal and actuated using two servos each. The eyebrows use another pair of servos and some tubing covered in electrical tape as the actual eyebrow.

[Chris] Kindly goes through the entire build process including information for beginners such as servo motor control. The whole thing is controlled using a PIC 18F452 and circuit diagrams and code are all available on the site. Check out the video after the break to see the eyes in action, you will also find more videos describing the build process if you follow through the tutorial.

Continue reading “Eye See You.”

Build Your Own Class AB Audio Amplifier

[Dino Segovis] wrote in to tell us about his “hack”, making an AB Audio Amplifier. The advantage of this particular amp is that the transistors never turn off, which would cause distortion. A full schematic is given in the article as well as a parts list. A complete “bill of materials” makes any circuit building project easier, especially for the beginner.

Although this is by no means a new circuit design, (a similar setup is used in car audio equipment) [Dino] does a great job of explaining how things work in the article itself and in the video after the break. He also gives some great tips about transferring your drawn circuit to a breadboard in a neat and organized way at around 5:00 in the video. Continue reading “Build Your Own Class AB Audio Amplifier”

Installing Linux On A 386 Laptop

The “cheap” and “easy” way in about an hour! A question that pop’s up from time to time is “I somehow ended up with an archaic old laptop / computer, can it run Linux?” Well of course it can, but that totally depends! On what? Well machine CPU, CPU speed, hard disk space, RAM and most importantly what you are expecting it to do.

Okay, why a Intel 386? Well number one I own a 386, but more importantly its the absolute bottom Intel CPU you can run Linux on. While it wont be able to do much, it will give you a basic system to kick around and “get to know” the insides of Linux without a million things installed and the worry of breaking it.

Unfortunately a 386 requires some special moves as the actual chip was dropped from almost all distributions long ago. All of the modern distributions I have looked at require at least a 486 CPU. This tutorial will be strictly for installing a basic bare bones Linux on a 386. Have a 486? Pentium? Faster? Never fear I will be covering that in a part II later this week.

Linux on a 386 in about an hour? Madness you might think, it probably takes Linux longer to boot on a 386 (and in some cases you are correct)! Want to know the trick? Simple, cheat!

Join me after the break for the parts and steps needed to get you started.

Continue reading “Installing Linux On A 386 Laptop”

Overhaul An Old Mechanical Keyboard

Deskthority forum user [lowpoly] recently posted a writeup on his complete overhaul of an Apple M0110  mechanical keyboard.  Any one familiar with the satisfying clack of a good mechanical key under their fingers can appreciate the effort put into this project.

[lowpoly] removed the keyboard’s PCB, rewired the key matrix adding diodes, built in a teensy USB board, broke apart the mechanical switches and fit replacement springs and finally applied a generous portion of retr0bright to all of the aging plastic. Since the teensy has no mounting holes [lowpoly] had to create a mounting assembly out of some spare plastic. A usb mini cable is even fitted into the original RJ-11 connector.  To compensate for the lack of PCB the key assembly was fitting with some rubber washers. To top off the whole thing some nice new rubber feet were taped to the underside of the M0110.

[lowpoly] reports that with the foam, new springs, and lack of PCB the keyboard is much quieter and easy to use.  The end result is a slick retro looking modern keyboard. If you’ll excuse us we have to go rooting through some old storage bins to find our own ancient keyboards.

We have seen our share of vintage keyboard hacks which can be useful, impressive and sometimes just odd. This build keeps it down to a nice simple, functional, useful retrofit. Nice work!

Video – Turning Good Gnomes Evil

Image of gnomes with glowing eyes

In this video [Jack] will show you how to take a garden gnome and a solar light to create a FrankenGnome that is sure to creep out your friends and neighbors. This Hackaday original video is the first in a new series of videos that we will now be posting on a weekly basis.

You’ll notice a few symbols at the beginning of these videos. These symbols are there to help you understand what the video is all about. In the upper left corner, we have the skill level. These will range from 1 for very basic projects to 4 for highly advanced projects. The upper right corner breaks the video into two categories. The first category is ‘feature adding’. In these videos we will be taking off-the-shelf items and modifying them to do something new. The other category is ‘skill building’. In these, we will be exploring different topics in depth. At first, the skill building videos will be mostly about electronics and software. In the future when we have excavated more room in Hackaday Headquarters, located deep beneath a mountain in remote [REDACTED], we will start doing videos showing you topics with a more mechanical nature. The other icons represent the major skills involved in the project.

Check out the video after the break.

Continue reading “Video – Turning Good Gnomes Evil”