Breathing New Life Into Old School ThinkPad Keyboards

The ThinkPad is generally considered the unofficial laptop of hackerdom, so it’s no surprise that we see plenty of projects focused on repairing and modifying these reliable workhorses. But while we usually see folks working on relatively modern incarnations of this iconic line of computers, this project by [Frank Adams] and [Brian Chan] shows that the hacker’s love affair with the ThinkPad stretches back farther than many might realize.

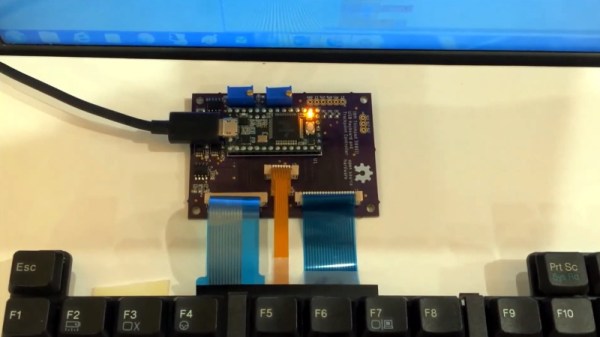
As explained on the project’s Hackaday.io page, the duo have produced an open hardware board that will allow you to take the keyboard and trackpoint from a late ’90s ThinkPad 380ED and use it as a standard USB input device on a modern computer. According to [Frank], the keyboards on these machines are notable for having full-size keys rather than the “chicklet” boards that are so common today.

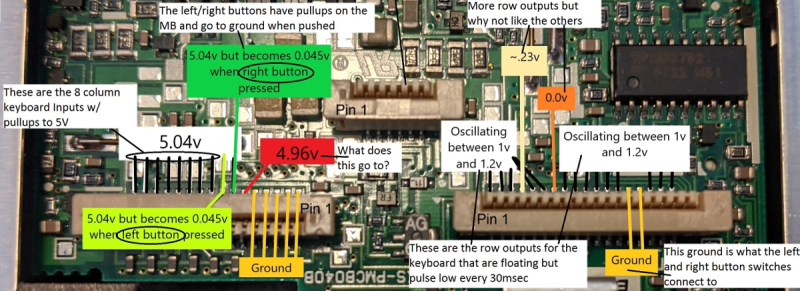
Now you may be wondering why this is significant. After all, we’ve seen plenty of projects that hook up an old keyboard to a USB-equipped microcontroller to get them speaking the lingua franca. Well, the trick here is that the trackpoint on these older ThinkPads actually required additional circuitry on the motherboard to function. The keyboard features three separate FPC connections for the matrix, the trackpoint buttons, and the analog strain gauges in the trackpoint itself.

After a considerable amount of reverse engineering, [Frank] and [Brian] have developed a board that uses the Teensy 3.2 to turn this plethora of pins into something useful. In the video after the break, you can see the new composite USB device working perfectly on a modern Windows computer.

It will probably come as little surprise to find that [Frank] is no stranger to hacking ThinkPad keyboards. In 2018 we covered a similar adapter he built for the far more modern T61, which was an absolute cakewalk by comparison.

Continue reading “Breathing New Life Into Old School ThinkPad Keyboards”

DIY Magsafe Charger Feeds Off 12 V Solar Battery

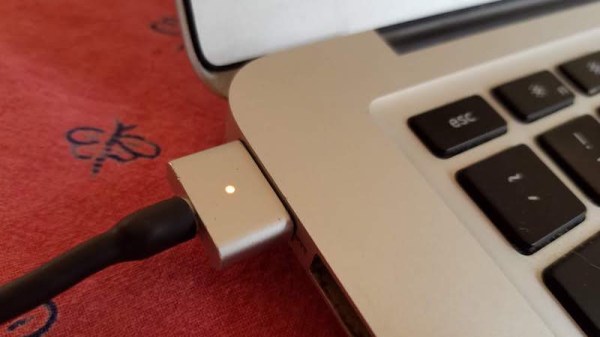
[Steve Chamberlin] has a spiffy solar-charged 12 V battery that he was eager to use to power his laptop, but ran into a glitch. His MacBook Pro uses Apple’s MagSafe 2 connector for power, but plugging the AC adapter into the battery via a 110 VAC inverter seemed awfully inefficient. It would be much better to plug it into the battery directly, but that also was a problem. While Apple has a number of DC power adapters intended for automotive use, none exist for the MagSafe 2 connector [Steve]’s mid-2014 MacBook Pro uses. His solution was to roll his own MagSafe charger with 12 VDC input.

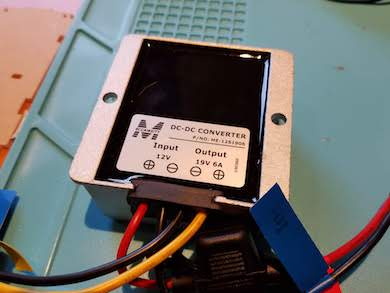
Since MagSafe connectors are proprietary, his first duty was to salvage one from a broken wall charger. After cleaning up the wires and repairing any frayed bits, it was time to choose a DC-DC converter to go between the MagSafe connector and the battery. The battery is nominally 12 volts, so the input of the DC-DC converter was easy to choose, but the output was a bit uncertain. Figuring out what the MagSafe connector expects took a little educated guesswork.

The original AC adapter attached to the charger claimed an output of 20 volts, another Apple adapter claimed a 14.85 V output, and a third-party adapter said 16.5 volts. [Steve] figured that the MagSafe connectors seemed fine with anything in the 15 to 20 V range, so it would be acceptable to use a 12 V to 19 V DC-DC boost converter which he had available. The result worked just fine, and [Steve] took measurements to verify that it is in fact much more efficient than had he took the easy way out with the inverter.

MagSafe has been displaced by USB-C nowadays, but there are plenty of MagSafe devices still kicking around. In a pinch, keep in mind that a little bit of filing or grinding is all that’s needed to turn MagSafe 1 into MagSafe 2.

Replacing A Non-Replacable Laptop Keyboard

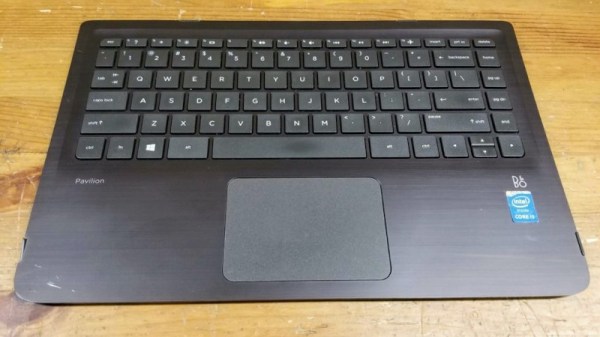
Spilling a drink on a laptop is a terrifying experience. If you’re lucky you’ll ruin just a keyboard, and if not, your entire machine could go up in smoke. Assuming you’ve just suffered the latter, you can still be out of luck, as many laptops come with fancy integrated keyboards that are not designed to be removable. It’s not always the case however, as this ingenious hack from [InsideMyLaptop] bears out.

The hack begins with removing the top case assembly from a HP Pavilion laptop. The keyboard is riveted into the top plate assembly, along with the trackpad, which would normally necessitate their replacement as a total unit. However, if properly armed with a soldering iron, these plastic rivets can be melted to allow the backing plate and keyboard to be removed. A replacement part can then be sourced, and the remaining rivet stubs can be remelted to hold the new part in place.

It’s a simple hack, but one that goes to show one shouldn’t always take “No User Servicable Parts Inside” as an answer. We’ve seen other useful work from [InsideMyLaptop] before – like this power jack repair way back in 2011.

Recreating Lord Nikon’s Laptop From Hackers

The outlandish computers from 1995’s Hackers are easily one of the most memorable elements of the iconic cult classic. In the film, each machine is customized to reflect the individual hacker that operates it, and feature everything from spray painted camouflage paint schemes to themed boot animations based on the owner’s personal iconography. But what might not be so obvious is that the real-life props took a considerable amount of hardware hacking before they were ready for their big-screen debut.

A group of dedicated Hackers fans have created a website to document, and ideally recreate, all the custom work that went into the various pieces of tech featured in the film. As explained by [Nandemoguy], the group’s latest triumph is a screen-accurate build of Lord Nikon’s laptop. The final product not only looks just like the machine used in the film, but thanks to the internal Raspberry Pi, is far more powerful than the original computer would have been.

Unless you’re on the team over at HackersCurator.com, you might not know that the laptops in the film were handmade chimeras that combined the external cases of various PCs with (usually) the internals of an Apple Powerbook 180c. Why the prop masters of the film would have gone through so much trouble to create the character’s computers is not immediately clear, but if we had to guess, presumably it was due to the requirements of the over-the-top graphical interfaces that are featured so heavily in the film.

At any rate, the replica created by [Nandemoguy] is built in much the same way. At least for the parts you can see on the outside, anyway. He goes through the considerable case modifications required to replace the original keyboard on the Toshiba Satellite T1850 with a Powerbook keyboard, which as you might have guessed, has been converted into a USB HID device with a Teensy microcontroller. He even cuts the ports off the back of the Mac’s motherboard and glues them in place around the backside of the machine. But everything else, including the LCD, is all new hardware. After all, who really wants to go through all that trouble just to have a fancy Powerbook 180c in 2019?

Even if you weren’t a fan of Hackers, the level of detail and effort put into this build it absolutely phenomenal. It’s interesting to see the parallels between this replica and the burgeoning cyberdeck scene; it seems like with a Teensy, a Raspberry Pi, and enough Bondo, anything can be turned into a functional computer.

Continue reading “Recreating Lord Nikon’s Laptop From Hackers

A Raspberry Pi Grimoire For The Command Line Wizard

Who says there’s no such thing as magic? Not anyone who knows what a Unix pipe is, that’s for sure. If you do some of your best incantations at a blinking cursor, this scratch-built Raspberry Pi Zero “Spellbook” laptop created by [Calvin] might be just what the apothecary ordered. Lucky for us, he was kind enough to document the design and construction of this penguin-powered tome for anyone else who wishes to dabble in the GNU Dark Arts.

In the series of videos after the break, viewers have the opportunity to watch a project go from idea to final product. The first video was uploaded nearly a month before the project was completed, and goes over some of the design elements of the project as well as different ideas [Calvin] had in terms of things like component placement. Throughout the video, he illustrates his ideas in TinkerCAD, which might not have been our first choice for a project this complex, but it does go to show what’s possible in the free web-based CAD package.

By the second video, [Calvin] has printed some parts and now has the hardware coming together. The general idea is that the outside panels of the “book” are made out of steel cut from the side panel of an old computer, with the 3D printed components taking the form of spacers between the electronic components. These plastic “pages” are not only easier and faster to print than a complete case, but help sell the appearance of the book when viewed from the sides.

[Calvin] has shared his TinkerCAD design so that others can print out the necessary components for the book, though you’ll have to source your own steel plates. He also breaks down all the principle components he used and gives links to where you can buy them, from the display and keyboard down to the screws and standoffs. He went with the Pi Zero and sticks to mainly console work, but if you want something with enough power to throw around a graphical environment, he says there’s room in the case for a Pi 3.

Hackers seem to enjoy hiding hardware inside of books, PLA or otherwise. We’ve recently seen an iPad nestled snugly into a notebook, and of course no house would be complete without a book doubling as a hidden switch.

Continue reading “A Raspberry Pi Grimoire For The Command Line Wizard”

Thinkpad T25 Gets Less Retro With Hardware Swap

For many, the Thinkpad T25 was something of a dream come true. Celebrating the 25th anniversary of the venerable business-oriented laptop that hackers love so much, it featured a design inspired by “retro” Thinkpads of yore, but with modern hardware inside. Unfortunately, as it was more fan service than a serious revitalization of classic Thinkpad design, the T25 was only ever available in a single hardware configuration.

[kitsunyan] liked the look and feel of the T25, but in 2019 was already feeling a bit let down by the hardware. The screen wasn’t up to snuff, and while the CPU is an i7, it only has dual cores. To make sure the T25 is still viable down the road, it seemed the only option was to try to transplant the hardware from one of the current Thinkpad models into the anniversary chassis. It certainly wasn’t easy, but given the fact that the T25 was more of a redress than a completely new product to begin with, everything came together a lot better than you might expect.

A custom mount installed in the T25

To help put things into perspective, the T25 is basically a modified version of the T470. Last year, Lenovo replaced the T470 with the new T480 that has just the sort of hardware improvements that [kitsunyan] wanted. The T480 was more of a refresh than a complete revamp, so the actual chassis of the machine didn’t change much compared with its predecessor. That being the case, it seemed like it should be possible to transplant the newer T480 components into the T470 derived T25. Got all that straight?

[kitsunyan] was able to put this theory to the test when the opportunity to connect a T25 keyboard to the newer T480 presented itself. Since the 7-row keyboard on the anniversary edition was one of its biggest selling points, seeing if it would work on another machine was kind of a big deal. It didn’t fit physically, and some of the keys didn’t work as expected, but it at least had the same connector and didn’t let out the magic smoke. It represented the first tiny step of a much larger journey.

In the end, it took a lot of trimming, gluing, hacking, and fiddling to get all the new hardware from the T480 to fit into the T25. But if you’re brave enough, the process has been detailed exquisitely by [kitsunyan]. Not only are the part numbers listed for everything you need to order, but there’s plenty of pictures to help illustrate the modifications that need to be made to all the clips, brackets, and assorted widgets that go into a modern laptop.

While we’re very impressed by this project, we can’t say it comes as a complete surprise. We’re well aware of the incredible lengths Thinkpad aficionados will go to keep their machines running into the 21st century. But don’t just take our word for it, you too can join the ranks of the Thinkpad elite.

[Thanks to Pierre for the tip.]

Hack A ThinkPad Display

Hackers really like their tools. This leads to holy wars over languages, editors, keyboards, and even laptops. The problem with laptops is that they age, and not always gracefully. [Syonyk] likes his ThinkPad T430S, except for one thing, its TN display wasn’t really very good. These flat screens use an older technology and show color changes with different viewing angles among other problems. So he managed to upgrade the device’s screen to IPS with the help of a replacement screen and an adapter (see right). Apparently, many similar ThinkPads can take the same sort of upgrade.

The problem is that the laptop uses LVDS to talk to the TN screen, while newer screens are likely to use Embedded DisplayPort (eDP) which is a different protocol entirely. However, there’s now a converter that [Syonyk] found on eBay (from China, of course). For about $70, the motherboard’s LVDS output can transform to eDP. Of course, you also need an IPS display panel.

Continue reading “Hack A ThinkPad Display”