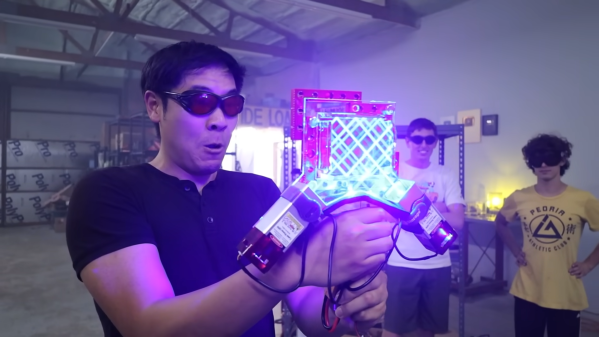
We’ve got to say that [Les Wright] has the most fun on the internet, at least in terms of megawatts per dollar. Just look at his new video where he turns a $30 eBay tattoo-removal laser into a benchtop beast.
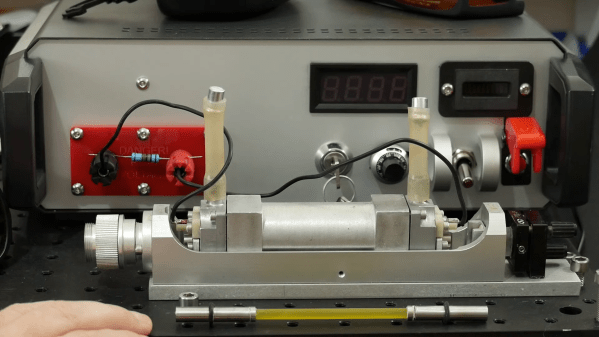
The junk laser in question is a neodymium:YAG pulse laser that clearly has seen better days, both externally and internally. The original pistol-grip enclosure was essentially falling apart, but was superfluous to [Les]’ plans for the laser. Things were better inside the business end of the gun, at least in terms of having all the pieces in place, but the teardown still revealed issues. Chief among these was the gunk and grunge that had accumulated on the laser rod and the flash tube — [Les] blamed this on the previous owner’s use of tap water for cooling rather than deionized water. It was nothing a little elbow grease couldn’t take care of, though. Especially since the rest of the laser bits seemed in good shape, including the chromium:YAG Q-switch, which allows the lasing medium to build up a huge pulse of photons before releasing them in one gigantic pulse.
Cleaned up and with a few special modifications of his own, including a custom high-voltage power supply, [Les]’ laser was ready for tests. The results are impressive; peak optical power is just over a megawatt, which is enough power to have some real fun. We’ll be keen to see what he does with this laser — maybe blasting apart a CCD camera?
Continue reading “Tattoo-Removal Laser Brought Out Of Retirement For A Megawatt Of Fun”