Bringing A Child’s Play Kitchen To Life

Given how many adults will go out of their way to avoid spending any extended amount of time in the kitchen, it’s pretty amazing how much children love playing in their miniature versions. Especially since they tend to be pretty simple: usually they’re little more than different sized boxes made out of MDF to represent the refrigerator, oven, and microwave. Of course, some kids are fortunate enough to have hackers and makers for parents.

[Brian Lough] wanted to get his two year old daughter her own play kitchen, but wasn’t terribly impressed with anything on the market. So he decided to start with the IKEA Duktig and add in his own personal touches to turn the stark white playset into something that would really get his daughter’s imagination going. With the liberal application of RGB LEDs and microcontrollers, her kitchen is sure to be envy of the sandbox.

Being the class act that he is, [Brian] starts his write-up acknowledging the various IKEA Duktig hacks and modifications that served as inspiration for his own build. Most of the prior art out there relates to making the microwave and oven a bit more exciting with the addition of lights and sounds, which ultimately ended up being the way he approached his daughter’s version as well.

For the oven, [Brian] decided to add some big arcade buttons over the door which would change the color of the RGB LEDs inside. He thought this association would be a good way to help his daughter learn her colors, since she’ll be able to see the oven change color when she presses the corresponding button. He also added a knob to control the intensity of the light, meant to be analogous to the temperature control in a real oven.

The modifications to the microwave are a bit more extensive, including a “timer” made out of a TM1637 LED display in a 3D printed panel complete with a buzzer to indicate when the plastic food has been thoroughly illuminated. [Brian] even made it so the LEDs in the NeoPixel ring light up in a spinning pattern to cast some shadows and simulate movement. He notes that the microwave was actually a bit overwhelming to his daughter at first, but after a couple months of getting used to the functions, she enjoys it as much as the oven.

While hacking a play kitchen might be new territory for him, [Brian] is no stranger to building awesome stuff. We’ve previously seen him put together a YouTube subscriber counter in the style of Tetris, and he even managed to create a gorgeous looking display out of shoelaces of all things.

The Display For When You Want Nixies Without All The Hassle

If you want to display numbers, just go for Nixies. There’s no better way to do that job, simply because they look so cool. Unfortunately, Nixies require high voltages, controlling them is a tiny bit strange, and they suck down a lot of power. These facts have given us a few Nixie alternatives, and [Dave] is here with yet another one. It’s a light pipe Nixie, made from acrylic rod.

The idea of using lights shining into a piece of acrylic to display a number is probably as old as the Nixie itself. There were a few tools in the 60s that used side-lit plastic panels to display numbers, and more recently we’ve seen a laser-cut version, the Lixie. This display is just ten sheets of acrylic etched with the numbers 0 through 9. Shine a light through the right acrylic sheet, and that number lights up.

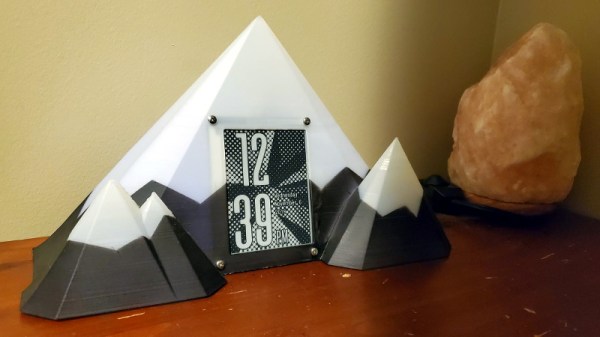
You can do just about everything in acrylic, and it’s already used for a light pipe, so [Dave] grabbed some acrylic rod and bent it into the shape of a few numbers. With a little work, he was able to make his own FauxNixie by mounting these numbers in a carefully modified lamp socked wired up with ten individual LEDs. The results make for big, big, big Nixie-style numbers, and the perfect clock for the discerning glowey aficionado.

Continue reading “The Display For When You Want Nixies Without All The Hassle”

Arcade With LED Marquee Shows Off Your Game

We’ve seen a lot of arcade machine builds here on Hackaday. Seriously, a lot. Even more so since the Raspberry Pi took over the world and made it so you didn’t have to cannibalize an old laptop to build one anymore. It’s one of those projects with huge appeal: either you’re somebody who’s built their own arcade, or you’re somebody who wishes they had. But even after seeing all these builds, we occasionally come across a specimen that deserves special recognition.

LED display controller

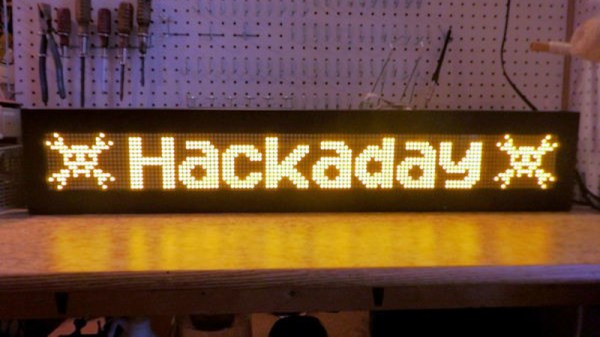
[Al Linke] recently wrote in to tell us about his arcade build, which we think you’ll agree is worth a closer look. The core build is actually a modification of a previously published design, but what makes this one unique is the addition of a programmable LED matrix in the top that actually shows the logo and artwork for whatever game you’re currently playing. This display really helps sell the overall look, and instantly makes the experience that much more authentic. Sure you don’t need the marquee of your home arcade machine to show era-appropriate artwork…but we know you want it to.

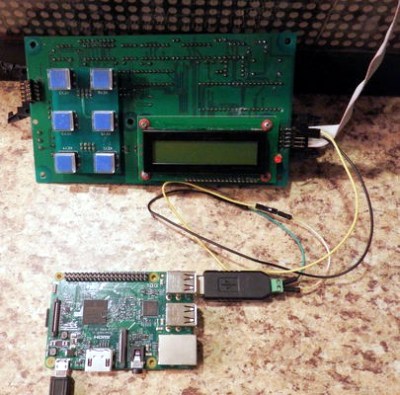
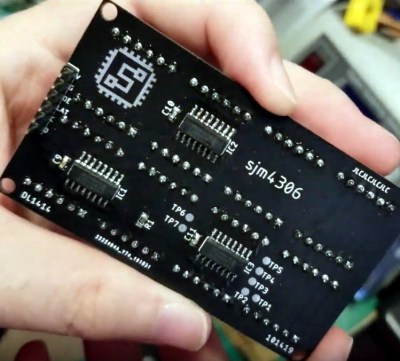
So how does one interface their Raspberry Pi with this beautiful 64×32 LED marquee display? Well it just so happens that [Al] is in the business of making cool LED displays, and even has a couple successful Kickstarter campaigns under his belt to prove it. He’s developed a board that lets you easily connect up to low-cost HUB75 LED panels such as the one used in the arcade. It’s been a few years since we’ve last seen a project that tackled these specific LED displays, and it’s encouraging to see how far things have come since then.

Even if you’re somehow not in love with the LED marquee, this build really does stand on its own as a fantastic example of a desktop arcade machine. [Al] went to great length to document his build, including putting together several videos during different phases of construction. If you’re curious about the start of the art for home arcade builds, this project would be a pretty good one to use as a barometer.

Whether it’s a full-size replica of the machine you spent your youth standing in front of, or an entirely new design made to your exacting specifications, there’s few projects that are a better conversation starter than one of these beauties blinking away in your living room.

Continue reading “Arcade With LED Marquee Shows Off Your Game”

[Caleb Kraft] Brings Us The Moon, On A Budget

As you might expect from one of our most illustrious alumni, [Caleb Kraft] is a rather creative fellow. Over the years he’s created some absolutely phenomenal projects using CNC routers, 3D printers, laser cutters, and all the other cool toys the modern hacker has access to. But for his latest project, a celebration of the full Moon, he challenged himself to go low-tech. The Moon is something that anyone on Earth can look up and enjoy, so it seemed only fitting that this project should be as accessible to others as possible.

[Caleb] started this project by looking for high-resolution images of the Moon, which was easy enough. He was even able to find sign shops that were more than happy to print a giant version for him. Unfortunately, the prices he was quoted were equally gargantuan. To really be something that anyone could do, this project needed to not only be easy, but as affordable as possible. But where do you get a giant picture of the Moon for cheap?

He eventually found a source for Moon shower curtains (we told you he was creative), which fit the bill perfectly. [Caleb] says they aren’t nearly as detailed as the original images he found, but unless you’ve got your face pressed up against it you’ll never notice anyway. To make the round frame, he used PEX tubing from the hardware store and simply stapled the curtain directly to the soft plastic. The hardest part of the whole project is arguably getting the curtain flat and taut on the PEX ring.

Technically you could stop now and have a pretty slick piece of art to hang on your wall, but [Caleb] took the idea a bit farther and put a strip of RGB LEDs along the inside of the ring. The shower curtain material does a decent enough job of diffusing the light of the LEDs to make it look pretty good, though there’s certainly some room for improvement if you want to get a more even effect over the entire surface. While you’re at it, you might as well add in some additional electronics so the lighting matches the current phase of the real-life Moon.

On the other hand, if you’re willing to settle for a far more diminutive version of Luna and don’t mind using those highfalutin hacker tools that [Caleb] decided to avoid for the good of mankind, we’ve got a project you might be interested in.

Continue reading “[Caleb Kraft] Brings Us The Moon, On A Budget”

Ammo Can Holds A 14,000 Lumen LED Flashlight

For most people, a flashlight is just something you keep in a drawer in the kitchen in case the power goes out. There’s even a good chance your “flashlight” is just an application on your phone at this point. But as we’ve seen many times before from mechanical keyboards to Power Wheels, hardcore niche communities can develop around the most innocuous pieces of hardware; and the lowly flashlight is no different.

Case in point, this 14,000 lumen LED flashlight built by [Bryson Hicks]. Designed around a 100 watt module from Stratus LED, the flashlight uses a number of 3D printed components to make itself at home in a suitably hardcore enclosure: a metal ammo can. With the addition of some modular electronics and a rather slick little control panel, his light is ready to deliver an unreasonable level of brightness anywhere he wishes.

The Stratus LED module includes its own driver, and just needs to be hooked up to a suitably beefy power source to do its thing. [Bryson] went with a 4500 mAh LiPo battery that he says gets him about a one hour runtime at full brightness. For somewhat less intense operation, he’s added a potentiometer which interfaces with the module’s driver board to control the LED output. Considering how fast the light sucks down the juice, adding a small LCD battery charge indicator to the top of the device seems like it was a prudent decision.

To prevent you from cooking anyone’s eyes at close range, the light requires you to first “arm” it by flipping the military style protected switch. Once the switch is in the on position, an illuminated push button is used to actually turn the LED module on and off. You can also snap the toggle switch back into the closed and covered position if you needed to kill the light in a hurry.

This isn’t the first preposterously bright LED flashlight we’ve seen around these parts. There’s something of an arms-race between hackers and makers to develop increasingly bright lights they can carry around, on the off chance they need to illuminate an entire neighborhood.

Can You Live Without The WS2812?

As near as we can tell, the popular WS2812 individually addressable RGB LED was released to the world sometime around the last half of 2013. This wasn’t long ago, or maybe it was an eternity; the ESP8266, the WiFi microcontroller we all know and love was only released a year or so later. If you call these things “Neopixels”, there’s a good reason: Adafruit introduced the WS28212 to the maker community, with no small effort expended on software support, and branding.

The WS2812 is produced by WorldSemi, who made a name for themselves earlier with LED driver solutions, especially the WS2811, an SOIC chip that would turn a common anode RGB LED into one that’s serially controllable. When they stuffed the brains from the WS2811 into a small package with a few LEDs, they created what is probably the most common programmable LED lighting solution available today.

A lot has changed in the six years that the WS2812 has been on the market. The computer modding scene hasn’t heard the words ‘cold cathode’ in years. Christmas lights are much cooler, and anyone who wants to add blinky to their bling has an easy way to do that.

But in the years since the WS2812 came on the market, there are a lot of follow-up products that do the same thing better. You now have serially addressable LEDs that won’t bring down the rest of the string when they fail. You have RGBW LEDs. There are LEDs with a wider color gamut and more. This is a look at the current state of serially addressable RGB LEDs, and what the future might have in store.

Continue reading “Can You Live Without The WS2812?”

A 3D Printed Blooming Rose For (Next) Valentines Day

Inspiration runs on its own schedule: great ideas don’t always arrive in a timely manner. Such was the case with [Daren Schwenke]’s notion for creating a 3D-printed blooming rose for his valentine, a plan which came about on February 13. Inspired by [Jiří Praus]’s animated wireframe tulip, [Daren] figured he could make a rose from clear printed petals colored by RGB LEDs. 24 hours seemed tight but sufficient, so he diligently set to work, but – after a valiant effort – finally had to extend the schedule. It’s now more than a month later, and tweaks to the design continue, but the result is nothing short of spectacular.

We first saw a discussion of the idea over on Hack Chat, and followed as it evolved into a project on hackaday.io. There, you can read the full details of the trials and tribulations that had to be endured to make this project happen. From a printer that wouldn’t boot, through testing PLA, TPU, and nylon filament, trying a number of different approaches for springs and hinges to operate the petals, and wiring the delicate DotStar LEDs with magnet wire, you can get a really good sense of the amount of experimentation it takes to complete a project like this. If you know anyone who still thinks 3D printing is as easy as clicking a button, send them over to read the logs on this project.

An early try at forming PLA petals

What finally materialized is a terrific combination of common hacker technologies. The petals are printed flat in nylon, then formed over a hot incandescent chandelier bulb. The stem and leaves are also printed, but the side stem has a piece of magnet wire embedded in the print as a capacitive touch sensor; when the leaf is touched, the rose blossom opens or closes. Magnet wire for the LEDs and a connecting rod for the mechanics run through the main stem to the base, where a 9g servo is responsible for controlling the bloom. The whole thing is controlled, naturally, with an Arduino. To move the project along a little more quickly, [Daren] enlisted the help of another Hack Chat denizen, [Morning.Star], who did an amazing job on the software without any access to the actual hardware.

Be sure to check out the video of the rose in action, after the break.

Continue reading “A 3D Printed Blooming Rose For (Next) Valentines Day”