Automated Watering Machine Has What Plants Crave: Fertilizer

We’ve seen countless automated plant care systems over the years, but for some reason they almost never involve the secret sauce of gardening — fertilizer. But [xythobuz] knows what’s up. When they moved into their new flat by themselves, it was time to spread out and start growing some plants on the balcony. Before long, the garden was big enough to warrant an automated system for watering and fertilizing.

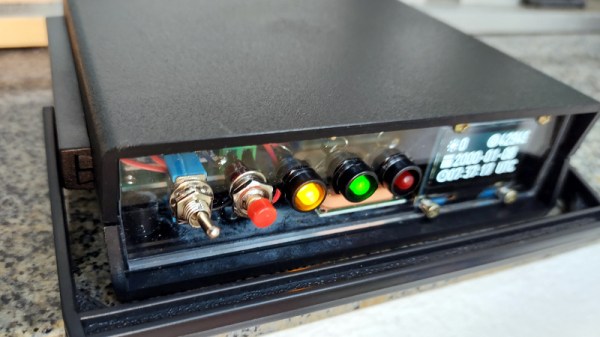
This clever DIY system is based around a 5L gravity-fed water tank with solenoid control and three [jugs] of liquid fertilizer that is added to the water via peristaltic pump. Don’t worry, the water tank has float switches, and [xythobuz] is there to switch it off manually every time so it doesn’t flood the flat.

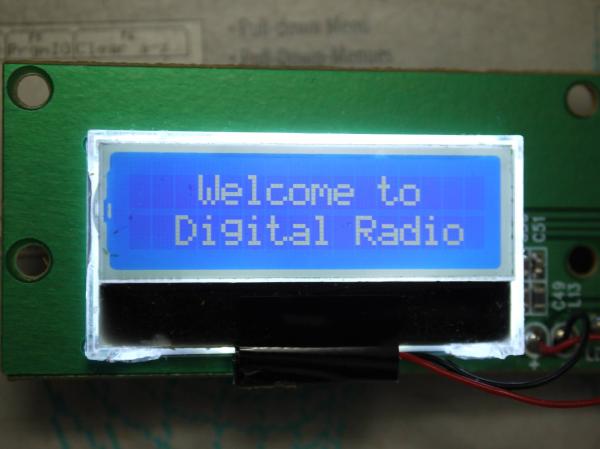
On the UI side, an Arduino Nano clone is running the show, providing the LCD output and handling the keypad input. The machine itself is controlled with an ESP32 and a pair of four-channel relay boards that control the inlet valve, the four outlet valves, and the three peristaltic pumps that squirt out the fertilizer. The ESP also serves up a web interface that mimics the control panel and adds in the debug logs. These two boards communicate using I²C over DB-9, because that’s probably what [xythobuz] had lying around. Check out the demo video after the break, and then go check on your own plants. They miss you!

Don’t want to buy just any old peristaltic pumps? Maybe you could print your own.

Continue reading “Automated Watering Machine Has What Plants Crave: Fertilizer”

The ARMv9 ISA, And What It Can Do For You

The number of distinct ARM Instruction Set Architectures (ISA) versions has slowly increased, with Arm adding a new version every few years. The oldest ISA version in common use today is ARMv6, with the ARMv6 ISA (ARM11) found in the original Raspberry Pi SBC and Raspberry Pi Zero (BCM2835). The ARMv6 ISA was introduced in 2002, followed by ARMv7 in 2005 (start of Cortex-A series) and ARMv8 in 2011. The latter was notable for adding 64-bit support.

With ARMv7 being the first of the Cortex cores, and ARMv8 adding 64-bit support in the form of AArch64, what notable features does ARMv9 bring to the table? As announced earlier this year, ARMv9’s focus appears to be on adding a whole host of features that should improve vector processing (vector extensions, or SVE) as well as digital signal processing (DSP) and security, with its Confidential Compute Architecture (CCA).

In addition to this, ARMv9 also includes all of the features that were added with ARMv8.1, v8.2, v8.3 and so on. In essence, this makes an ARMv9-based processor theoretically capable of going toe-to-toe with the best that Intel and AMD have to offer.

Continue reading “The ARMv9 ISA, And What It Can Do For You”

Apple AirTag Spills Its Secrets

The Apple AirTag is a $29 Bluetooth beacon that sticks onto your stuff and helps you locate it when lost. It’s more than just a beeper though, the idea is that it can be silently spotted by any iDevice — almost like a crowd-sourced mesh network — and its owner alerted of its position wherever they are in the world.

There are so many questions about its privacy implications despite Apple’s reassurances, so naturally it has been of great interest to those who research such things. First among those working on it to gain control of its nRF52832 microcontroller is [Stacksmashing], who used a glitching technique whereby the chip’s internal power supply is interrupted with precise timing, to bypass the internally enabled protection of its debug port. The firmware has been dumped, and of course a tag has been repurposed for the far more worthwhile application of Rickrolling Bluetooth snoopers.

The idea of a global network of every iDevice helping reunite owners with their lost possessions is on the face of it a very interesting one, and Apple are at great pains on the AirTag product page to reassure customers about the system’s security. On one hand this work opens up the AirTag as a slightly expensive way to get an nRF microcontroller for other applications, but the real value will come as the firmware is analysed to see how at the tag itself works.

[Stacksmashing] has appeared on these pages many times before, often in the context of Nintendo hardware. Just one piece of work is the guide to opening up a Nintendo Game and Watch.

The Keyboard You Really Don’t Need Or Want

Most people think of a keyboard as a flat, vaguely rectangular thing with around 100ish different keys. A mechanical keyboard enthusiast would heartily disagree and point out various tenkeyless, 75%, 60%, or 40% keyboards that strip down the idea of what a keyboard is by taking keys out. [Stavros Korokithakis] takes that notion and turns it on its side by creating the five-button vertical keyboard known as Keyyyyyyyys.

This keyboard, or keystick, is designed to be onehanded and to be eye-contact-free. With just five keys, it makes heavy use of chording to output all the characters needed. It has a maximum of 32 possible states and taking out pressing nothing as a no-op leaves 31 possible key combinations. So [Stavros] had to get creative and laid out the letters according to their frequency in the English language. The brains of Keyyyyyyyys is the ubiquitous ESP32, emulating a Bluetooth keyboard while being wrapped in a simple 3d printed box. The code is hosted on GitLab.

If you don’t know how hard it is to learn a five-key chording keyboard from scratch, definitely check out [Stavros]’ video embedded below. “C’mon h.” We have heard reports that you can learn these things, though.

While this five-button keyboard may seem small, this two-button keyboard still has it beat by three keys. A one-button keyboard is just a morse code keyboard, and we are looking forward to a wireless Bluetooth version. Continue reading “The Keyboard You Really Don’t Need Or Want”

Modified Microwave Cures Resin Parts With Style

Once you make the leap to resin-based 3D printing, you’ll quickly find that putting parts out in the sun to cure isn’t always a viable solution. The best way to get consistent results is with a dedicated curing chamber that not only rotates the parts so they’re evenly exposed to the light, but allows you to dial in a specific curing time. A beeper that goes off when the part is done would be handy as well. Wait, this is starting to sound kind of familiar…

As you might expect, [Stynus] isn’t the first person to notice the similarities between an ideal UV curing machine and the lowly microwave oven. But his conversion is certainly one of the slickest we’ve ever seen. The final product doesn’t look like a hacked microwave so much as a purpose-built curing machine, thanks in large part to the fact that all of the original controls are still functional.

The big break there came when [Stynus] noticed that the control panel was powered by a one-time programmable PIC16C65B microcontroller. Swapping that out for the pin-compatible PIC16F877A opened up the possibility of writing custom firmware to interface with all the microwave’s original hardware, he just needed to reverse engineer how it was all wired up. It took some time to figure out how the limited pins on the microcontroller ran the LED display and read the buttons and switches at the same time, but we’d say the final result is more than worth the work.

With full control over the microwave’s hardware, all [Stynus] had to do was strip out all the scary high voltage bits (which were no longer functional to begin with) and install an array of UV LEDs. Now he can just toss a part on the plate, spin the dial to the desired curing time, and press a button. In the video below, you can see he’s even repurposed some of the buttons on the control panel to let him do things like set a new default “cook” time to EEPROM.

Compared to the more traditional fused deposition modeling (FDM) 3D printers, resin printing requires a lot of additional post-processing and equipment. You don’t necessarily have to gut your microwave just to cure your prints, but you’d be wise to fully consider your workflow will look like before pulling the trigger on that shiny new printer.

Continue reading “Modified Microwave Cures Resin Parts With Style”

Looks Like A Pi Zero, Is Actually An ESP32 Development Board

ATMegaZero ESP32- S2, showing optional color-coded 40-pin header (top)

The ATMegaZero ESP32-S2 is currently being funded with a campaign on GroupGets, and it’s a microcontroller board modeled after the Raspberry Pi Zero’s form factor. That means instead of the embedded Linux system most of us know and love, it’s an ESP32-based development board with the same shape and 40-pin GPIO header as the Pi Zero. As a bonus, it has some neat features like a connector for inexpensive SSD1306 and SH1106-based OLED displays.

Being able to use existing accessories can go a long way towards easing a project’s creation, and leveraging that is one of the reasons for sharing the Pi Zero form factor. Ease of use is also one of the goals, so the boards will ship with CircuitPython (derived from MicroPython), and can also be used with the Arduino IDE.

If a microcontroller board using the Pi Zero form factor looks a bit familiar, you might be remembering the original ATMegaZero which was based on the Atmel ATMega32U4, but to get wireless communications one needed to attach a separate ESP8266 module. This newer board keeps the ATMegaZero name and footprint, but now uses the Espressif ESP32-S2 to provide all the necessary functions.

CircuitPython has been a feature in a wide variety of projects and hacks we’ve seen here at Hackaday, and it’s a fine way to make a microcontroller board easy to use right out of the box.

RGB LED Rings Teach Old Dash New Tricks

We’ve seen several so-called “digital dash” upgrades over the years that either augment, or completely replace, a vehicle’s original dashboard indicators with new displays. Whether its seven segment LEDs or a full-on graphical interface powered by the Raspberry Pi, the end result is the same: a dashboard that looks wildly different than it did when the car rolled off the assembly line.

But this LED dashboard project from [Flyin’ Miata] takes a slightly different approach. Rather than replace the analog gauges entirely, rings of RGB LEDs of the same diameter were placed behind their matte black faces. When the LEDs are off you’d never notice them, but once they kick on, the light is clearly visible through the material.

LEDs can easily shine through the gauge face.

So far, it looks like most of the work seems to have been put into the tachometer. The firmware running on the CAN equipped Adafruit Feather M4 can do things such as light up a dynamic redline based on current engine temperature. It will also light up the LEDs to follow the analog gauge as it moves around, which might not have much practical application, but certainly looks cool.

On the speedometer side, the LEDs seem to be used primarily as warning indicators. As demonstrated in the video below, the whole gauge can light up bright red to indicate a critical situation such as low oil pressure. If you wanted to, the system could also be configured with different colors corresponding to various possible fault conditions.

Compared to some of the more aggressive dashboard updates we’ve seen, this is an interesting compromise that helps retain the look of the original instrumentation. Of course, depending on the make and model of the car, you might be able to sneak in a small LCD screen without anyone noticing.

Continue reading “RGB LED Rings Teach Old Dash New Tricks”