Monitoring An Electric Fence With LoRaWAN

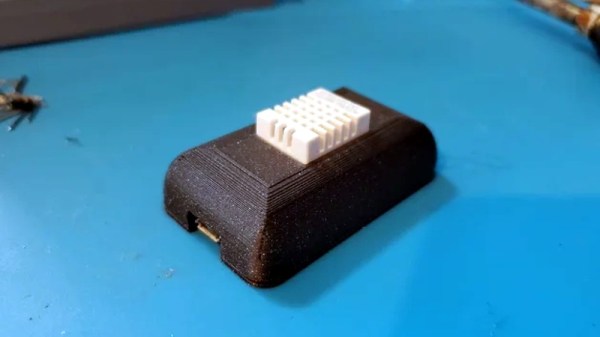
Making sure that an electric fence which is keeping one’s cattle and sheep from wandering off is still working properly seems like a fairly daunting task, especially when this fence is quite a distance from one’s home so checking up on it is time-consuming. After a friend of [kiu] got called a few times by the police because some of the sheep had pulled a prison break, the obvious technological solution was to IoT-enable the fence with LoFence.

This solution is nothing if not elegant in its simplicity. For phoning home with status data, the system uses the Microchip RN2483 IC, which handles pretty much all aspects of LoRaWAN, so that one merely has to send data to its serial interface to transmit. Because this system uses The Things Network (TTN) there are no service costs due to the low data rates. This was the easy part, aside from having to add a LoRaWAN gateway to boost the signal in the area with the electric fence.

With that side covered, the rest of the build features an AVR ATmega328p MCU, a resistor divider and op-amp (TLV9062) along with some passives. The resulting circuit measures voltage, essentially to detect whether the fence is still forming a full circuit. Hacking into the little box that energizes the fence might be a possible upgrade there, but at least it is a fairly uncomplicated way to measuring things. Electric fences do work best with a voltage on them, after all.

At the other end of the LoRaWAN network, the data is parsed and analyzed by a service so that it can be displayed on a Grafana dashboard, ensuring that a single glance suffices to see the current state of the fence and whether one has to dash out in the rain at 1 AM to fix it or not.

Fixing A Cheap UPS HAT For Your Raspberry Pi With A Tiny Daemon

An uninterruptible power supply (UPS) isn’t something solely to have hooked up to your desktop PC. Your Raspberry Pi SBC might also benefit from it. Yet the available options aren’t too great, or are too expensive. This leads folk including [Joachim Baumann] to modify cheerfully cheap Chinese UPS HAT boards such as the Geekworm UPS HAT to fix its myriad of issues and missing features.

Inspired by a number of other hacks on this board which fixed things like needing to push a button on the UPS to boot the Raspberry Pi, [Joachim] set out to make a similar ATtiny-based solution that would address all issues, above all the fact that this Geekworm UPS does not detect when the connected SBC has turned off and will happily run the lithium battery pack dry. Finding a blog post by Simon who had reverse-engineered the board previously was immensely helpful. Continue reading “Fixing A Cheap UPS HAT For Your Raspberry Pi With A Tiny Daemon”

The Amazon Dash Button: A Retrospective

The Internet of Things will revolutionize everything! Manufacturing? Dog walking? Coffee bean refilling? Car driving? Food eating? Put a sensor in it! The marketing makes it pretty clear that there’s no part of our lives which isn’t enhanced with The Internet of Things. Why? Because with a simple sensor and a symphony of corporate hand waving about machine learning an iPhone-style revolution is just around the corner! Enter: Amazon Dash, circa 2014.

The first product in the Dash family was actually a barcode scanning wand which was freely given to Amazon Fresh customers and designed to hang in the kitchen or magnet to the fridge. When the Fresh customer ran out of milk they could scan the carton as it was being thrown away to add it to their cart for reorder. I suspect these devices were fairly expensive, and somewhat too complex to be as frequently used as Amazon wanted (thus the extremely limited launch). Amazon’s goal here was to allow potential customers to order with an absolute minimum of friction so they can buy as much as possible. Remember the “Buy now with 1-Click” button?

That original Dash Wand was eventually upgraded to include a push button activated Alexa (barcode scanner and fridge magnet intact) and is generally available. But Amazon had pinned its hopes on a new beau. Mid 2015 Amazon introduced the Dash Replenishment Service along with a product to be it’s exemplar – the Dash Button. The Dash Button was to be the 1-Click button of the physical world. The barcode-scanning Wands require the user to remember the Wand was nearby, find a barcode, scan it, then remember to go to their cart and order the product. Too many steps, too many places to get off Mr. Bezos’ Wild Ride of Commerce. The Dash Buttons were simple! Press the button, get the labeled product shipped to a preconfigured address. Each button was purchased (for $5, with a $5 coupon) with a particular brand affinity, then configured online to purchase a specific product when pressed. In the marketing materials, happy families put them on washing machines to buy Tide, or in a kitchen cabinet to buy paper towels. Pretty clever, it really is a Buy now with 1-Click button for the physical world.

There were two versions of the Dash button. Both have the same user interface and work in fundamentally the same way. They have a single button (the software can recognize a few click patterns), a single RGB LED (‘natch), and a microphone (no, it didn’t listen to you, but we’ll come back to this). They also had a WiFi radio. Version two (silently released in 2016) added Bluetooth and completely changed the electrical innards, though to no user facing effect.

In February 2019, Amazon stopped selling the Dash Buttons. Continue reading “The Amazon Dash Button: A Retrospective”

GigaDevice Releasing RISC-V MCUs And Development Boards

Probably not too many people have heard of Chinese manufacturer GigaDevice who so far has mostly been known as a NOR Flash memory manufacturer. Their GD32 range of MCUs is however STM32-compatible, making them interesting (cheaper) alternatives to sourcing directly from ST. Now GigaDevice has announced during a presentation that they are releasing a range of RISC-V-based MCUs: the GD32V series.

As GigaDevice has not yet updated their English-language website, the information we do have is based on CNX-Software‘s translations from Chinese. The specs for the GD32VF103 series of MCUs are listed by them as follows:

  • Core – GD32VF103 RISC-V “Bumblebee Core” @ 108 MHz
  • Memory – 8KB to 32KB SRAM
  • Storage  – 16KB to 128KB flash
  • Peripherals – USB OTG and CAN 2.0B
  • I/O – 3.3V, 5V tolerant
  • Supply Voltage – 2.6 to 3.6V
  • Package – QFN36, LQFP48, LQFP64, and LQFP100 packages

Whether they are pin-compatible with the GD32 MCUs is still to be confirmed. If that turns out to be the case, then this might be an interesting drop-in solution for some products. From the specs it seems clear that they are targeting the lower-end ARM-based MCUs such as ST’s Cortex-M3-based STM32F103, which are quite common in a large range of embedded systems.

Seeing a performance comparison between both types of MCU would be interesting to see as lower power usage and higher efficiency compared to the ARM cores is being claimed. Both MCUs and development boards are already available for sale at Tmall, with the basic GD32VF103C-START board going for about $11 and the GD32VF103TBU6 MCU (QFN36, 64 kB Flash) for roughly $1.27.

Documentation and SDKs in English seem to be a bit scarce at this point, but hopefully before long we too will be able to use these MCUs without having to take up Chinese language classes.

Thanks to [Flaviu] for the tip!

Debug Superpowers Bring An STM32 Back From The Dead

When a processor has a fault it can leave what looks to be precious little in the way of cause and effect. Debug-by-print-statement works surprisingly well in simple cases, but where in a desktop environment you would drop into a debugger to solve trickier problems this can be an onerous task on an embedded system. [Ross Schlaikjer]’s excellent blog post walks through setting up one of our favorite Open Hardware debug probes and shows us that with the right tooling in place, unexpected faults aren’t quite so impenetrable. Continue reading “Debug Superpowers Bring An STM32 Back From The Dead”

Candy-Colored Synth Sounds Sweet

Let’s face it, synthesizers are awesome. But commercial synths are pretty expensive. Even the little toy ones like the KORG Volca and the MicroKORG will run you a few hundred bucks. For the most part, they’re worth the price because they’re packed with features. This is great for experienced synth wizards, but can be intimidating to those who just want to make some bleeps and bloops.

[Kenneth] caught the mini-synth bug, but can’t afford to catch ’em all. After a visit to the Moog factory, he was inspired to engineer his own box based on the Moog Sirin. The result is KELPIE, an extremely portable and capable synth with 12 voices, 16 knobs, and 4 LED buttons. KELPIE is plug and play—power and a MIDI device, like a keyboard, are the only requirements. It has both 1/8″ and 1/4″ jacks in addition to a standard MIDI DIN connection. [Kenneth] rolled his own board based on the Teensy 3.2 chip and the Teensy audio shield.

Part of the reason Kenneth built this synthesizer is to practice designing a product from the ground up. Throughout the process, he has tried to keep both the production line and the DIYer in mind: the prototype is a two-part resin print, but the design could also be injection molded.

We love that KELPIE takes its visual design cues from the translucent candy-colored Game Boys of the late 90s. (We had the purple one, but always lusted after the see-through kind.)  Can we talk about those knobs? Those are resin-printed, too. To color the indicators, [Kenneth] used the crayon technique, which amounts to dripping molten crayon into the groove and scraping it off once hardened. Don’t delay; glide past the break to watch a demo.

Continue reading “Candy-Colored Synth Sounds Sweet”

A Colorful Way To Play Chess On An ATmega328

We’ve all seen those chess computers that consist out of a physical playing field, and a built-in computer that would indicate where you should put its pieces while inputting the position of your pieces in some way. These systems are usually found in a dusty cardboard box in a back room’s closet, as playing like this is fairly cumbersome, and a lot depends on the built-in chess computer.

This take by [andrei.erdei] on this decades-old concept involves an ATmega328p-based Arduino Pro Mini board, a nice wooden frame, and 4 WS2812-based 65×65 mm RGB 8×8 LED matrices, as well as some TTP223 touch sensors that allow one to control the on-board cursor. This is the sole form of input: using the UP and RIGHT buttons to select the piece to move, confirm with OK, then move to the new position. The chess program will then calculate its next position and indicate it on the LED matrix.

Using physical chess pieces isn’t required either: each 4×4 grid uses a special pattern that indicates the piece that occupies it.  This makes it highly portable, but perhaps not as fun as using physical pieces. It also kills the sheer joy of building up that collection of enemy pieces when you’ve hit that winning streak. You can look at the embedded gameplay video after the break and judge for yourself.

Continue reading “A Colorful Way To Play Chess On An ATmega328”