Custom Car Keypad Entry

jeepKeyless

[EdsJunk] loves the outdoors and using his Jeep Wrangler to get him there, but hiding a key just to go for a swim makes him nervous. After a friend showed him how convenient it was to have keypad entry to his vehicle, [EdsJunk] decided it was time he built his own.

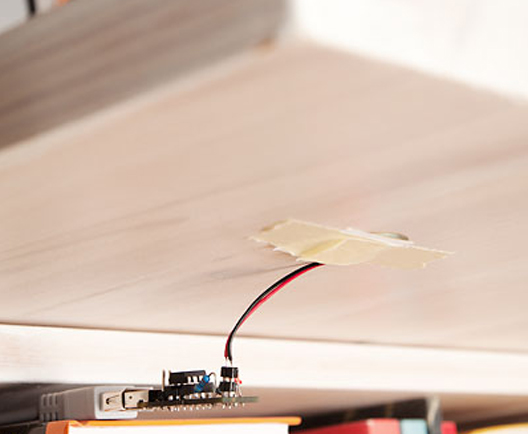
The build uses a spare waterproof keypad attached to an Arduino Micro. [EdsJunk] simplified things by cannibalizing his extra keyless entry keyfob; if the ‘duino receives the right code from the keypad, it presses the unlock button on the keyfob to grant access. [EdsJunk] admits that the Wrangler’s soft top is easy enough to get into, but explains that the goal of this project is to keep the alarm activated, which would presumably go off if someone tried to break in through the soft top. You can watch a video demo of the keypad access below. This is another great addition to the multitude of hacks he’s performed on one vehicle.

We do, however, hope that there’s some kind of lockout built into the code to prevent brute forcing: it should be easy enough to activate the car’s panic button after a set number of failed attempts. Car hacks are popular this summer: check out the Real Car Remote Control if you missed it.

Continue reading “Custom Car Keypad Entry”

The JavaScript Of Things

Espruino

There are a ton of people out there that can program in JavaScript, but give them an embedded device, and they’re up the creek without a paddle. Not anymore, that is, thanks to [Gordon]’s wonderful Espruino, a JavaScript interpreter for ARM microcontrollers. Oh, it’s also a very capable dev board that has more than enough power to turn just about any project you can imagine into reality.

On board the Espruino is an ARM Cortex M3 in the form of an STM32 chip, 256kB Flash, 48kB of RAM, and a ton of PWM and ADC pins to go along with 2 SPI ports, 2 I2C ports, and 2 DACs. It’s a very capable piece of hardware, and if you’re looking to build anything, it would be hard to pick a better general purpose dev board.

[Gordon] has put his board up on Kickstarter, and since it’s already been successfully funded, he’ll be releasing the hardware and software sources under an Open Source license. If you’ve ever wanted to run JavaScript on an ARM board, it looks like Espruino is just the ticket.

Yet Another Self-Balancing Unicycle

No one has time to hone their balancing skills these days, and if building your own Segway doesn’t generate enough head-turning for you, then the self-balancing unicycle from the guys at [Scitech] should. Their build is chain-driven, using easy-to-find salvaged Razor scooter parts. Throw in a motor controller, 5DOF IMU and some batteries and it’s almost ready to burn up the sidewalks in hipster-tech style.

Some of the previous unicycle builds we’ve seen are a little on the bulky side, but the [Scitech] cycle aims for simplicity with its square tube steel framing and footrests. As always, unicycle builds like these take some effort on behalf of the rider: shifting your weight controls steering and throttle. The [Scitech] gang also discovered that it’s usually best when you don’t accidentally wire the motors up to the controller backwards. We recommend that you find a helmet and watch the video after the break.

Too-cool-for-unicycle hackers can build a dangerously fast e-skateboard instead.

Continue reading “Yet Another Self-Balancing Unicycle”

Learn JTAG By Writing A Bit-banging Programmer

j-tag-flow-chart

[Pesco] won one of Dangerous Prototypes’ PCB giveaways a few months ago. He opted for a CPLD breakout board. He just needed to put in a parts order and populate the components himself. But then what? He needed a JTAG programmer to work with the chip. Like any good autodidact he choose to make his own rather than buying one. He absorbed the JTAG specification and coded a bit banging programmer using an Arduino.

We’ve used JTAG many times to program ARM chips. But until now we never took the time to figure out how the specification works. If you’ve got an IEEE subscription you can download the whitepaper, but [Pesco] was also able to find one floating around on the interwebs. The flow chart on the left is the cheat sheet he put together based on his readings. From there he wrote the Arduino sketch which implements the programming standard, allowing him to interact with a chip through a minicom terminal window.

[via Dangerous Prototypes]

CC3000 WiFi Driver For .NET Micros

CC3000

The Netduino and other .NET Micro boards don’t seem to get much love, but that doesn’t mean they’re not able to use one of the coolest chips we’ve seen in a while. [Valkyrie] has written a driver for TI’s new CC3000 all-in-one WiFi chip, giving any .NET micro device a very small and very cheap WiFi connection.

A while back, [Chris Magagna] created a TI CC3000 library for the Arduino. [Valkyrie] fell out of his chair when he saw that post, as it meant the .NET Micro devices such as the Netduino could finally use this device. With a TI Launchpad and a logic analyzer, [Valkyrie] recorded all the SPI commands and responses eventually reconstructing the entire library.

As for how useful this is without any hardware, There’s already a CC3000 Gadgeteer module available from GHI Electronics.

Sony SmartWatch Hack Lets It Tell Time With A Teapot Animation

sony-smartwatch-wireframe

This hack turns the Sony SmartWatch into a wristwatch. Functionally it’s not all that impressive. But the journey to get to this point represents quite a bit more. This example features an animated tea pot using a 3D rendering engine ported over to the device.

[Federico] started work on the project soon after hearing that Sony had released details about developing for the hardware. He dug into the documentation but soon found it lacked the depth he needed to get a handle on bare metal work. He shelved the project for a while until coming across the Astrosmash project we featured in June. That used a wrapper that allows Arduino sketches to run on the watch. After studying how that’s done he had enough background to port this code.

We’re still waiting to see a really innovative hack for the watch. But we’re glad to see progress with each new proof of concept like this one!

Continue reading “Sony SmartWatch Hack Lets It Tell Time With A Teapot Animation”

Reaction Time Challenge

reactionChallenge

We’re not sure where [Bill Porter] finds all of his free time, but we’re glad he’s put it to such good use by building an exhibit piece for the local science museum: Reaction Time Challenge. It’s likely that we were all inspired to love science as kids in a museum like this, and [Bill’s] contribution is already fascinating its young audience. The challenge lets two participants test how fast they can smack a big red button after a randomly-generated countdown. The time taken for the players to react is translated into the RGB LED strips, measuring how fast they managed to hit the button.

Builds like this one need to clearly communicate how they should be used; you don’t want confused children bamming around on your cabinet. First, [Bill] guts the dim LEDs inside the big plastic buttons and replaces them with some brighter ones. To keep the connections clean, he takes the cannibalized ends of an Ethernet cable and hooks the speaker and buttons to an Ethernet jack. The jack sits snugly in a project box where it connects to an Arduino. Two RGB LED strips run from the opposite end of the box, daisy-chaining from the bottom of the cabinet to the top, then back down again. See it all come together in the video after the break.

[Bill’s] museum must be pretty lucky; he resurrected the “Freeze Frame” exhibit for them just over a year ago and has done a bunch of other projects for them over the years.

Continue reading “Reaction Time Challenge”