Custom Controller Makes Turbomolecular Pump Suck

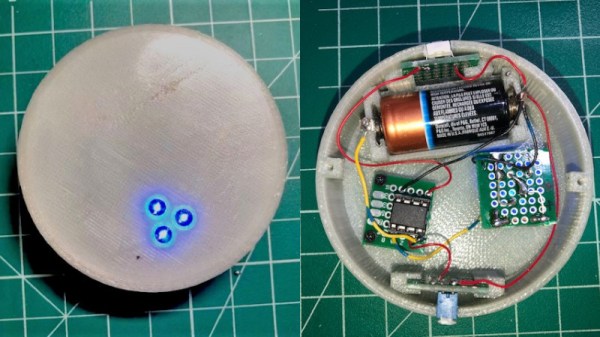
[Mark Aren] purchased a pair of Turbomolecular pumps (TMP) sans controllers, and then built an FPGA based BLDC controller for the Turbomolecular pumps. A TMP is similar to a jet turbine, consisting of several stages of alternating moving turbine blades and stationary stator blades, and having turbine rotation speeds ranging from 10,000 rpm to 90,000 rpm. TMP’s cannot exhaust directly to atmosphere, and must be combined with a backing (or roughing) pump to create a lower grade vacuum first. They find use in lots of applications such as electron microscopy, analytical sciences, semiconductors and lamp manufacturing. With the lamp industry rapidly embracing LEDs, many of the traditional lamp making lines are getting decommissioned, and if you are lucky, you can snag a TMP at a low cost – but it still will not be cheap by any means.

The two BOC-Edwards EXT255H Compound Molecular Pumps (PDF), that [Mark] bought did not have their accompanying EXC100E Turbomolecular Pump Controllers (PDF), and given pandemic related restrictions, he decided to build a controller of his own, using components and modules from his parts bin. The pump and controller user manuals offered only sketchy details about the sensored BLDC motor used in the pump. The low phase-to-phase resistance implied low drive voltage, and [Mark] decided to try running it at 24 V to start with. He already had experience using the Mitsubishi PS21245-E IGBT inverter bridge, and even though it was rated for much higher voltages, he knew that it would work just fine at 24 V too.

After figuring out a state machine for motor commutation that utilized PWM based adjustable current control, he implemented it on a 128 element FPGA board. Considering how expensive the TMP was, he wisely decided to first try out his driver on a smaller “expendable” BLDC motor. This whole process was non-trivial, since his available IGBT module was untested and undocumented, and required several tweaks before he could run it at the required 12 kHz PWM signals. His test motor was also undocumented, failing to run correctly when first hooked up. Fixing that issue meant having to disassemble the motor to check its internal wiring. Eventually, his efforts paid off, and he was able to safely run the TMP motor to confirm that his design worked.

With FPGA code, IGBT wiring and power supply issues sorted, the next step was to add a supervisory micro-controller, using an Arduino Nano. Its functions included interfacing with a touch screen LCD as a user interface, communicating with the FPGA module, and controlling several relays to switch power to the motor power supply, the roughing pump, TMP cooling fan, and a solenoid for the vacuum vent. Spindle current is calculated by measuring voltage drop across shunt resistors on the low side of the IGBT. Motor speed is measured using one of the motor hall sensors, and a thermistor provides motor temperature sensing. [Mark]’s PCB fabrication technique seems a bit different too. Using an Excellon drill file, he drills holes in a piece of plastic using a laser cutter to create a bare board, and then solders copper tracks by hand.

His initial tests at atmospheric pressure (although not recommended unless you monitor pump temperature), resulted in 7300 rpm while consuming about 7 Amps before he had to shut it down. In further tests, after adding a roughing pump to the test setup, he was able to spin the TMP to 20,000 rpm while it consumed 0.6 A. Obviously, the pump is rated to operate at a higher voltage, possibly 48 V based on the values mentioned in the TMP controller manual. The project is still “work in progress” as [Mark] hopes to eventually drive the pump up to its specified 60,000 rpm operating speed. What is not clear is what he eventually intends to do with this piece of exotic machinery. All he mentions is that “he has recently taken an interest in high-vacuum systems and is interested in exploring the high-vacuum world of electron guns.”

Maybe [Mark] can compare notes with the Open Source Turbomolecular Pump Controller that we featured some time back. And if you’d like to be a little bit more adventurous and build you own TMP, we got you covered with this DIY Everyman’s Turbomolecular Pump.

[Ben Eater]’s Breadboarding Tips

A solderless breadboard is a place where ideas go to become real for the first time. Usually, this is a somewhat messy affair, with random jumpers flying all about the place, connecting components that can be quickly swapped to zero in on the right values, or to quickly change the circuit topology. Breadboards aren’t the place to make circuit artwork.

That is, however, not always the case, and we’ve seen more than a few examples from [Ben Eater] on breadboarding that approaches the circuit sculpture level of craftsmanship. And like any good craftsman, [Ben] has shared some of his breadboarding tips and tricks in a new video. Starting with a simple 555 blinkenlight project that’s wired up in the traditional anything-goes fashion, [Ben] walks us through his process for making a more presentation-worthy version.

His tools are high-quality but simple, with the wire strippers being the most crucial to good results. Surprisingly, [Ben] relies most heavily on the simple “scissors-style” strippers for their versatility, rather than the complicated semi-automatic tools. We found that to be the biggest take-home from the video, as well as the results of practice. [Ben] has done tons of this type of breadboarding before, which means when he “eyeballs” stripping 0.3 inches of insulation, he can do it down to a ten-thousandth precision.

Granted, there’s not much new here, but watching this video is a little like watching [Bob Ross] paint — relaxing and strangely compelling at the same time. You can get more of the same with pretty much any of his videos that we’ve covered, like this 6502 breadboard computer build. We’ve also seen [Eater]-inspired builds that are pretty impressive, like this full-8-bit breadboard computer.

Continue reading “[Ben Eater]’s Breadboarding Tips”

Domino Layer Lets You Focus On Toppling

Knocking dominoes down is a fun pastime for a rainy afternoon, but setting them all up can be a drag. Thankfully, [Lewis] of [DIY Machines] has built a helpful machine to do the job for you, letting you focus on the fun part instead!

The machine is run by an Arduino Uno, that can be pre-programmed with a layout or controlled over Bluetooth in real time. It uses a geared-down DC motor to drive around a smooth surface, with a servo for steering. A second servo is used to turn a carousel loaded with up to 130 dominoes, allowing the machine to lay long runs without needing a refill. It’s designed to be easy to change so multiple carousels can be printed to quickly run courses of extended lengths.

The build is a great example of a machine capable of doing a tricky task with ease, thanks to 3D printing and smart design. We’re particularly impressed with the simple domino transport mechanism integrated into the drive system without requiring extra motors or servos. It’s not the first domino layer we’ve seen, either. Video after the break.

Continue reading “Domino Layer Lets You Focus On Toppling”

Cupcake Machine Makes Tasty, If Weird, Creations

Baking cupcakes is a fun pastime, and one which we imagine many people took up in this year of quarantine and lockdown. However, anything a human can do, a machine can certainly make an attempt at, as [Skyentific] shows with this roboticized cupcake machine.

The build will be familiar to anyone who has worked with 3D printers or DIY CNC machines before. A series of stepper motors move a carriage carrying a regulation-sized patty pan. This is filled with dough from a tube, squirted out by a modified electric caulking gun. The carriage then transports it to a small microwave chamber of custom construction. After a minute or so of cooking, it’s then removed, and topping is applied from a further two caulking guns. An Arduino is in charge of the operation, running the show with some stepper drivers, limit switches, and a bank of relays.

The final product isn’t the prettiest cupcake we’ve ever seen, but it’s perfectly edible. We can imagine with some small modifications the device could probably cook batches of four at a time without too much trouble. We’ve seen other baking robots before, too. Video after the break.

Continue reading “Cupcake Machine Makes Tasty, If Weird, Creations”

Water And Molten Aluminium Is A Dangerous Combination

It is not uncommon for a Hackaday writer to trawl the comments section of a given article, looking for insights or to learn something new. Often, those with experience in various fields will share kernels of knowledge or raise questions on a particular topic. Recently, I happened to be glazing over an article on aluminium casting with interest, given my own experience in the field. One comment in particular caught my eye.

 And no, the water won’t cause a steam explosion. There’s a guy on youtube (myfordlover, I think) who disproves that myth with molten iron, pouring the iron into water, pouring water into a ladle of molten iron and so on. We’ll be happy to do a video demonstrating this with aluminum if so desired.

Having worked for some time in an aluminium die casting plant, I sincerely hope [John] did not attempt this feat. While there are a number of YouTube videos showing that this can be done without calamity, there are many showing the exact opposite. Mixing molten aluminium and water often ends very poorly, causing serious injury or even fatalities in the workplace. Let’s dive deeper to see why that is.

Continue reading “Water And Molten Aluminium Is A Dangerous Combination”

New Part Day: SD NAND Are Surface Mount Chips That Work Like An SD Card

SD cards have long been a favorite with microcontroller hobbyists. Cheap, readily available, and easily interfaced, they remain a staple for small projects that need to store a lot of data. Now, they’re available in chip form! These are known as SD NAND parts that emulate the SD card interface itself.

[LadyAda] recently gave them a test-drive after spotting a tweet from [Greg Davill] (who we’re familiar with thanks to his excellent LED cubes). The devices are manufactured by XTX Technology and available from LCSC in a range of 1, 2, 4, and 8 GB sizes. [Ivan Grokhotkov] also illuminated a similar device from another maker in a reply to [Greg’s] original tweet, so there may be more sources out there.

These chips come in standard LGA8 surface mount package and can be easily soldered to a board, offering mechanical and manufacturing benefits versus using a normal SD or microSD card in a slot-type connector. Also, unlike other SMD flash memory parts, they handle all the file system details and wear levelling for you! With the inflation of SD card sizes, it’s also difficult to find these on the shelf in normal cards these days.

[Adafruit] plan to have a breakout for these parts out soon with a level shifter included for ease of use. We can imagine these chips finding their way into all manner of datalogger projects, since they can be ordered with other parts and permanently soldered into a design. If you’ve got a particularly good idea where these chips would prove useful, sound off in the comments. Video after the break.

Continue reading “New Part Day: SD NAND Are Surface Mount Chips That Work Like An SD Card”

Fully Backlit AlphaSmart NEO2 Lights Up The Night

The AlphaSmart NEO and NEO2 are great little word processors for distraction-free writing anywhere you want to go, but they lack the backlight of the later Dana model. Well, [starboyk] has done what many thought impossible and added a backlight to a NEO2. Experience gained from a ton of console mods and repairs led to the question of whether the NEO2’s LCD is similar to a Game Boy’s.

[starboyk] started with a fresh NEO2 from ebay, then swapped out the reflective polarizer for a translucent polarizer and added a trio of LED backlights meant for the original Game Boy across the back of the screen. The best part is that the backlight has its own power switch and a brightness control pot. It sounds easy enough, but this mod is not for the faint of heart as it sounds like a really tight fit in the end. Apparently we only need 500 orders to get a custom backlight manufactured, but barring that does anyone know of a backlight that’s 157mm x 44mm?

You can always stick with the mod where you power the USB-A port and use a USB reading light like I did with my NEO.