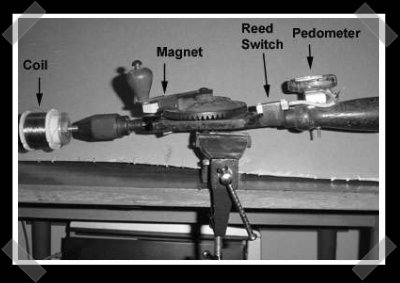
This will probably be more useful to custom speaker builders, but coil winding has always been a bit tedious. [iwicom] put together a simple coil winder using a hand drill, a magnet, a reed switch that triggers a pedometer. Aside from the coil winder, I love the idea of using the pedometer as a cheap event counter.
Misc Hacks4181 Articles
Computer Controlled Lawn Defender
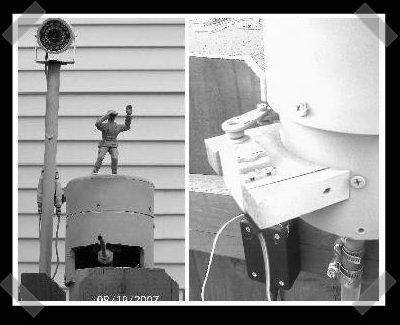
I found this thanks to [Mark
Nobel Prize Hard Drive Hacking Roundup

Ironically, high end gear is moving toward solid state hard drives, but I think it’s time for a hard drive hacking roundup in honor of the Nobel prize for physics being awarded for the technology behind todays magnetic hard drives.
We recently saw this awesome hard drive clock – which uses the actual drive hardware to show the time. Then there’s the now classic hard drive window – the trick is to create a clean room/box so you can swap out the cover. Let’s not forget the hard drive oscilloscope – made from a laser mounted on the oscillating drive arm. Sometimes drives die, so a bit of resurrection may be in order. Locked out? Maybe you should built a lock-picking gun from a junk drive. Some people just like to hide the things.
Joule Thief LED Driver
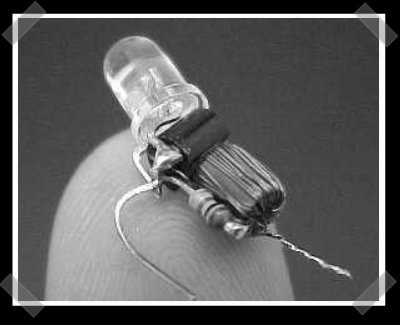
[Bird603568] sent in this sweet little LED hack that’ll drive a white LED from just 1.5 volts. The circuit consists of a pair of coils wound on a ferrite core, a resistor and a NPN transistor. He notes that the circuit still functions even at .35v. The version pictured is even small enough to fit inside a normal flashlight bulb base.
Pulse Soldering Iron
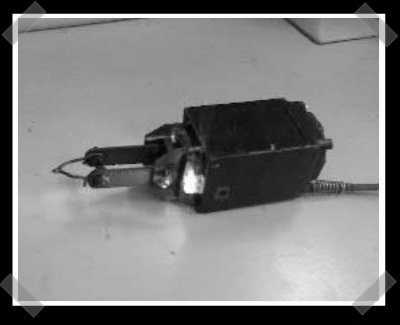
I’m always interested in new ways to solder. [SPman] sent in this diy pulse soldering iron. It heats up in 5 seconds on demand, then cools in about 15. The writeup is a bit terse (since it’s translated from Russian), but it would definitely be handy for larger wiring jobs. The transformer is hand wound, and an oscillation driver forms a sort of crude frequency modulation to run the MOSFETS that drive the heating elements. I’d keep it away from delicate electronics unless you’re confidant of the temperature stability. It was designed for 220V, so you’d need to modify the transformer a bit to get similar performance on a 110V circuit.
$25 Head Mounted Display
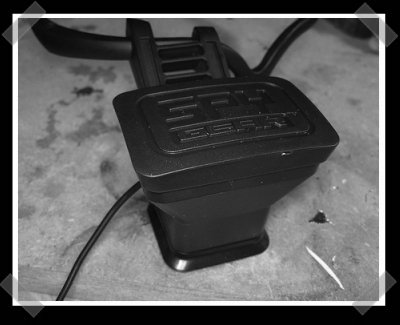
[Jake] sent in his source for a cheap head mounted display. In his writeup he notes that the spy video car comes with quite a pile of handy electronics – video tx/rx, camera and this simple black and white monocle head mounted display. (Which happens to be available as a replacement unit for a mere $20) The screen is a Kopin 300M (Black and white, 300×240 pixels) The display is actually somewhat usable out of the box, but he takes the time to note some simple mods that’ll improve the displays performance.
If you ever bought a virtual boy just to gut the display, then you know you want one. In fact, I’ve got a perfect project in mind for this particular toy.
Back From Belize Extra

Yesterday, I was standing on a tropical island off the coast of Belize. Vacation rocked with lots of SCUBA diving, spearfishing and snorkeling. I’m back home, shaking off the jet lag and clearing up my inbox. Thanks to [fabienne] for filling in and letting me unplug for a while!
[Darkrom] has set a new standard for Hack-A-Day readers… I haven’t seen it in person, but that looks like a legit Hack-A-Day tattoo.
[null] sent in a new use for a frequency generator, a spare car amp, a sub-woofer and a plastic coffee can – brass cartridge polishing.
[LoopyMind] sent in this Game Boy Advanced Movie Player IDE hack. It’s pretty much a direct CF to laptop drive cable with an external battery supply.
[Dingolishious] sent in a POE UPS/remote power control solution. Could be handy if you’re using many POE devices, or if you’re having power issues. He added an inexpensive remote power monitor/switch solution behind his UPS. It senses power outages and kicks out an email – and allows remote power cycling of his POE devices. Of course, if you’ve got a linux box behind the UPS, it can monitor the output from the UPS and send notifications.
[William] added a preamp stage to his iKEY usb recorder. looks like an interesting toy – it’ll record audio directly to a USB flash key. The pre-amp allows him to record in more challenging environments.
[Andrew] noted a simple mod to increase the deadly fire power of the ubiquitous airsoft pellet gun. It’s just a matter of reducing some extra space in the spring compression area.
Last but not least, [VIPER] modded his projector to use a 12v halogen headlight bulb. Not a bad idea – at one point I was pondering a 550 watt source four halogen as a possible replacement.


