Sometimes you notice something small that nevertheless you can’t explain. [Greg Davill] found himself in just such a situation this week when he noticed some green LEDs glowing dimly when reflowing some boards. Naturally, [Greg] set out to investigate.
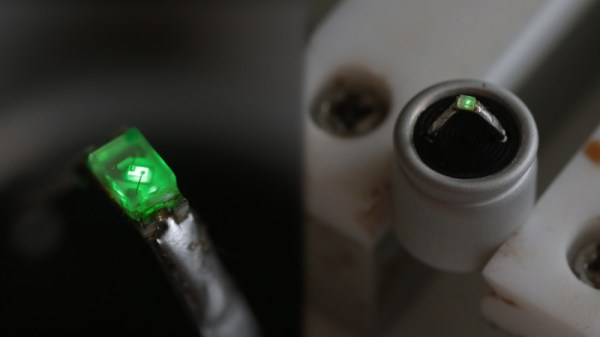
The green LEDs were wired up as power indicators, and [Greg] suspected that the polymer caps on the board might be generating a small current somehow that was causing the LEDs to light up ever so slightly. A simple test hooked a polymer cap directly up to a multimeter. When warmed with a heat gun, the meter showed a small current “in the 5-10 uA range.”
Going further, [Greg] soldered an LED to the cap and once again heated it up, this time to 100° C. The LED glowed, continuing to do so for around 60 seconds with heat removed. The mystery also grew deeper – [Greg] noticed that this only happened with “fresh” capacitors. Once they’d been through one heat cycle, the caps would no longer light an LED when warmed up.
It’s a curious case, and has many speculating as to the causative mechanism on Twitter. Explanations from thermoelectric effects to chemical reactions inside the capacitor. If you’ve got the inside scoop on what’s going on here, don’t hesitate to let us know in the comments. Meanwhile, check out some of [Greg]’s best work – a glowing D20 dice featuring a whopping 2400 LEDs.
[Thanks to J Peterson for the tip!]