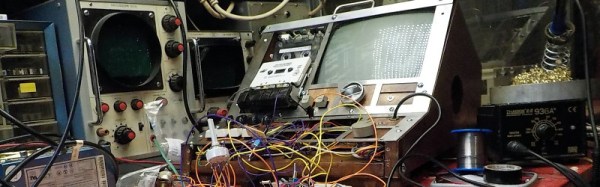
Retrotechtacular: The Hammond Novachord

Just when we thought we’d heard of all the cool early synthesizers, a tipster rattled our jar with news that someone completely restored a Novachord. These spinet piano-shaped prototypical synthesizers were made by Hammond for only four years. About a thousand of them were built before sales sagged and parts became scarce in 1942. It is estimated that only 200 or so are still around today.

The Novachord’s sounds are generated by a bank of twelve monostable vacuum tube oscillators. Each one is tuned to a pitch of the chromatic scale in what is called divide-down architecture. [Hammond] and his co-creators [John Hanert] and [C.N. Williams] used the property of dividing a frequency in half to generate the same tone, but one octave lower. This design means that all 72 notes can be played at the same time. Adjustable formant filters shape the often otherworldly sounds, which are then passed through flexible tube-based envelopes.

[Phil] knew it would be a big job to restore a Novachord in any condition. Thousands of passive components all had to be replaced. The cabinet bore all the hallmarks of a well-used parlor instrument—water rings from cocktails, scratches, and cigarette burns galore. [Phil] says that woodworking really isn’t his thing, but he did an outstanding job nonetheless of sanding every nook and cranny and applying several coats of stain. There are tons of drool-inducing pictures on his project site, and several clips of [Phil] really putting it through its paces.

Thanks for the tip, [Mike]!

Retrotechtacular is a weekly column featuring hacks, technology, and kitsch from ages of yore. Help keep it fresh by sending in your ideas for future installments.

Tricking A Car Stereo To Think Your Cellphone Is A Tapedeck

When you have an older vehicle there’s not a lot of options in the stock stereo department, often a CD player and tape deck is what you get. When you want to play your tunes from your mobile what do you do? Buying an adapter, or a new head unit for that matter, isn’t any fun. So why not hack it? This isn’t just a mechanical marriage of a Bluetooth dongle and an elderly stereo. Some real work went into convincing the stereo that the BT receiver was the stock tape deck.

car-stereo-logic-analyzerAttacking the outdated Cassette deck [kolonelkadat] knew that inside the maze of gears and leavers, most of it is moving around actuating switches to let the radio know that there is a tape inside and that it can switch to that input and play. Tricking the radio into thinking there is a tape inserted is handled by an Arduino. Using a logic analyzer [kolonelkadat] figured out what logic signals the original unit put out and replicating that in his Arduino code.

Audio is handled by the guts of a bluetooth speaker with the output redirected into the radio where the signal coming off the tape head normally would have been directed. Join us after the break for a couple of videos with all of the details.

Continue reading “Tricking A Car Stereo To Think Your Cellphone Is A Tapedeck”

Zynq And The OPL3 Music Synthesizer

We’re big fans of the Zynq, which is an answer to the question: what do you get when you cross a big ARM processor with a big FPGA? So it isn’t surprising that [GregTaylor’s] project to emulate the OPL3 FM Synthesis chip in an FPGA using the Zynq caught our eye.

The OPL3 (also known as the Yamaha YMF262) was a very common MIDI chip on older PC sound cards. If you had a Sound Blaster Pro or 16 board, you had an OPL3 chip in your PC. The OPL3 was responsible for a lot of the music you associate with vintage video games like Doom. [Greg] not only duplicated the chip’s functions, but also ported imfplay from DOS to run on the Zynq’s ARM processors so he could reproduce those old video game sounds.

The Zybo board that [Greg] uses includes an Analog Devices SSM2603 audio codec with dual 24-bit DACs and 256X oversampling. However, the interface to the codec is isolated in the code, so it ought to be possible to port the design to other hardware without much trouble.

To better match the original device’s sampling rate with the faster CODEC, this design runs at a slightly slower frequency than the OPL3, but thanks to the efficient FPGA logic, the new device can easily keep up with the 49.7 kHz sample rate.

Using an FPGA to emulate an OPL3 might seem to be overkill, but we’ve seen worse. If you prefer to do your synthesis old school, you can probably get a bulk price on 555 chips.

Continue reading “Zynq And The OPL3 Music Synthesizer”

Laser Cut Your Own Vinyl Records

[Amanda Ghassaei] has created an awesome hack for making your own vinyl records using a laser cutter from an MP3 file. Her excellent hack uses a Processing sketch that converts a digital audio file into a vector graphics file, which is then burned onto vinyl using a laser cutter. We saw a demo of this at the FabLab11 conference, and it’s an impressive hack.

One of the best parts of her write up are the details of how she arrived at the appropriate processing settings to get the record sounding as good as possible, but still be cuttable. It’s an object lesson in how you iterate on a project, trying different approaches and settings until you find the one that works. She also decided to take it a few steps further, cutting records on paper and wood for the ultimate eco-friendly record collection.

Audiophiles should avoid this technique though. Due to limitations in the resolution of the laser cutter, [Amanda] ended up having to reduce the bandwidth of the audio signal to 4.5Khz and use a 5-bit sampling depth. That translates to a rather tinny-sounding record. Vinyl record snobs can breathe easy: this isn’t going to replace their beloved white-hot stampers. For the rest of us, there are always records etched into tortillas.

Continue reading “Laser Cut Your Own Vinyl Records”

Ghost Guitar Plays Hendrix

Purple Haze all in my brain,
lately guitars they don’t seem the same,
[Josh] is playin’ funny but I don’t know why
‘scuse me while he electrifies.

[Josh] wanted to experiment with playing a guitar by different means. We’ve seen a few guitar hacks that use servos to play, and Arduino-based guitars that replace the strings with membrane potentiometers, but he decided to try a different approach. He’s using a permanent magnet and the electromagnetic effect to play the string.

Purple Haze all around,
all those amps are runnin’ up or down.
Are my strings all goin’ left or right?
Whatever it is, electromagnetism is pushin’ me outta sight.

To do this, he put a large permanent magnet next to the string and ran an alternating current through the string itself. When the current and the magnetic field interact, the string is pushed, like the bearing of a motor.  When the current goes the other way, the string is pushed in the opposite direction. Because he is using an alternating current (driven through a MOSFET tied into a frequency generator), he was able to control the frequency of this, and find the frequencies that made the string resonate, including the harmonics that give guitars their unique sound. It’s a pretty neat hack, but don’t forget that he is dealing with quite a lot of juice: if you were to inadvertantly touch the string and ground it to earth, there is enough current in the circuit to kill you.

Yeah, [Josh’s] hack is all about the right hand rule,
I know that he’s no hacking fool,
you’ve got my E string resonating, resonating so fine
just don’t touch it, or you’ll end your time
Help me, yeah, Purple Haze!

(with apologies to the ghost of [Jimi Hendrix], guitar hacker supreme)

Continue reading “Ghost Guitar Plays Hendrix”

Make A Microphone Out Of A Hard Drive

[Rulof Maker] has a penchant for making nifty projects out of old electronics. The one that has caught our eye is  a microphone made from parts of an old hard drive. The drive’s arm and magnet were set aside while  the aluminum base was diagonally cut into two pieces.  One piece was later used to reassemble the hard drive’s magnet and arm onto a wooden platform.

v2_micThe drive’s arm and voice coil actuator are the key parts of this project. It was modified with a metal extension so that a paper cone cut from an audio speaker could be attached, an idea used in microphone projects we’ve previously featured. Copper wire scavenged from the speaker was then soldered to voice coil on the arm as well as an audio jack. In the first version of the Hard Drive Microphone, the arm is held upright with a pair of springs and vibrates when the cone catches sound.

While the microphone worked, [Rulof] saw room for improvement. In the second version, he replaced the mechanical springs with magnets to keep the arm aloft. One pair was glued to the sides of the base, while another pair recovered from an old optical drive was affixed to the arm. He fabricated a larger paper cone and added a pop filter made out of pantyhose for good measure. The higher sound quality is definitely noticeable. If you are interested in more of [Rulof’s] projects, check out his YouTube channel.

Continue reading “Make A Microphone Out Of A Hard Drive”

Forgotten Rock Band Drum Controller As A MIDI Instrument

Happen to have an old Rock Band drum controller collecting dust in your living room? If you also have a spare Arduino and don’t mind parting with that plastic college memento then you’ve got the bulk of what could potentially be your new percussive MIDI instrument. In his project video [Evan Kale] outlines the steps necessary to turn that unloved plastic into a capable instrument for recording.

The whole process as outlined by [Evan] in under seven minutes. This looks like a great weekend endeavor for those of us just starting out with MIDI. After cracking the back of the Guitar Hero drum kit controller open, the main board within is easily replaced with a standard sized Ardunio (which matches the present mounting holes exactly). About 4:50 into the video [Evan] explains how to add a basic perf-board shield over the Arduino which connects the piezo sensors in each of the drum pads to the analog pins of the micro-controller. The MIDI jack that comes built into the back of the kit can also be reused as MIDI out when wired to the Arduino’s serial out pin. By adjusting [Evan’s] example code you can dial in the instrument’s feedback to match the intensity of each hit.

The video with all of the details is after the jump. Or you can check out a MIDI hack that goes the other way and uses a drum kit as a Guitar Hero or Rock Band controller instead

Continue reading “Forgotten Rock Band Drum Controller As A MIDI Instrument”