Making Minty Fresh Music With Markov Chains: The After Eight Step Sequencer

Step sequencers are fantastic instruments, but they can be a little, well, repetitive. At it’s core, the step sequencer is a pretty simple device: it loops through a series of notes or phrases that are, well, sequentially ordered into steps. The operator can change the steps while the sequencer is looping, but it generally has a repetitive feel, as the musician isn’t likely to erase all of the steps and enter in an entirely new set between phrases.

Enter our old friend machine learning. If we introduce a certain variability on each step of the loop, the instrument can help the musician out a bit here, making the final product a bit more interesting. Such an instrument is exactly what [Charis Cat] set out to make when she created the After Eight Step Sequencer.

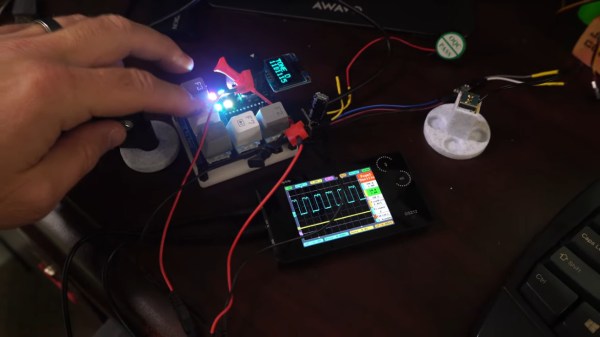
The After Eight is an eight-step sequencer that allows the artist to set each note with a series of potentiometers (which are, of course, housed in an After Eight mint tin). The potentiometers are read by an Arduino, which passes MIDI information to a computer running the popular music-oriented visual programming language Max MSP. The software uses a series of Markov Chains to augment the musician’s inputted series of notes, effectively working with the artist to create music. The result is a fantastic piece of music that’s different every time it’s performed. Make sure to check out the video at the end for a fantastic overview of the project (and to hear the After Eight in action, of course)!

[Charis Cat]’s wonderful creation reminds us of some the work [Sara Adkins] has done, blending human performance with complex algorithms. It’s exactly the kind of thing we love to see at Hackaday- the fusion of a musician’s artistic intent with the stochastic unpredictability of a machine learning system to produce something unique.

Thanks to [Chris] for the tip!

Continue reading “Making Minty Fresh Music With Markov Chains: The After Eight Step Sequencer”

Guitar With Hot-Swappable Pickups Lights Our Fire

There’s a story that goes something like this: Chet Atkins was playing his guitar when someone remarked, ‘that guitar sounds great!’ Mr. Atkins immediately stopped playing and asked, ‘how does it sound now?’ While it’s true that the sound ultimately comes from you and your attention to expression, we feel that different pickups on the same guitar can sound, well, different from each other.

However, this is merely speculation on our part, because changing pickups is pretty serious surgery, and there’s only one company out there making guitars with hot-swappable pickups. Since their low-end model is out of most people’s price range, [Mike Lyons] took one for the team and decided to build a guitar from scratch to test out various pickups of any size, from lipstick to humbucker. [Mike] can swap them out in under a minute, and doesn’t need any tools to do it.

[Mike] modeled the swapping system on that one company’s way of doing things, because why reinvent the wheel? The pickups are inserted through the back and held in place with magnets and a pair of cleverly-designed printed pieces — one to mount the pickup to, and the other inside the pickup cavity.

As far as actually connecting the things up, [Mike] went with a commercially-available quick-connect pickup solution that uses a mini four-conductor audio plug and jack. The body is based on the Telecaster, while the headstock is more Stratocaster — the perfect visual combination, if you ask us.

We are particularly fond of [Mike]’s list of caveats for this project, especially the requirement that it had to be built using only hand tools and a 3D printer. Although a drill press would have been nice to use, [Mike] did a fantastic job on this guitar. Whether you’re into guitars or not, this is a great story of an awesome build.

What, you don’t even have hand tools? You could just print the whole guitar instead.

Polyphony On A Tiny Scale

Older readers may remember the Stylophone, a small battery powered electric organ using conductive PCB pads and a stylus to create notes. The simple multivibrators in those instruments made them monophonic, but here in 2021 we can do better than that! [Sjm4306] has gone the extra mile with a PCB organ, by making a capacitive-touch instrument that boasts four-note polyphony.

At its heart is an ATmega328p whose software sports four tone generators that each emerge on a different pin. These are summed using a set of 100 Ω resistors and fed to a tiny speaker. Power comes from a CR2032 lithium cell, and he notes that a higher voltage delivers more volume.

The full story is detailed in the video below the break, along with a bit of four-note polyphonic action. We’re guessing that this instrument would sound sensational when hooked up to a reverb unit.

Continue reading “Polyphony On A Tiny Scale”

Auto Strummer Can Plectrum The Whole Flat-Strumming Spectrum

Playing the guitar requires speed, strength, and dexterity in both hands. Depending on your mobility level, rocking out with your axe might be impossible unless you could somehow hold down the strings and have a robot do the strumming for you.

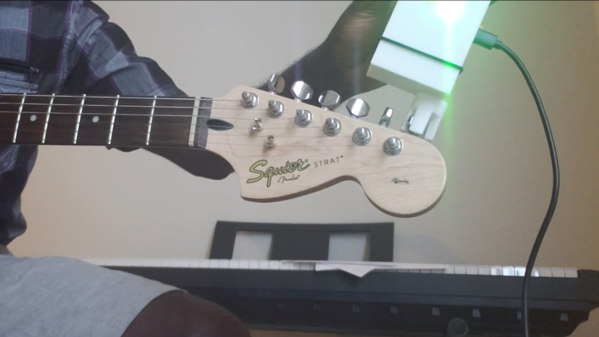
[Jacob Stambaugh]’s Auto Strummer uses six lighted buttons to tell the hidden internal pick which string(s) to strum, which it does with the help of an Arduino Pro Mini and a stepper motor. If two or more buttons are pressed, all the strings between the outermost pair selected will be strummed. That little golden knob near the top is a pot that controls the strumming tempo.

[Jacob]’s impressive 3D-printed enclosure attaches to the guitar with a pair of spring-loaded clamps that grasp the edge of the sound hole. But don’t fret — there’s plenty of foam padding under every point that touches the soundboard.

We were worried that the enclosure would block or muffle the sound, even though it sits about an inch above the hole. But as you can hear in the video after the break, that doesn’t seem to be the case — it sounds fantastic.

Never touched a real guitar, but love to play Guitar Hero? There’s a robot for that, too.

Continue reading “Auto Strummer Can Plectrum The Whole Flat-Strumming Spectrum”

Building A Robotic Band To Make Up For Lack Of Practice

Learning to play a musical instrument well requires a significant time investment. [Ivan Miranda] had dreamt of doing this but made peace with the fact that his talents and motivation lay in building machines. However, he has decided to play to his strengths and is building a robotic band. See the videos after the break.

So far he has mechanized a hi-hat, snare drum, and a very basic guitar. The guitar is nothing more than a single string stretched across an aluminum frame, with an electronic pickup. Most of the work has gone into the solenoid-driven picking mechanism. He wanted to avoid picking the string when the solenoid is turned of, so he created a simple little mechanism that only comes in contact with the string when it’s moving in one direction. A bistable solenoid might be a simpler option here.

For the high hat, [Ivan] built a custom stand with two bistable solenoids to lift and drop the top cymbal. A solenoid-driven drumstick was also added. The snare drum uses a similar mechanism, but with a larger solenoid. So far he hasn’t really worked on a control system, focusing mainly on electronics.

[Ivan] points out several times that he has knows very little about making music, but we do enjoy watching him explore and experiment with this new world. Usually, his projects involve a lot more 3D printing, like when he built a giant nerf bazooka or a massive 3D printed tank. Continue reading “Building A Robotic Band To Make Up For Lack Of Practice”

RCA Plug Plays Sixteen-Minute Chiptune Piece, All By Itself

Frequenters of arcades back in the golden age of video games will likely recall the mix of sounds coming from a properly full arcade, the kind where you stacked your quarters on a machine to stake your claim on being next in line to play. They were raucous places, filled with the simple but compelling sounds that accompanied the phosphor and silicon magic unfolding all around.

The days of such simple soundtracks may be gone, but they’re certainly not forgotten, with this chiptunes generator built into an RCA plug being both an homage to the genre and a wonderful example of optimization and miniaturization. It’s the work of [girst] and it came to life as an attempt to implement [Rob Miles]’ Bitshift Variations in C Minor algorithmically generated chiptunes composition in hardware. For the first attempt, [girst] chose an ATtiny4 as the microcontroller, put it and the SMD components needed for a low-pass filter on a flex PCB, and wrapped the whole thing around a button cell battery. Stuffed into the shell of an RCA plug, the generator detects when it has been inserted into an audio input jack and starts the 16-minute piece. [girst] built a second version, too, using the Padauk PSM150c “Three-Cent Microcontroller” chip.

This is quite an achievement in chiptunes minimization. We’ve seen chiptunes in 32 bytes, Altoids tin chiptunes, and an EP on a postage-stamp-sized PCB, but this one might beat them all on size alone.

Continue reading “RCA Plug Plays Sixteen-Minute Chiptune Piece, All By Itself”

Synth Gains Plug And Play Analog MUX

High school computer engineering teacher [Andy Birch] kept losing track of I/O pins on his home-built synth, so he made a custom plug and play addressable MUX system to solve the problem. [Andy]’s synth is based on the Teensy microcontroller, and he was already using CMOS analog 8:1 multiplexer chips (CD4051) to give him more I/O pins. But I/O pin expansion means that now there are more I/O pins to forget. Did I hook up that pitch potentiometer on U3 pin 13 or was it U10 pin 2?

He proceeds to design an addressing system for each I/O card using three bits (expandable to four) supporting eight cards, with a maximum of 16 possible in the future. Since each card may not use all eight signals, each card can tell the Teensy how many signals it has. [Andy] does his address decoding on each card using OR and XOR gates. We would have considered using a single 74HC85 four-bit magnitude comparator instead. That would require only one chip instead of two, but would deprive his students of the opportunity to learn gate level address decoding.

When seeing the term “I/O card”, you may be fooled like we were into thinking this was using PCBs and some kind of motherboard. [Andy]’s I/O cards are actually solderless breadboards mounted on the back of the synth control panel. We really like his bus technique — he removes the power strip sections from several breadboards and repurposes them as address and data buses. Check out the thorough documentation that [Andy] has prepared, and let us know if you have ever designed your own plug and play method for a project in the comments below.

[Ed Note: We love us some muxes!]

I/O Cards — Note the use of Power Strip Bars as Data / Address Buses