There are many ways to attach a project to the Internet, and a plethora of Internet-based services that can handle talking to hardware. But probably the most ubiquitous of Internet protocols for the average Joe or Jane is the web browser, and one of the most accessible of programming environments lies within it. If only somebody with a bit of HTML and Javascript could reach a GPIO pin on their Raspberry Pi!
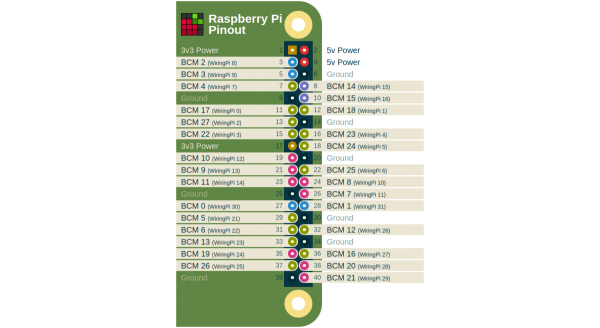
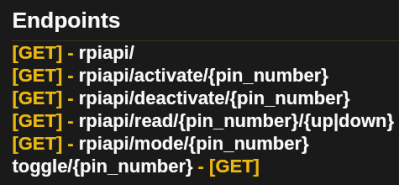 If that’s your wish, then help could be at hand in the form of [Victor Ribeiro]’s RPiAPI. As its name suggests, it’s an API for your Raspberry Pi, and in particular it provides a simple web-accessible endpoint wrapper for the Pi’s GPIO library from which its expansion port pins can be accessed. By crafting a simple path on the address of the Pi’s web server each pin can be read or written to, which while it’s neither the fastest or most accomplished hardware interface for the platform, could make it one of the easiest to access.
Security comes courtesy of Apache password protected directories via .htaccess files, so users would be well-advised to consider the implications of connecting this to a public IP address very carefully. But for non experts in security it still has the potential to make a very useful tool in the armoury of ways to control hardware from the little single board computer. It’s not the first try at this idea as we’ve seen a PHP example early in the Pi’s lifetime as well as one relying upon MySQL, but it does seem to be a simpler option than the others.