Portable Photo Booth Named Buzz

We’re all used to posing for a picture — or a selfie — but there’s something about photo booths that make getting your photo taken an exciting and urgent affair. To make this experience a bit easier to tote about, Redditor [pedro_g_s] has laboriously built, from the ground up, a mobile photo booth named Buzz.

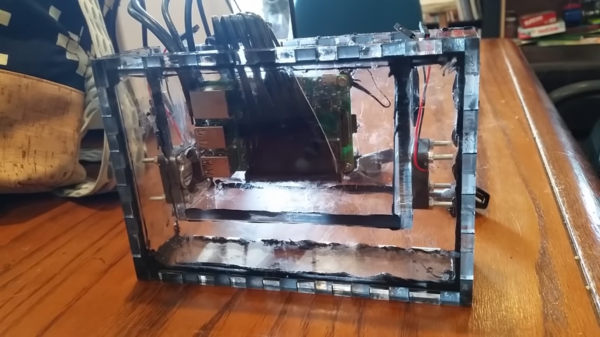
He needed a touchscreen, a Raspberry Pi, almost definitely a webcam, and a 3D printer to make a case — although any medium you choose will do — to build this ‘booth.’ That said, he’s built the app in a way that a touchscreen isn’t necessary, but carting around a mouse to connect to and operate your portable photo booth seems a bit beside the point. On the back end, he used Electron to code the photo booth app, React helped him build a touchscreen UI, and Yarn kept the necessary dependencies in order.

Operation is simple, and every time a photo is taken it is sent to and collated within a previously set-up email service. To set it up, [pedro_g_s] is here to guide you through the process.

Continue reading “Portable Photo Booth Named Buzz”

3D Printering: Which Raspberry Pi Is Best At Slicing In Octoprint?

OctoPrint is arguably the ultimate tool for remote 3D printer control and monitoring. Whether you simply want a way to send G-Code to your printer without it being physically connected to your computer or you want to be able to monitor a print from your phone while at work, OctoPrint is what you’re looking for. The core software itself is fantastic, and the community that has sprung up around the development of OctoPrint plugins has done an incredible job expanding the basic functionality into some very impressive new territory.

RAMBo 3D controller with Pi Zero Integration

But all that is on the software side; you still need to run OctoPrint on something. Technically speaking, OctoPrint could run on more or less anything you have lying around the workshop. It’s cross platform and doesn’t need anything more exotic than a free USB port to connect to the printer, and people have run it on everything from disused Windows desktops to cheap Android smartphones. But for many, the true “home” of OctoPrint is the Raspberry Pi.

As I’ve covered previously, the Raspberry Pi does make an exceptional platform for OctoPrint. Given the small size and low energy requirements of the Pi, it’s easy to integrate into your printer. The new Prusa i3 MK3 even includes a header right on the control board where you can plug in a Raspberry Pi Zero.

But while the Raspberry Pi is more than capable of controlling a 3D printer in real-time, there has always been some debate about its suitability for slicing STL files. Even on a desktop computer, it can sometimes be a time consuming chore to take an STL file and process it down to the raw G-Code file that will command the printer’s movements.

In an effort to quantify the slicing performance on the Raspberry Pi, I thought it would be interesting to do a head-to-head slicing comparison between the Pi Zero, the ever popular Pi 3, and the newest Pi 3 B+.

Continue reading “3D Printering: Which Raspberry Pi Is Best At Slicing In Octoprint?”

Raspberry Pi Is Up Up And Away

BACAR — Balloon Carrying Amateur Radio — is just what it sounds like. A high-altitude balloon carries experiments and communicates via amateur radio. [ZR6AIC] decided to fly a payload in a local BACAR experiment. The module would send its GPS position via the APRS network and also send a Morse code beacon every seven minutes. It also sends other data such as temperature, and has an optional camera fitted.

The hardware used was the ubiquitous Raspberry Pi along with an associated daughterboard for transmitting on the 2 meter ham band. An RTL dongle took care of the receive portion and another dongle provided GPS. A DS18B20 temperature sensor provides the temperature data.

Continue reading “Raspberry Pi Is Up Up And Away”

Battery Backup Conceals A Pentesting Pi

Over the last few years one thing has become abundantly clear: hackers love cramming the Raspberry Pi into stuff. From classic game systems to mirrors, there’s few places that haven’t been invaded by everyone’s favorite Linux SBC. From the inspired to the bizarre, we’ve brought such projects to your attention with minimal editorialization. As we’ve said before: it’s not the job of Hackaday to ask why, we’re here to examine how.

That said, some builds do stand out from the crowd. One such project is the “Pentesting BBU Dropbox” which [b1tbang3r] has recently posted to Hackaday.io. Noticing the battery bay in a cheap Cyberpower 350VA battery backup was just about the same size as the Raspberry Pi, he decided to convert it into a covert penetration testing device. Of course the illusion isn’t perfect as the battery backup function itself doesn’t work anymore. But if you hid this thing in an office or server room, there’s very little chance anyone would ever suspect it didn’t belong.

The key to the final device’s plausibility is that from stock it had dual RJ-11 jacks for analog modem surge protection. Swapping those jacks out for RJ-45 network connectors gives the BBU Dropbox an excuse to be plugged into the network. At a cursory glance, at least. Internally there is a TRENDnet Ethernet switch which allows the Pi to get on the network when an Ethernet cable is plugged into the battery backup.

We especially like the little details [b1tbang3r] put in to make the final device look as real as possible. The “Reset” button and “Wiring Fault” LED have been connected to the GPIO pins of the Pi, allowing for an exceptionally discrete user interface. For instance the LED could be setup to blink when a scan is complete, or the button could be used to wipe the device in an emergency.

This build reminds us of the Power Pwn released back in 2012 by Pwnie Express. That device was based around a relatively bulky power strip, and the only “feature” it looks like this DIY build is missing from the professional version is the $1,300 price.

Google Lowers The Artificial Intelligence Bar With Complete DIY Kits

Last year, Google released an artificial intelligence kit aimed at makers, with two different flavors: Vision to recognize people and objections, and Voice to create a smart speaker. Now, Google is back with a new version to make it even easier to get started.

The main difference in this year’s (v1.1) kits is that they include some basic hardware, such as a Raspberry Pi and an SD card. While this might not be very useful to most Hackaday readers, who probably have a spare Pi (or 5) lying around, this is invaluable for novice makers or the educational market. These audiences now have access to an all-in-one solution to build projects and learn more about artificial intelligence.

We’ve previously seen toys, phones, and intercoms get upgrades with an AIY kit, but would love to see more! [Mike Rigsby] has used one in his robot dog project to detect when people are smiling. These updated kits are available at Target (Voice, Vision). If the kit is too expensive, our own [Inderpreet Singh] can show you how to build your own.

Via [BGR].

Remote Control Of Clocks Is Easy As Pi

[Fatjedi007] recently acquired three programmable boxing gym-type clocks to help his developmentally disabled clients manage their time. The plan was to have timers of varying lengths fire at preset times throughout the day, with the large displays providing a view from anywhere. Unfortunately, the clocks were not nearly as programmable as he needed them to be.

Since he’d spent enough money already, [Fatjedi007] turned to the power of Raspberry Pi to devise an affordable solution. Each clock gets a Pi Zero W and a simple IR transmit/receive circuit that operates using LIRC. The clocks came with remote controls, so it was just a matter of re-programming them. From LIRC, he wrote some scripts with SEND_ONCE and schedules the timers with a cron job. No need to get out the ladder—he can program all of them from his chair over VNC.

He does have one problem, though, and that’s getting the Zeros to set themselves over NTP with static IPs. Do you have any suggestions? Put ’em in the comments and help a Jedi out.

LIRC is pretty handy for anything you want to control remotely, like a stereo system.

Raspberry Pi W Antenna Analysis Reveals Clever Design

The old maxim is that if you pay peanuts, you get a monkey. That’s no longer true, though: devices like the Raspberry Pi W have shown that a $10 device can be remarkably powerful if it is well designed. You might not appreciate how clever this design is sometimes, but this great analysis of the antenna of the Pi W by [Carl Turner, Senior RF Engineer at Laird Technology] might help remind you.

Continue reading “Raspberry Pi W Antenna Analysis Reveals Clever Design”