IKEA Lamp With Raspberry Pi As The Smartest Bulb In The House

We love to hack IKEA products, marvel at Raspberry Pi creations, and bask in the glow of video projection. [Nord Projects] combined these favorite things of ours into Lantern, a name as minimalist as the IKEA lamp it uses. But the result is nearly magic.

The key component in this build is a compact laser-illuminated video projector whose image is always in focus. Lantern’s primary user interface is moving the lamp around to switch between different channels of information projected on different surfaces. It would be a hassle if the user had to refocus after every move, but the focus-free laser projector eliminates that friction.

A user physically changing the lamp’s orientation is detected by Lantern’s software via an accelerometer. Certain channels project an information overlay on top of a real world object. Rather than expecting its human user to perform precise alignment, Lantern gets feedback from a Raspberry Pi camera to position the overlay.

Speaking of software, Lantern as presented by [Nord Projects] is a showcase project under Google’s Android Things umbrella that we’ve mentioned before. But there is nothing tying the hardware directly to Google. Since the project is open source with information on Hackster.io and GitHub, the choice is yours. Build one with Google as they did, or write your own software to tie into a different infrastructure (MQTT?), or a standalone unit with no connectivity at all.

Continue reading “IKEA Lamp With Raspberry Pi As The Smartest Bulb In The House”

Direct CNC Control With The Raspberry Pi

If you’re building a CNC router, laser cutter, or even 3D printer, you’ll usually be looking at a dedicated controller. This board takes commands from a computer, often in the form of G-Code, and interprets that into movement commands to the connected stepper motors. Historically this has been something of a necessary evil, as there was really no way to directly control stepper motors with a computer fast enough to be useful. That may not be the case anymore.

A stepstick driver

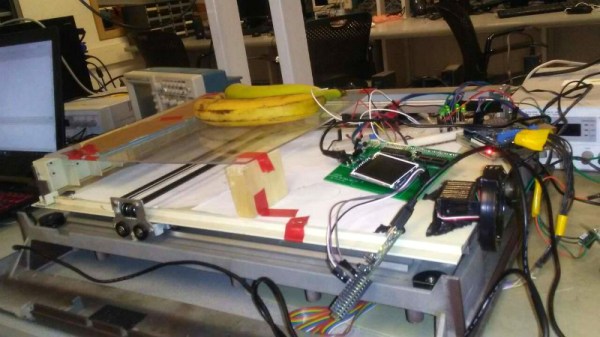
Thanks to the Raspberry Pi (and similar boards), we now have Linux computers with plenty of GPIO pins. The only thing missing is the software to interpret the G-Code and command the steppers over GPIO, which thanks to [pantadeusz], we now have. Called raspigcd, this software interprets a subset of G-Code to provide real-time control over connected steppers fast enough to drive a small CNC router.

Of course, you can’t directly control a beefy stepper motor to the GPIO pins of a Pi. You’ll let out all the magic smoke. But you can wire it up directly to a stepper driver board. These little modules connect up to a dedicated power supply and handle the considerable current draw of the steppers, all you need to do is provide them the number of steps and direction of travel.

This method of direct control offers some very interesting possibilities for small, low-cost, CNC projects. Not only can you skip the control board, you could conceivably handle the machine’s user interface (either directly via a touch screen or over the network) on the same Pi.

We’ve seen attempts at creating all-in-one Linux stepper controllers in the past, but the fact that anyone with a Raspberry Pi 2 or 3 (the boards this software has currently been tested on) can get in on the action should really help spur along development. Has anyone used this?

DIY Pi Zero Pentesting Tool Keeps It Cheap

It’s a story as old as time: hacker sees cool tool, hacker recoils in horror at the price of said tool, hacker builds their own version for a fraction of the price. It’s the kind of story that we love here at Hackaday, and has been the impetus for countless projects we’ve covered. One could probably argue that, if hackers had more disposable income, we’d have a much harder time finding content to deliver to our beloved readers.

[ Alex Jensen] writes in to tell us of his own tale of sticker shock induced hacking, where he builds his own version of the Hak5 Bash Bunny. His version might be lacking a bit in the visual flair department, but despite coming in at a fraction of the cost, it does manage to pack in an impressive array of features.

This pentesting multitool can act as a USB keyboard, a mass storage device, and even an RNDIS Ethernet adapter. All in an effort to fool the computer you plug it into to let you do something you shouldn’t. Like its commercial inspiration, it features an easy to use scripting system to allow new attacks to be crafted on the fly with nothing more than a text editor. A rudimentary user interface is provided by four DIP switches and light up tactile buttons. These allow you to select which attacks run without needing to hook the device up to a computer first, and the LED lights can give you status information on what the device is doing.

[Alex] utilized some code from existing projects, namely PiBunny and rspiducky, but much of the functionality is of his own design. Detailed instructions are provided on how you can build your own version of this handy hacker gadget without breaking the bank.

Given how small and cheap it is, the Raspberry Pi is gaining traction in the world of covert DIY penetration testing tools. While it might not be terribly powerful, there’s something to be said for a device that’s cheap enough that you don’t mind leaving it at the scene if you’ve got to pull on your balaclava and make a break for it.

1960’s Console Stereo Gets Raspberry Pi Touch Screen

When he was but a wee hacker, [WhiskeyDrinker] loved to play with the big console stereo his grandparents had. The idea of a functional piece of furniture always appealed to him, and he decided that when he grew up and had a place of his own he’d get a similar stereo. Fast forward to the present, and a Craigslist ad for a working Penncrest stereo seemed to be a dream come true. Until it wasn’t.

The original physical controls are connected to the Pi’s GPIO

As difficult as it might be to believe, sometimes things we read on the Internet are not true. The “working” Penncrest radio turned out to be a dud. But realizing that the look of the cabinet was more important to him than historical accuracy, [WhiskeyDrinker] decided to outfit it with a Raspberry Pi powered touch screen that would look as close to stock hardware as possible.

The final result really does look like some kind of alternate timeline piece of consumer electronics: where chunky physical buttons and touch screens coexisted in perfect harmony. The vintage stereo aficionados will probably cry foul, but let them. [WhiskeyDrinker] did a fantastic job of blending old and new, being respectful to the original hardware and aesthetic where it made sense, and clearing house where only nostalgia had lease.

A HiFiBerry DAC+ Pro is used to get some decent audio out of the Raspberry Pi, and the touch screen interface is provided by Volumio. [WhiskeyDrinker] mentions that it even has a GPIO plugin which he successfully used to handle getting the physical buttons to play nice with their digital counterparts.

Updating old audio gear is always a sensitive subject around these parts. Sometimes they go so far that the original hardware is almost an afterthought. On the other side of the spectrum are the projects which try to take modern gear and mimic the look of the classics. In any event, one thing is clear: they don’t make ’em like they used to.

Continue reading “1960’s Console Stereo Gets Raspberry Pi Touch Screen”

Raspberry Pi Becomes Cycle Exact Commodore Drive Emulator

The Commodore 1541 disk drive is unlike anything you’ll ever see in modern computer hardware. At launch, the 1541 cost almost as much as the Commodore 64 it was attached to ($400, or about $1040 at today’s value). This drive had a CPU, and had its own built-in operating system. Of course, anyone using a Commodore 64 now doesn’t deal with this drive these days — you can buy an SD2IEC for twenty dollars and load all your C64 games off an SD card. If you’re cheap, there’s always the tape drive interface and a ten dollar Apple Lightning to 3.5mm headphone adapter.

But the SD2IEC isn’t compatible with everything, and hacking something together using the tape drive doesn’t have the panache required of serious Commodoring. What’s really needed is a cycle-accurate emulation of the 1541 disk drive, emulating the 6502 CPU and the two 6522 VIAs in this ancient disk drive. The Raspberry Pi comes to the rescue. [Steve White] created the Pi1541, an emulation of the Commodore 1541 disk drive that runs on the Raspberry Pi 3B.

Pi1541 is a complete emulation of the 6502 and two 6522s found inside the Commodore 1541 disk drive. It runs the same code the disk drive does, and supports all the fast loaders, demos, and copy protected original disk images that can be used with an original drive.

The only hardware required to turn a Raspberry Pi 3 into a 1541 are a few transistors in the form of a bi-directional logic level shifter, and a plug for a six-pin serial port cable. This can easily be constructed out of some Sparkfun, Adafruit, Amazon, or AliExpress parts, although we suspect anyone could whip up a Raspberry Pi hat with the same circuit in under an hour. The binaries necessary to run Pi1541 on the Raspberry Pi are available on [Steve]’s website, and he’ll be releasing the source soon.

This is a great project for the retrocomputing scene, although there is one slight drawback. Pi1541 requires a Raspberry Pi 3, and doesn’t work on the Raspberry Pi Zero. That would be an amazing bit of software, as ten dollars in parts could serve as a complete emulation of a Commodore disk drive. That said, you’re still likely to be under $50 in parts and you’re not going to find a better drive emulator around.

Continue reading “Raspberry Pi Becomes Cycle Exact Commodore Drive Emulator”

A Home Network, Security System, And A Hidden Room Behind A Bookcase

Ok, now this is something special. This is a home network and security system that would make just about anyone stop, and with jaw hanging agape, stare, impressed at the “several months of effort” it took [timekillerjay] to install their dream setup. Just. Wow.

Want a brief rundown of the diverse skill set needed to pull this off? Networking, home security, home automation, woodworking, running two thousand feet(!) of cat 6a cable, a fair hand at drywall work for the dozens upon dozens of patches, painting, staining, and — while not a skill, but is definitely necessary — an amazingly patient family.

Ten POE security cameras monitor the premises with audio recording, infrared, and motion detection capabilities. This is on top of magnetic sensors for five doors, and eleven windows that feed back to an ELK M1-Gold security system which effortlessly  coordinates with an Insteon ISY994i smart home hub; this allows for automatic events — such as turning on lights after dark when a door is opened — to occur as [timekillerjay]’s family moves about their home. The ELK also allows [timekillerjay] to control other things around the house — namely the sprinkler system — via relays. [timekillerjay] says he lost track of how many smart switches are scattered throughout his home, but there are definitely 39 network drops that service the premises.

All of the crucial components are hidden in his office, behind a custom bookshelf. Building it required a few clever tricks to disguise the bookshelf for the secret door that it is, as well as selecting components with attention to how much noise they generate — what’s the point of a hidden security system if it sounds like a bunch of industrial fans?

An uninterruptible power supply will keep the entire system running for about 45 minutes if there is a power outage, with the cameras recording and system logging everything all the while. Not trusting the entrance to his vault to something from Batman, he’s also fitted the bookshelf with a 600lb magnetic lock that engages when the system is armed and the door already closed. A second UPS will keep the door secured for 6+ hours if the house loses power. Needless to say, we think this house is well secured.

[Via /r/DIY]

Commodore 64 To Raspberry Pi Conversion Is Respectful & Complete

We’re big fans of taking old computers and giving them a new lease on life, but only when it is done respectfully. That means no cutting, no hot glue, and no gouging out bits to make the new computer fit. It’s best if it can be done in a way that the original parts can be restored if required.

This Commodore 64 to Raspberry Pi conversion from [Mattsoft] definitely fits our criteria here, as it uses the old keyboard, joystick connectors and output portholes for the required authentic look. It does this through the clever use of a couple of 3D-printed parts that hold the Raspberry Pi and outputs in place, mounting them to use the original screw holes in the case.

Combine the Pi with a Keyrah V2 to connect the C64 keyboard and a PowerBlock to juice up all of the parts, and you’ve got a fully updated C64 that can use the keyboard, joysticks or other peripherals, but which also comes with a HDMI port, USB and other more modern goodies.

[Mattsoft] suggests using Combian 64, a C64 emulator for the Pi for the authentic look and feel. Personally, I might use it as a thin client to the big-ass PC with 16 CPU cores and 32GB of memory that’s hidden in my basement, but that’s just because I enjoy confusing people.