Discontinued Nintendo Consoles And Raspberry Pis

Nintendo has discontinued a Classic gaming console. It’s a pity, yes, but with the release of Nintendo’s new gaming console, they probably have bigger fish to fry. That doesn’t mean these discontinued Nintendo consoles will die a slow, miserable death locked away in a closet; at least one of them will live on with the heart of a Raspberry Pi.

This is a project [Liam] has been working on since 2012, just after he got the first edition of the Raspberry Pi. While some people were figuring out how to stuff the Pi inside a Nintendo Entertainment System or a Super Nintendo Entertainment System, [Liam] decided to embed the Pi inside a console of a more recent vintage: the Nintendo GameCube.

The first phase of this project was simply to get the Pi running inside the enclosure of the non-working GameCube he picked up. The power supply in this console was well designed, and after a quick perusal through some online documentation, [Liam] found a stable 5V with enough amps to power the Pi. After ripping out the internals of this console with the help of a quickly hacked together ‘Nintendo screwdriver’, [Liam] had a perfectly functional Pi enclosed in a Nintendo chassis.

Time marches on, and after a while, the Raspberry Pi 2 was released. By this time, retro emulation was hitting the big time, and [Liam] decided it was time for an upgrade. He disassembled this Nintendo console again, routed new wires and inputs to the original controller ports, and used a Dremel to route a few holes for the HDMI and SD card slot.

With the addition of a few SNES-inspired USB controllers, RetroPi, and a few ROMs, [Liam] has a wonderful console full of classic emulation goodness, packaged in an enclosure Nintendo isn’t making any more.

Networking: Pin The Tail On The Headless Raspberry Pi

Eager to get deeper into robotics after dipping my toe in the water with my BB-8 droid, I purchased a Raspberry Pi 3 Model B. The first step was to connect to it. But while it has built-in 802.11n wireless, I at first didn’t have a wireless access point, though I eventually did get one. That meant I went through different ways of finding it and connecting to it with my desktop computer. Surely there are others seeking to do the same so let’s take a look at the secret incantations used to connect a Pi to a computer directly, and indirectly.

Continue reading “Networking: Pin The Tail On The Headless Raspberry Pi”

Brazil Wins The Raspberry Pi Overclocking Olympics

[Alex Rissato] proudly reports that he now holds the record for highest benchmark score on HWBOT (machine translation); something he sees not only as a personal achievement but admirably, of national pride. Overclocking a Raspberry Pi is not as simple as achieving the highest operational clock rate. A record constitutes just the right combination of CPU clock, memory clock, GPU clock and finally the CPU core voltage. If you’ve managed to produce that special sauce, the combination must be satisfactorily cooled and most importantly be stable enough to pass an actual performance benchmark.

More POWAAA to the CPU!

[Alex] realized that the main hurdle to achieving the desired CPU clock was the internally generated and hence restricted, CPU core voltage; This is externally LC filtered and routed back to the CPU on a stock Pi. [Alex] de-soldered the filter on the PCB and provided the CPU with an externally generated core voltage.

Next, the cooling had to be tended to. Air cooling simply wouldn’t cut it, so a Peltier based heatsink interface had to be devised with the hot side immersed in a bucket of salt water. All of this translated to a comfy 16C at a clock speed of 1600 MHz.

Was all the effort justified? We certainly think it was! Despite falling short of the Pi zero CPU clock rate record, currently set at 1620MHz,  [Alex] earned the top spot in the HWBOT Prime overclocking benchmark. Brazil can now certainly add this to its trophy cabinet, arguably overshadowing the 129 Olympic medals.

Lattice ICE40 FPGA Configured By Linux Kernel

The Linux kernel recently added support for loading firmware into an FPGA via the FPGA Manager Framework. [OpenTechLab] has built a driver for the Lattice iCE40 FPGA (same chip used on the iCEStick and other development boards). One attraction to the iCE40 is there is an open source toolchain called iCEStorm.

Even if you aren’t specifically interested in FPGAs, the discussion about Linux device drivers is good background. The principles would apply to other drivers, and would definitely apply if you want to write another FPGA loader.

Continue reading “Lattice ICE40 FPGA Configured By Linux Kernel”

Detect Cars Running Stop Signs (and Squirrels Running Across The Roof)

In order to avoid the traffic and delays on a major thoroughfare, cars take the road behind [Devin Gaffney]’s house, but he noticed a lot of cars didn’t bother to stop at the stop sign. He had a Raspberry Pi and a camera, so he set them up to detect the violating cars.

His setup is pretty standard – Raspberry Pi and camera pointed outside at the intersection. He’s running OpenCV and using machine learning to detect the cars and determine if they have run the stop sign or not. His website has some nice charts showing when the violations occurred by hour and by day of the week. Also on the site are links that you can use to help train the system in noticing cars, cars that run the stop sign, determining if there’s enough of the video to determine if there’s a violation, and whether or not there’s a car going the wrong way through the intersection.

This is an interesting use of the Pi and OpenCV; there’s no guarantee that this will help the people of [Devin]’s neighborhood, but hopefully gives them some ammunition (assuming they want something done about the intersection.) It’s a cheap and easy setup and it’s nice to let the community have a hand in training the system.

For more OpenCV, check out this article on taking the perfect jump shot or this one which tries to quantify cloudiness.

Continue reading “Detect Cars Running Stop Signs (and Squirrels Running Across The Roof)”

Adulterated food detection

Hackaday Prize Entry: Detecting Adulterated Food Using AI

Adulterated food is food that has a substance added to it to save on manufacturing costs. It can have a negative effect, it can reduce the food’s potency or it can have no effect at all. In many cases it’s done illegally. It’s also a widespread problem, one which [G. Vignesh] has decided to take on as his entry for the 2017 Hackaday Prize, an AI Based Adulteration Detector.

On his hackaday.io Project Details page he outlines some existing methods for testing food, some which you can do at home: adulterated sugar may have chalk added to it, so put it in water and the sugar will dissolve while the chalk will not. His approach is to instead take high-definition photos of the food and, on a Raspberry Pi, apply filters to them to reveal various properties such as density, size, color, texture and so on. He also mentions doing image analysis using a deep learning neural network. This project touches us all and we’ll be watching it with interest.

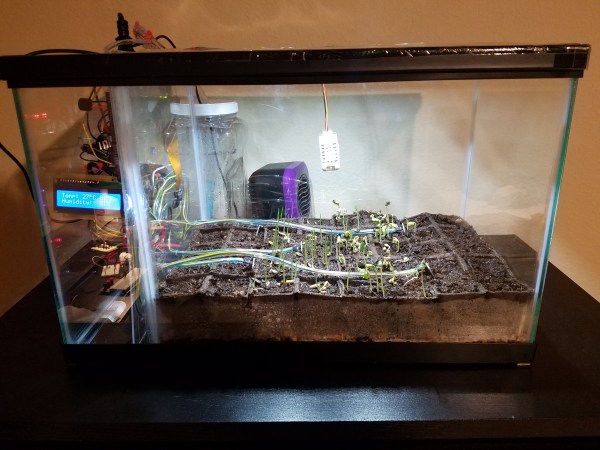
If all this talk of adulterated food makes you nervous about your food supply then consider growing our own, hacker style. One such project we’ve seen here on Hackaday is Farmbot, an open-source CNC farming robot. Another such is MIT’s OpenAg Food Computer, a robotic control and monitoring growing chamber.

PC in a mouse

PC In A Mouse

[Slider2732] got his Orange Pi Zero working with a 3 watt amplifier, wireless keyboard (with built-in mouse), and car reversing monitor. But he needed a case to house it in. He remembered that he used to make parameters for ghost hunting by filling PC mouse cases with all sorts of electronics. So why not put the Orange Pi Zero in a mouse too? Looking through his mouse collection, he picked out an old Logitech optical mouse and went to work.

We like that the Logitech has transparent bottom halves, perfect for proving to anyone who might be skeptical that the PC really is in the mouse. A great enhancement we think would be to make the mouse actually be the mouse too! But there doesn’t seem to be enough room left for that. What’s smaller than a Pi Zero that will also run the armbian Linux distribution, OpenELEC Mediacenter, Kodi and a bunch of games?

He even set up the wireless networking for watching YouTube videos. Check out the build and demo video after the break.

Continue reading “PC In A Mouse”